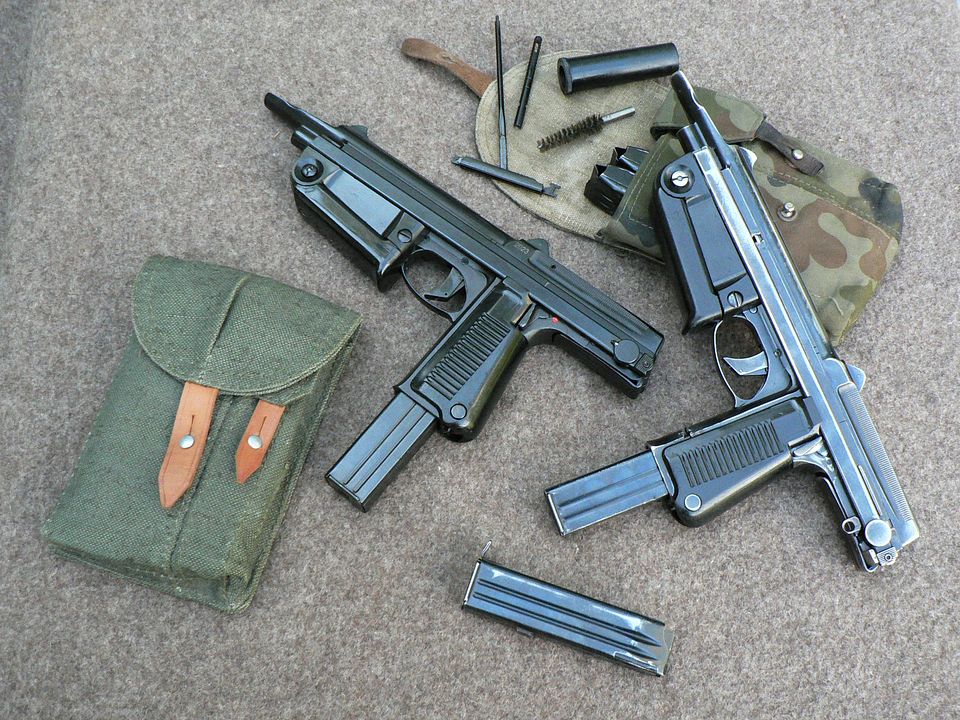
Combloc
Stop Negassing me!!!!!
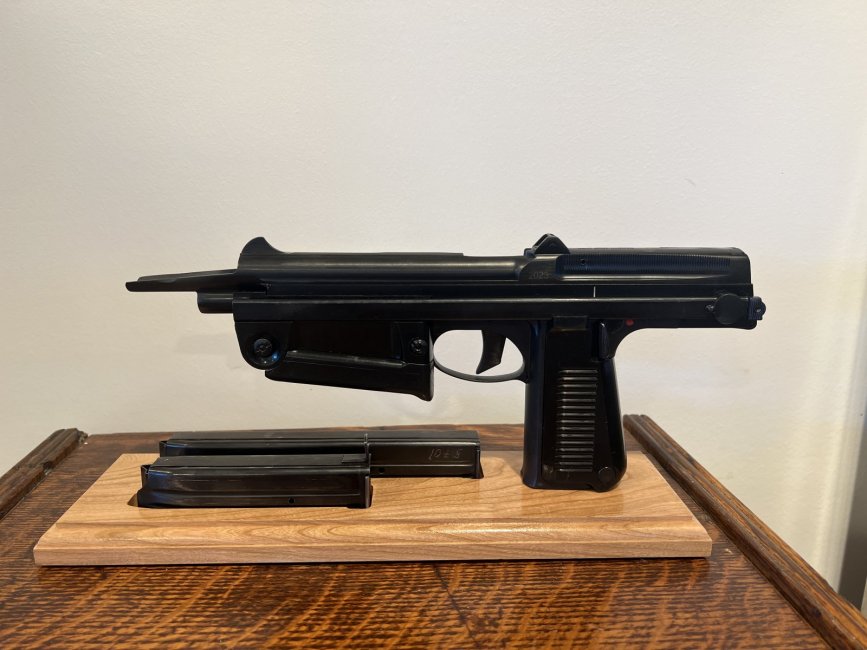
Tonight, we'll examine how the stock actually works.
As my parts kit is cut through where the stock mounts to the frame, I cannot fully illustrate some of what I'm going to type but I'll do the best I can for you.
To remove the stock from the PM-63:
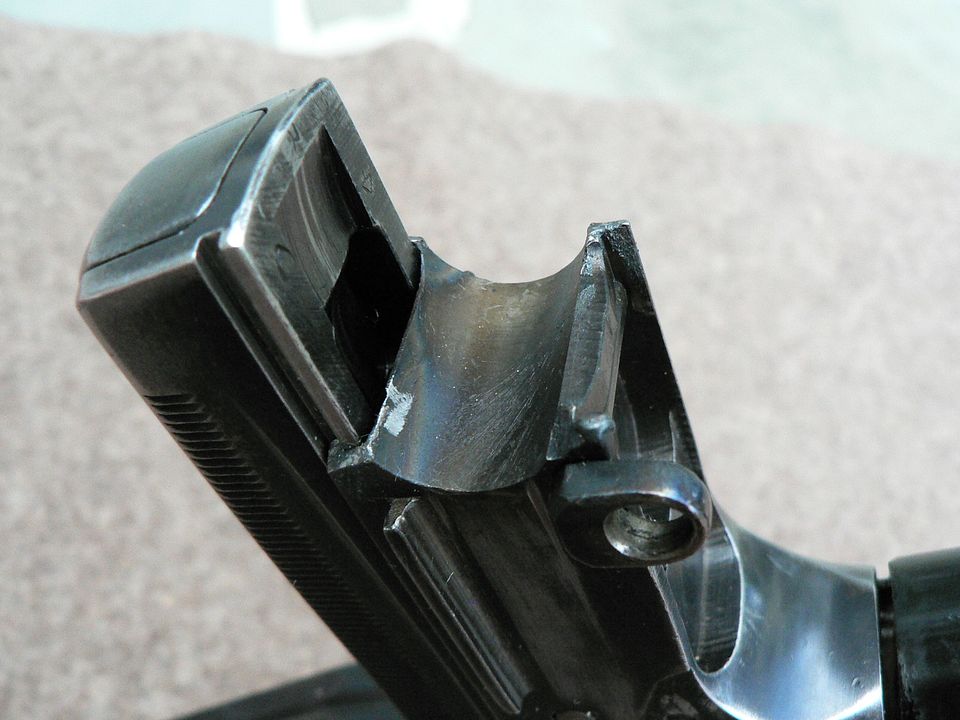
First, you have to fully extend it as shown above.
Next, you FULLY depress the button on the locking piece and pull the stock to the rear and away from the body of the firearm. In order to depress the button as far as is necessary to carry out this operation, you may have to use a pin punch:

With the stock removed, you next have to remove what I'm calling the "stock mounting drum" or "stock drum". It's the round part left in the frame that the stock arms slide through. To remove it, FULLY depress the button on the locking piece, and slide the drum out of the frame from left to right being careful not to lose the locking piece or its spring. In order to depress the button as far as is necessary to carry out this operation, you may have to use a pin punch.
Sorry, no picture here to illustrate this operation as my parts kit was cut in this area.
To remove my stock, I get to cheat because the rear of the frame on my parts kit was cut. All I have to do is just pull the stock to the rear whether it's deployed or not. As I do so, I not only remove the stock and the stock drum, I also remove the rear of the frame!

After I've removed the above:

It's a simple matter to remove the cut rear portion of the frame, leaving me with the stock still mounted to the stock drum:


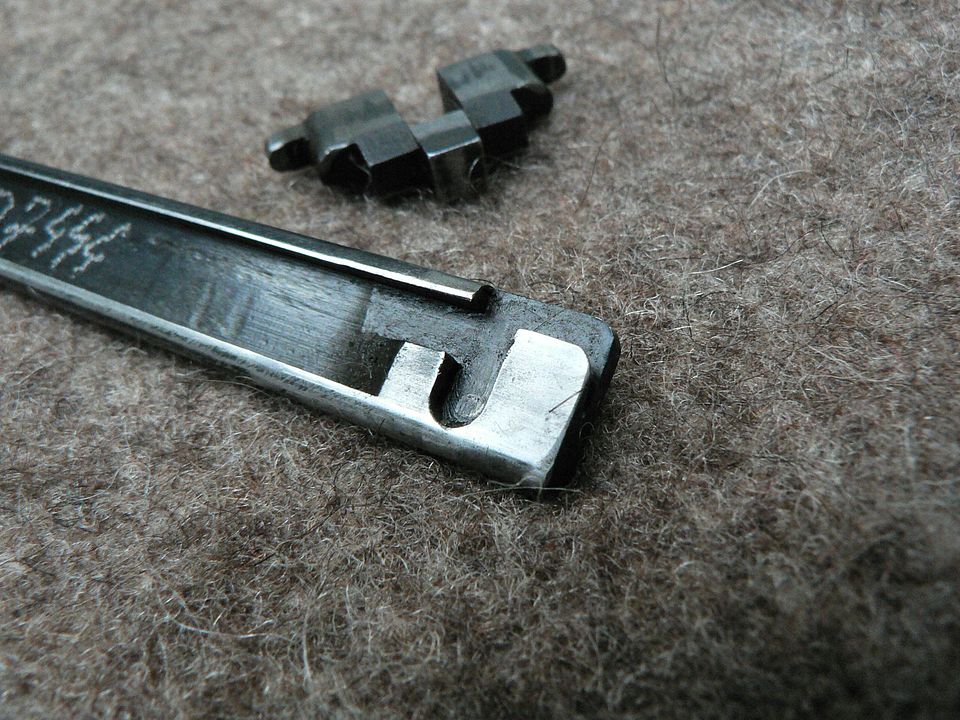
Then, I fully depress the button on the locking piece to remove the stock from the stock drum and the locking piece with its spring will fall right out of the stock drum:

Here's the rear of the cut frame on the parts kit:

The stock itself cannot be disassembled without destroying a peened in place pin running through both stock arms and the butt plate so we're not messing with that. The inside front of the left stock arm is electro penciled matching to the frame and slide. Whether that was standard practice or it was done when the kit was demilled, I do not know:

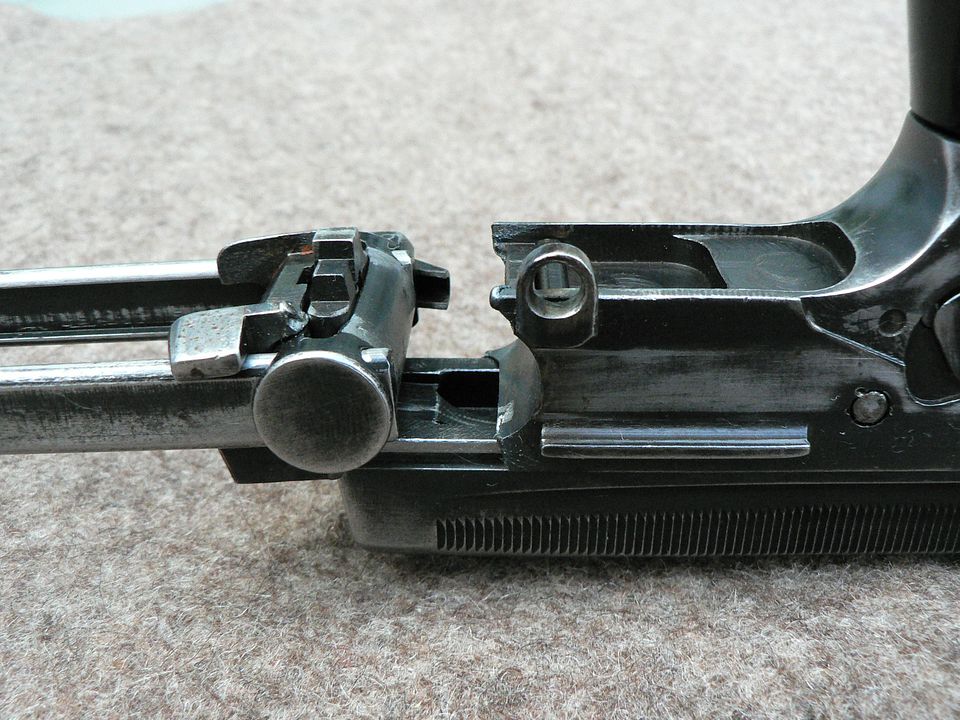
Detail of the locking piece:

It looks like the entrance gate to some ancient Central or South American city like Tikal or Puma Punku.
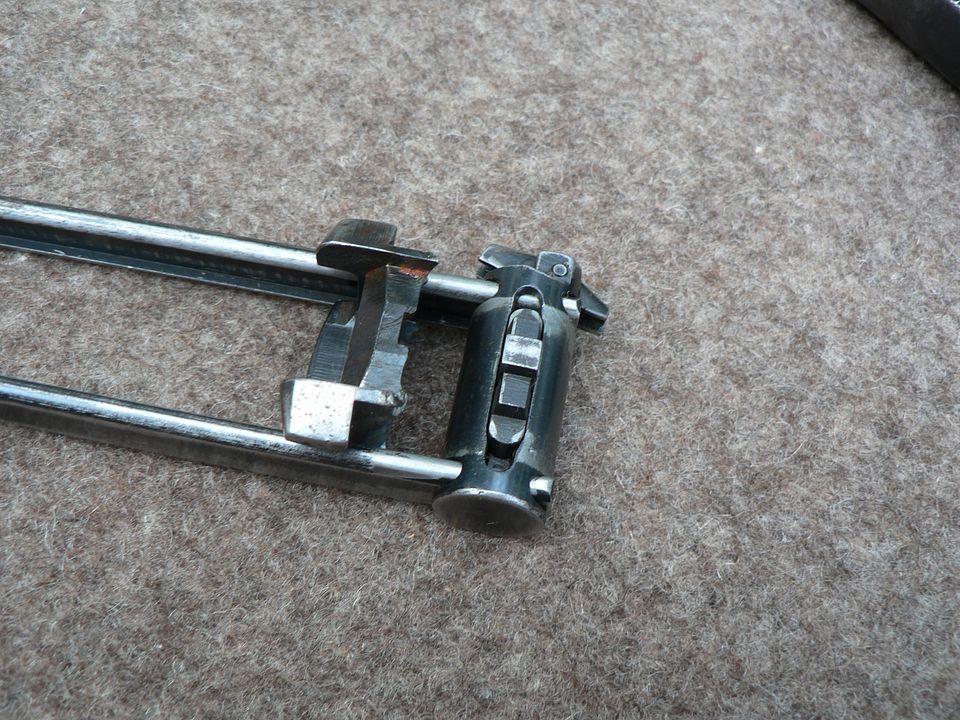
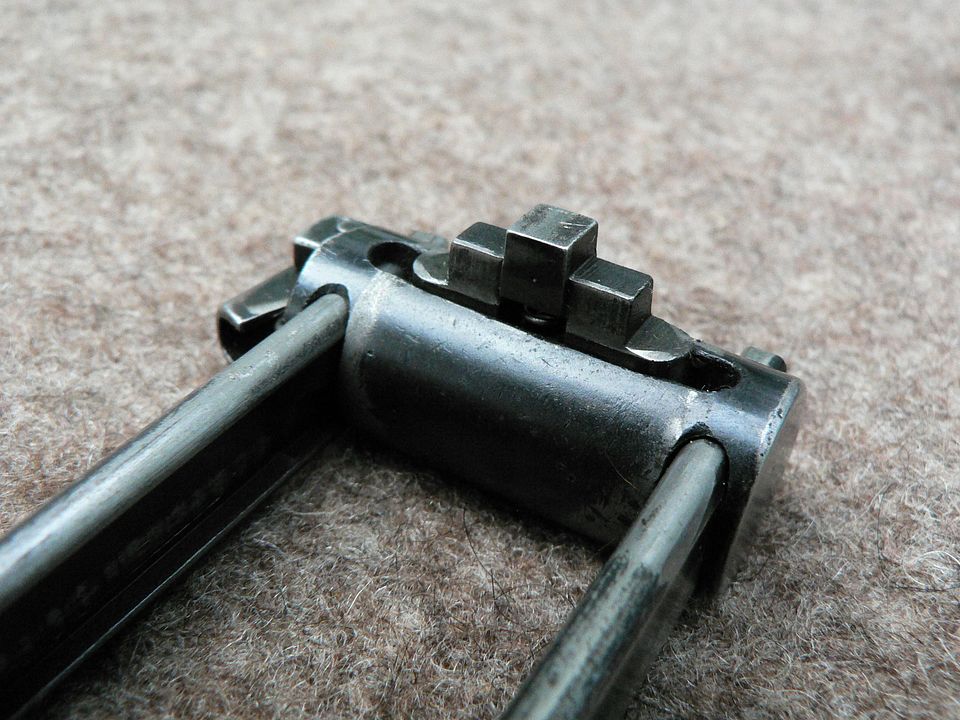
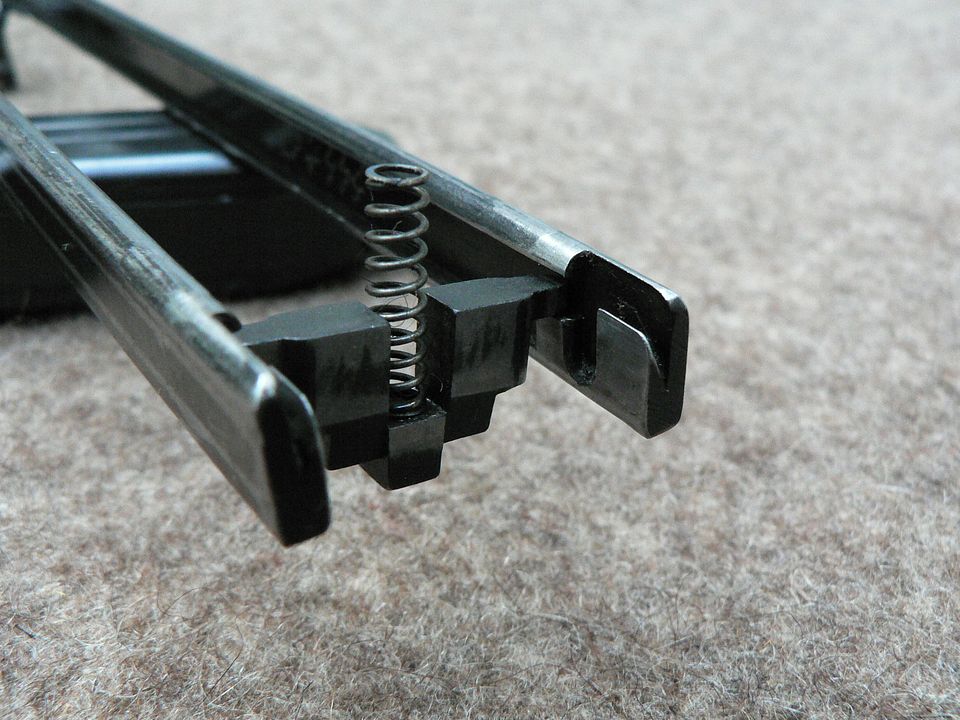
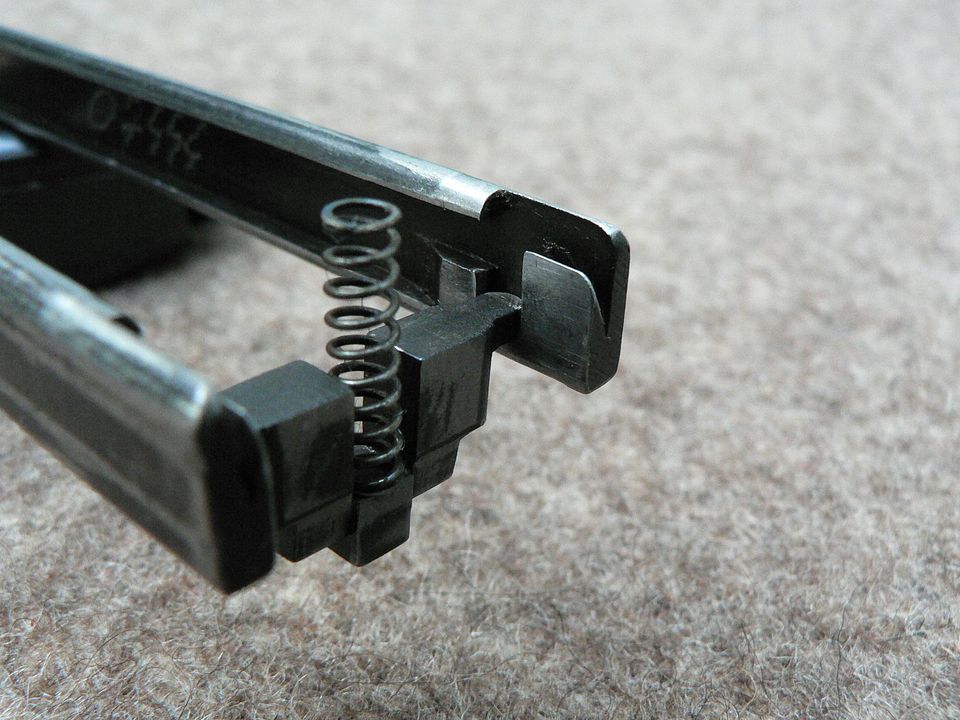
So, how does this whole stock locking mechanism thing work anyway? Well, we looked at the mechanism that keeps it closed in the last post so we already understand that. Now, we'll look at the mechanism that keeps it open. It's really dead simple and done with two parts contained in the stock drum, the locking piece and its spring. When these parts are assembled to the stock drum, there is a little lug on either side of the locking piece that protrudes out into the two slots machined through the drum where the stock arms slide. Here. we see the lug that protrudes out into the left slot of the stock drum:

There is also one on the right side of the stock drum but we can't see it because the stock release lever gets in the way but , trust me, there is one there.
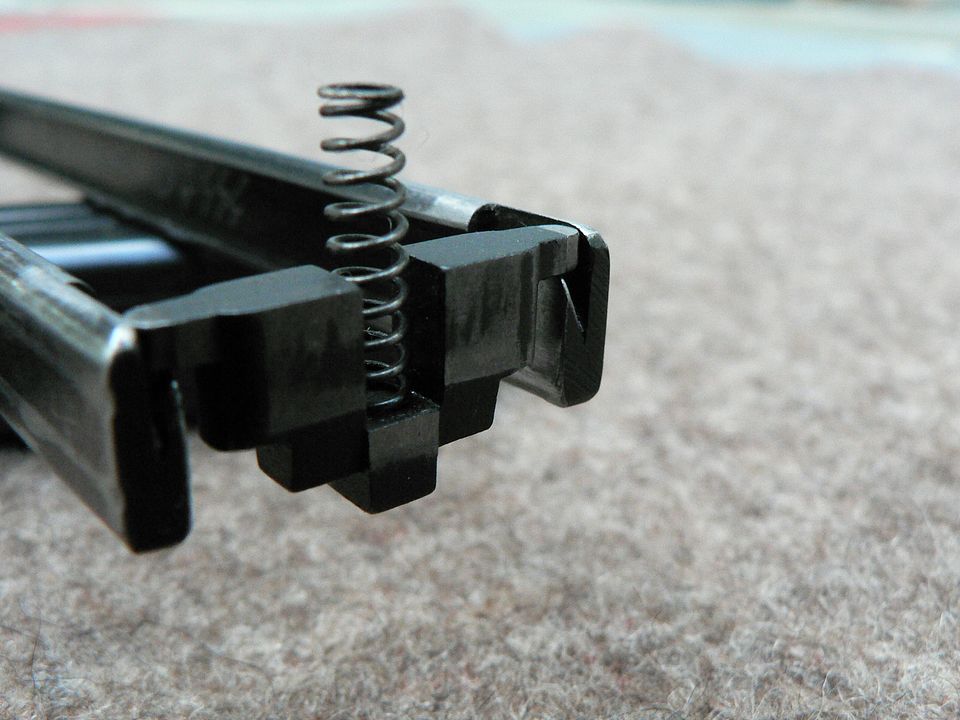
Almost the entire length of each stock arm has it's inside surface machined to create a channel for the protruding lug on the locking piece to run. However, at the very front of each arm, a little bit of modern art is machined into it and this is where the magic happens:

For clarity, we've removed the stock drum in the following set of five pictures so that we can see how the locking piece interacts with the stock arms.
After we've pressed the stock release lever and started pulling the stock to the rear for deployment, nothing happens for most of its travel. The locking piece spring is pushing down on the locking piece, keeping the lugs pressed against the bottom edge of the slot machined into the stock arms. This puts some tension on the stock arms creating slight resistance so that the stock must be pulled to the rear instead of it just falling to the rear:

As the stock approaches the end of travel, the locking piece lugs encounter a ramp on each stock arm:

Now, the locking piece spring is not nearly as strong as the force being applied to the stock pulling it to the rear. So, as the locking piece lugs encounter these ramps, the locking piece begins to rise until it gets high enough to pass through the horizontal notch between the top of the ramp and the top edge of the stock arm:

Finally, as the stock is pulled the final short distance to the rear, the locking piece lugs reach the end of the horizontal notch and the locking piece spring forces the locking piece down into the vertical slot machined into each stock arm. The stock is now locked in the deployed position:

When we remove the stock entirely from the firearm, we accomplish this by pressing the locking piece into the stock drum so far that the locking piece lugs can pass through a second, higher horizontal notch in each stock arm:

As mentioned earlier, this is difficult to do without the aid of a pin punch. This keeps it from happening in normal use of the stock.
So, that's the mechanics of the stock. Hopefully, that all makes sense to you because that's about the best I can explain it. As with most bits of firearm design, it's really quite simple once you deconstruct and examine it. The hard part was designing it in the first place!
In the next post, we'll finish with the stock by comparing the PM-63C to the PM-63. Can the PM-63C stock be made to work? Wellllllll, in my opinion, yes and no. It should be easy enough to make it slide in and out but will it lock open and, if so, will it work as originally intended. I'm not satisfied that it will. I'll explain that in the next post. I hope to see you soon.
As my parts kit is cut through where the stock mounts to the frame, I cannot fully illustrate some of what I'm going to type but I'll do the best I can for you.
To remove the stock from the PM-63:
First, you have to fully extend it as shown above.
Next, you FULLY depress the button on the locking piece and pull the stock to the rear and away from the body of the firearm. In order to depress the button as far as is necessary to carry out this operation, you may have to use a pin punch:

With the stock removed, you next have to remove what I'm calling the "stock mounting drum" or "stock drum". It's the round part left in the frame that the stock arms slide through. To remove it, FULLY depress the button on the locking piece, and slide the drum out of the frame from left to right being careful not to lose the locking piece or its spring. In order to depress the button as far as is necessary to carry out this operation, you may have to use a pin punch.
Sorry, no picture here to illustrate this operation as my parts kit was cut in this area.
To remove my stock, I get to cheat because the rear of the frame on my parts kit was cut. All I have to do is just pull the stock to the rear whether it's deployed or not. As I do so, I not only remove the stock and the stock drum, I also remove the rear of the frame!
After I've removed the above:
It's a simple matter to remove the cut rear portion of the frame, leaving me with the stock still mounted to the stock drum:
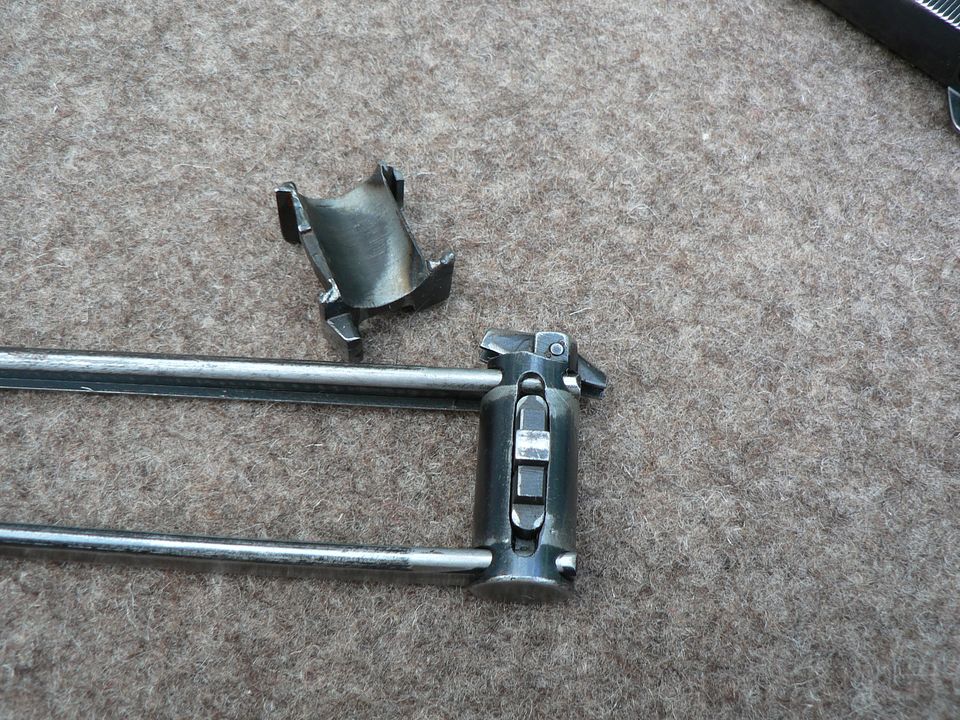
Then, I fully depress the button on the locking piece to remove the stock from the stock drum and the locking piece with its spring will fall right out of the stock drum:
Here's the rear of the cut frame on the parts kit:
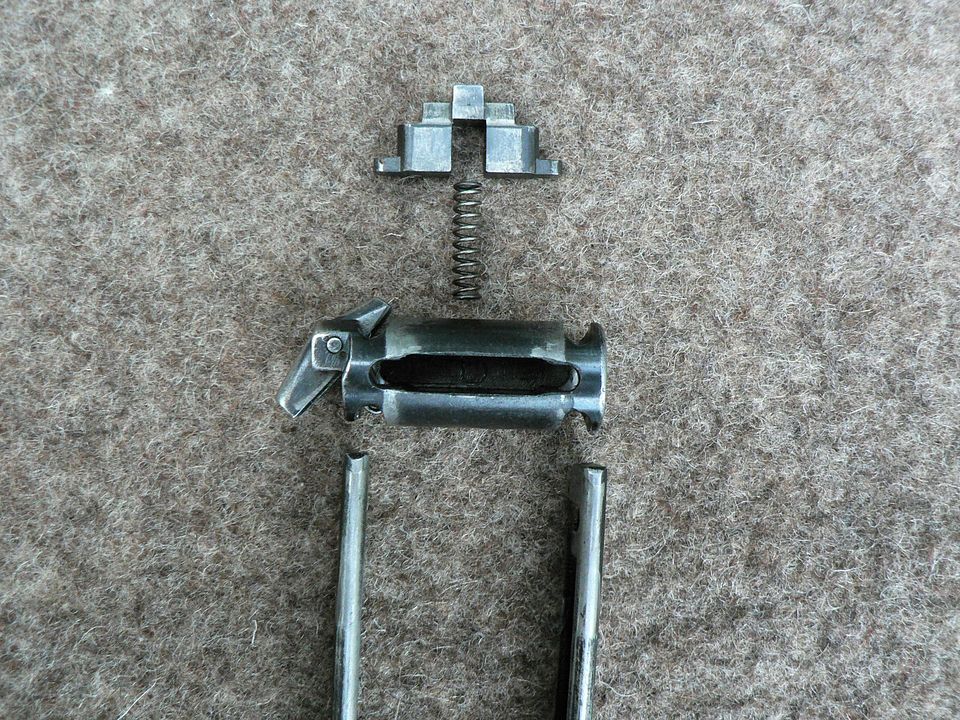
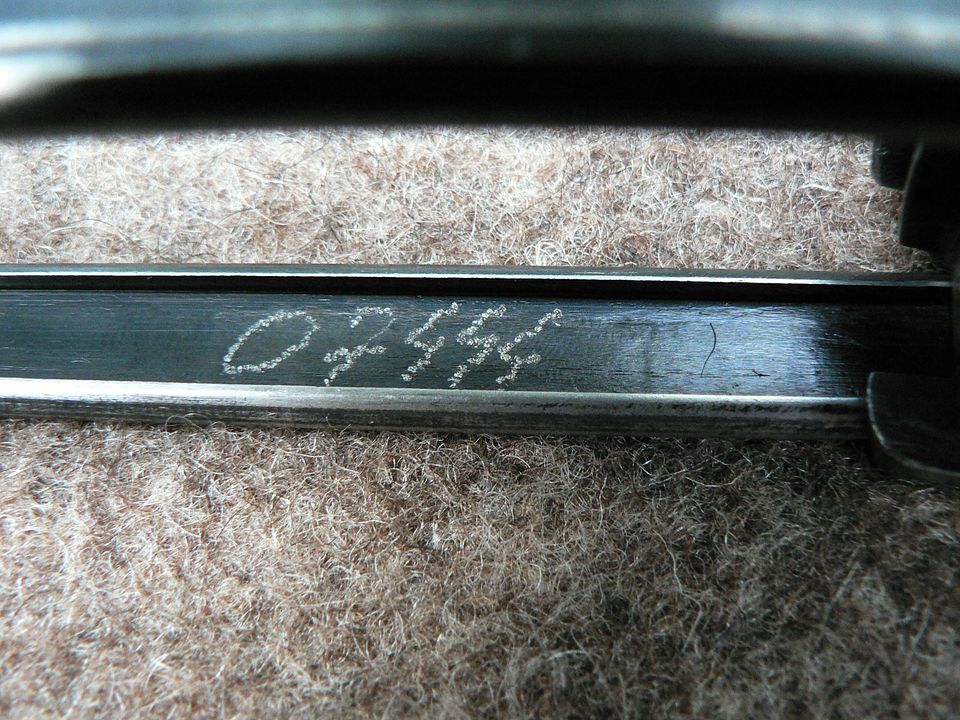
The stock itself cannot be disassembled without destroying a peened in place pin running through both stock arms and the butt plate so we're not messing with that. The inside front of the left stock arm is electro penciled matching to the frame and slide. Whether that was standard practice or it was done when the kit was demilled, I do not know:
Detail of the locking piece:
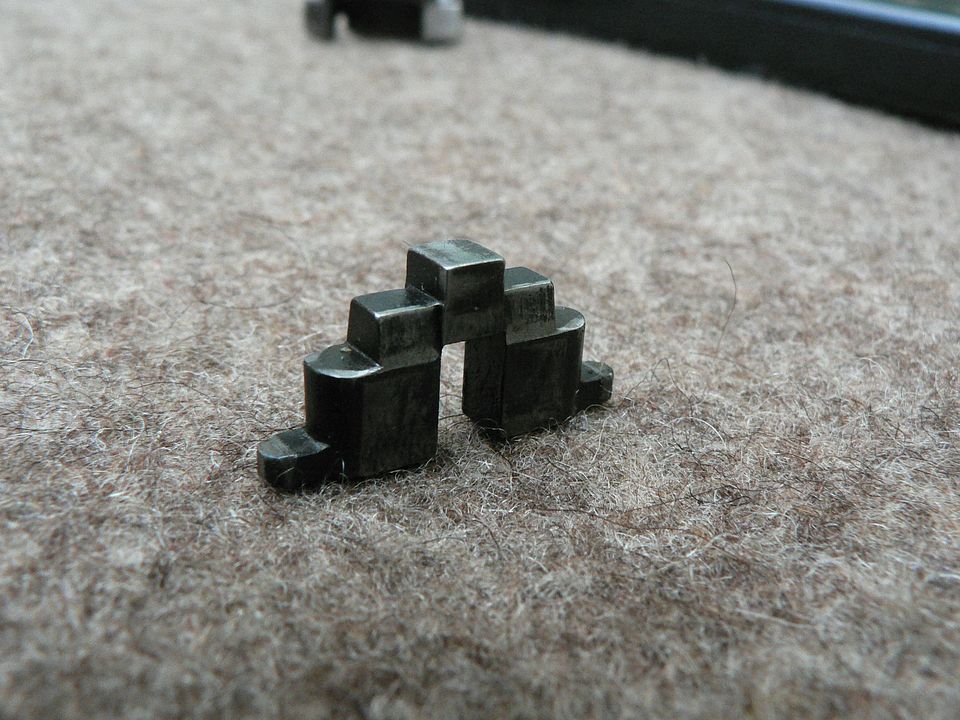
It looks like the entrance gate to some ancient Central or South American city like Tikal or Puma Punku.
So, how does this whole stock locking mechanism thing work anyway? Well, we looked at the mechanism that keeps it closed in the last post so we already understand that. Now, we'll look at the mechanism that keeps it open. It's really dead simple and done with two parts contained in the stock drum, the locking piece and its spring. When these parts are assembled to the stock drum, there is a little lug on either side of the locking piece that protrudes out into the two slots machined through the drum where the stock arms slide. Here. we see the lug that protrudes out into the left slot of the stock drum:

There is also one on the right side of the stock drum but we can't see it because the stock release lever gets in the way but , trust me, there is one there.
Almost the entire length of each stock arm has it's inside surface machined to create a channel for the protruding lug on the locking piece to run. However, at the very front of each arm, a little bit of modern art is machined into it and this is where the magic happens:
For clarity, we've removed the stock drum in the following set of five pictures so that we can see how the locking piece interacts with the stock arms.
After we've pressed the stock release lever and started pulling the stock to the rear for deployment, nothing happens for most of its travel. The locking piece spring is pushing down on the locking piece, keeping the lugs pressed against the bottom edge of the slot machined into the stock arms. This puts some tension on the stock arms creating slight resistance so that the stock must be pulled to the rear instead of it just falling to the rear:

As the stock approaches the end of travel, the locking piece lugs encounter a ramp on each stock arm:

Now, the locking piece spring is not nearly as strong as the force being applied to the stock pulling it to the rear. So, as the locking piece lugs encounter these ramps, the locking piece begins to rise until it gets high enough to pass through the horizontal notch between the top of the ramp and the top edge of the stock arm:
Finally, as the stock is pulled the final short distance to the rear, the locking piece lugs reach the end of the horizontal notch and the locking piece spring forces the locking piece down into the vertical slot machined into each stock arm. The stock is now locked in the deployed position:
When we remove the stock entirely from the firearm, we accomplish this by pressing the locking piece into the stock drum so far that the locking piece lugs can pass through a second, higher horizontal notch in each stock arm:
As mentioned earlier, this is difficult to do without the aid of a pin punch. This keeps it from happening in normal use of the stock.
So, that's the mechanics of the stock. Hopefully, that all makes sense to you because that's about the best I can explain it. As with most bits of firearm design, it's really quite simple once you deconstruct and examine it. The hard part was designing it in the first place!
In the next post, we'll finish with the stock by comparing the PM-63C to the PM-63. Can the PM-63C stock be made to work? Wellllllll, in my opinion, yes and no. It should be easy enough to make it slide in and out but will it lock open and, if so, will it work as originally intended. I'm not satisfied that it will. I'll explain that in the next post. I hope to see you soon.
Last edited: