Finally Picked Up a Polish PM63-C

The #1 community for Gun Owners of the Northeast

Member Benefits:

  • No ad networks!
  • Discuss all aspects of firearm ownership
  • Discuss anti-gun legislation
  • Buy, sell, and trade in the classified section
  • Chat with Local gun shops, ranges, trainers & other businesses
  • Discover free outdoor shooting areas
  • View up to date on firearm-related events
  • Share photos & video with other members
  • ...and so much more!
  • Combloc

    Stop Negassing me!!!!!
    Nov 10, 2010
    7,267
    In a House
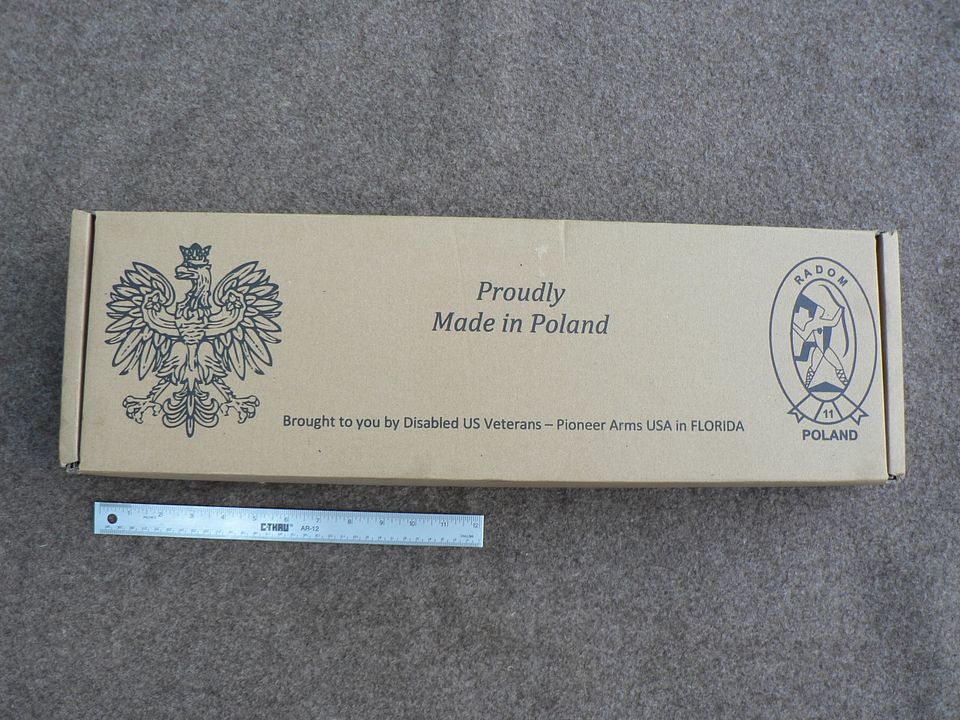
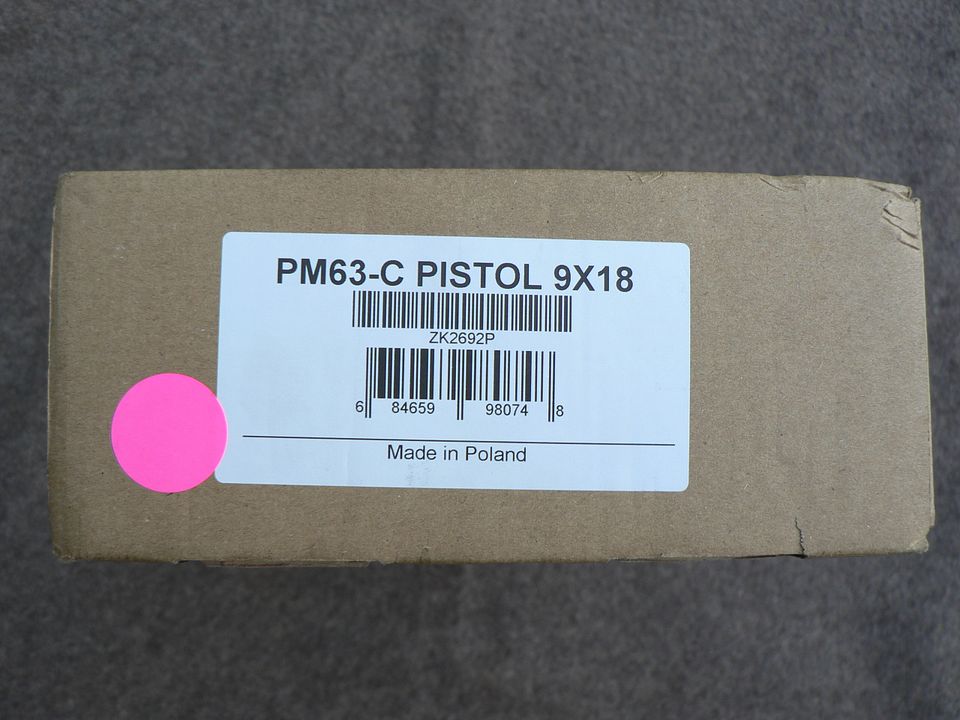
    It's one of the new Pioneer Arms imports.


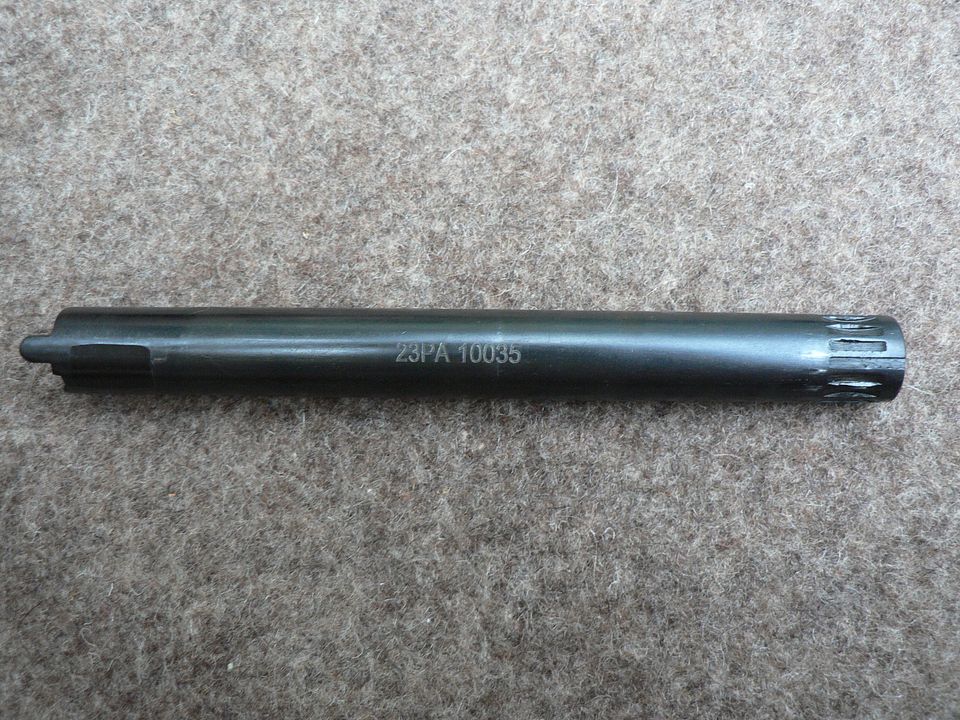
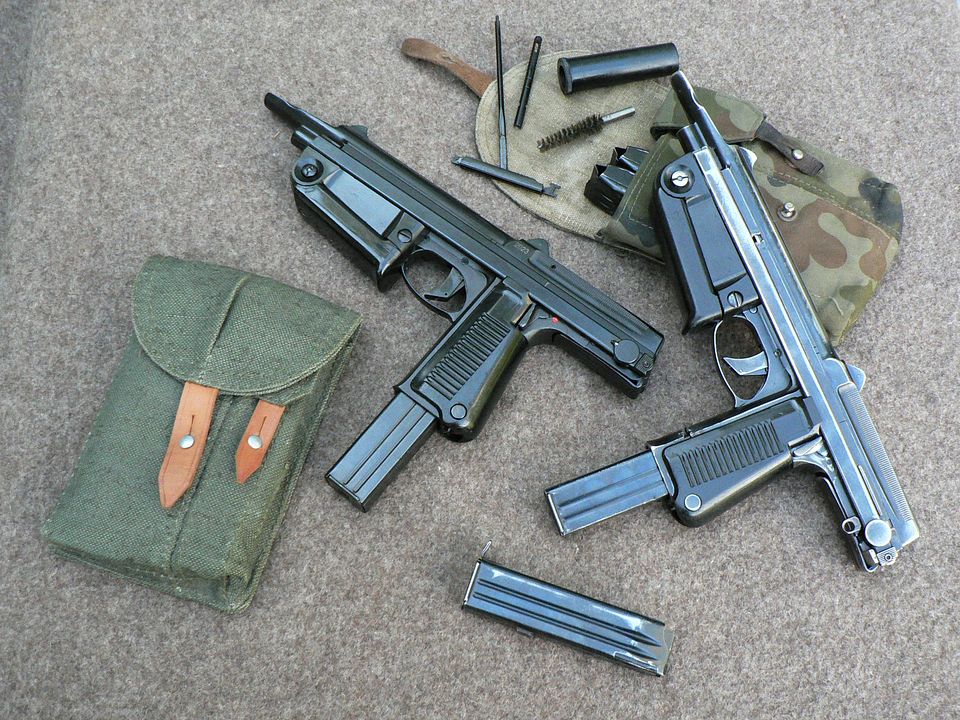
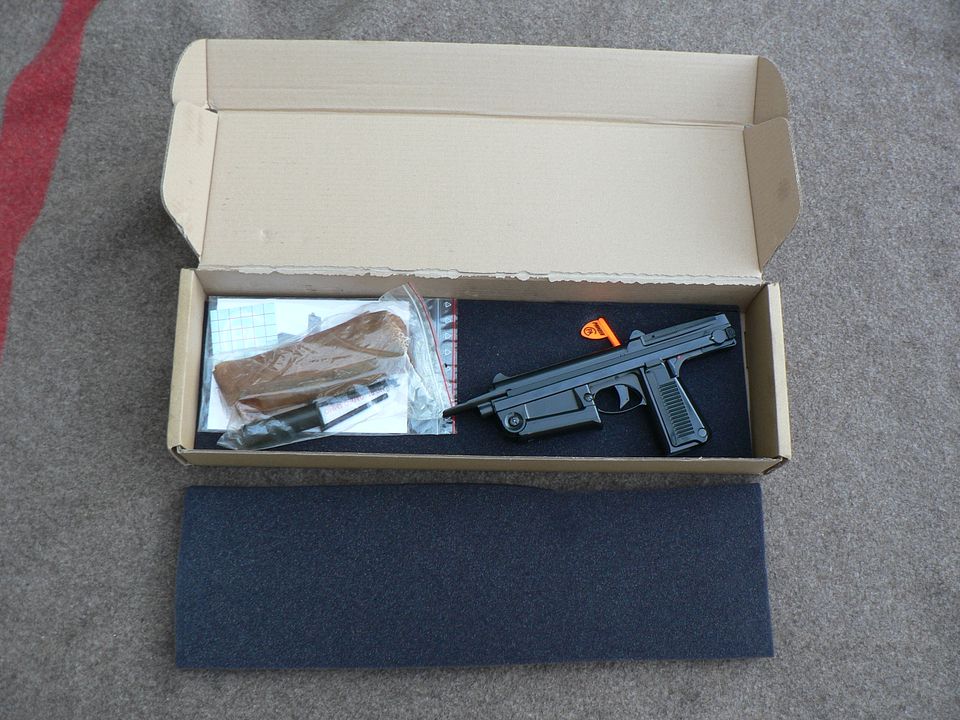
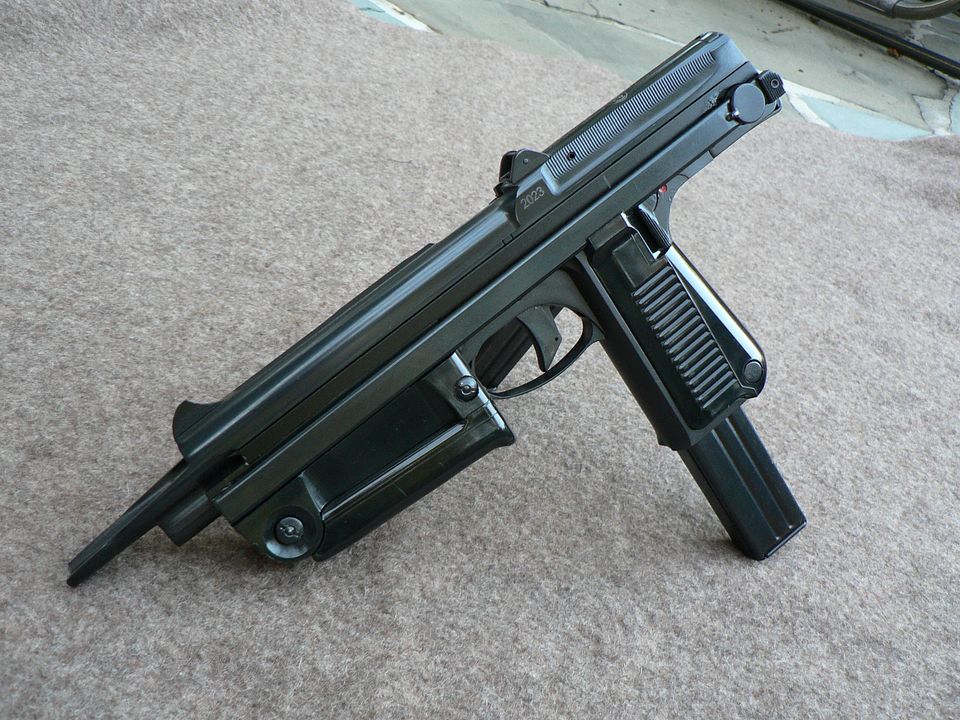
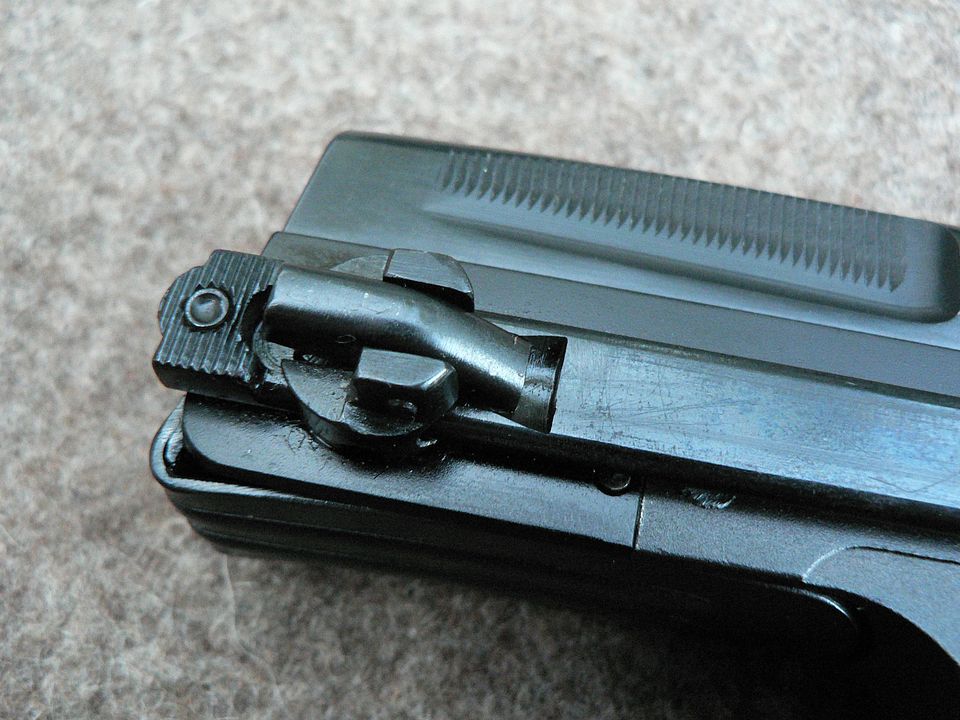
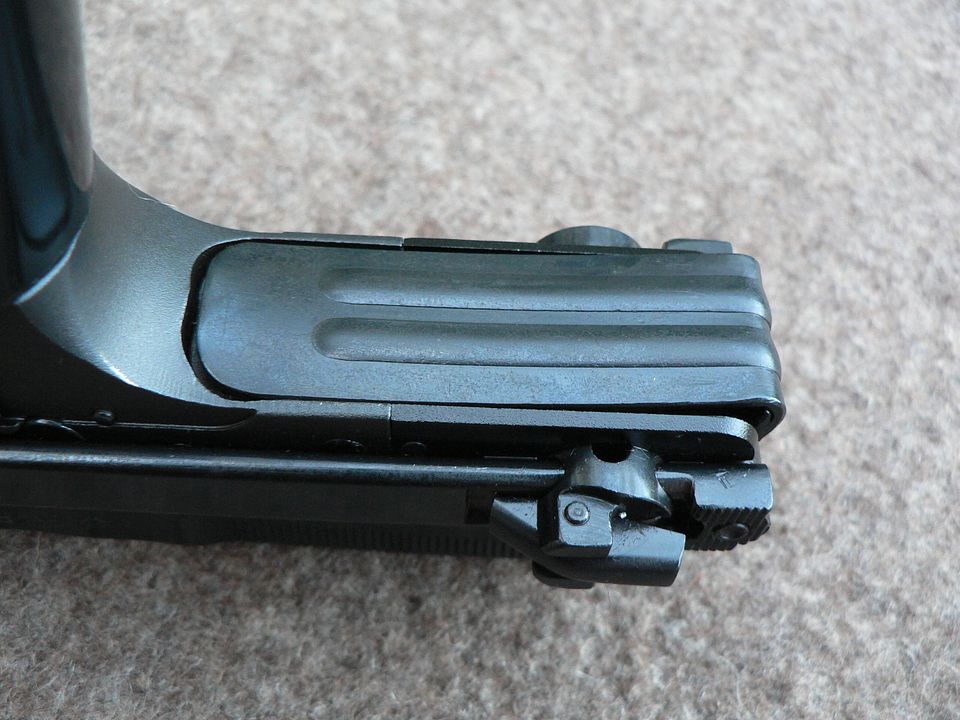
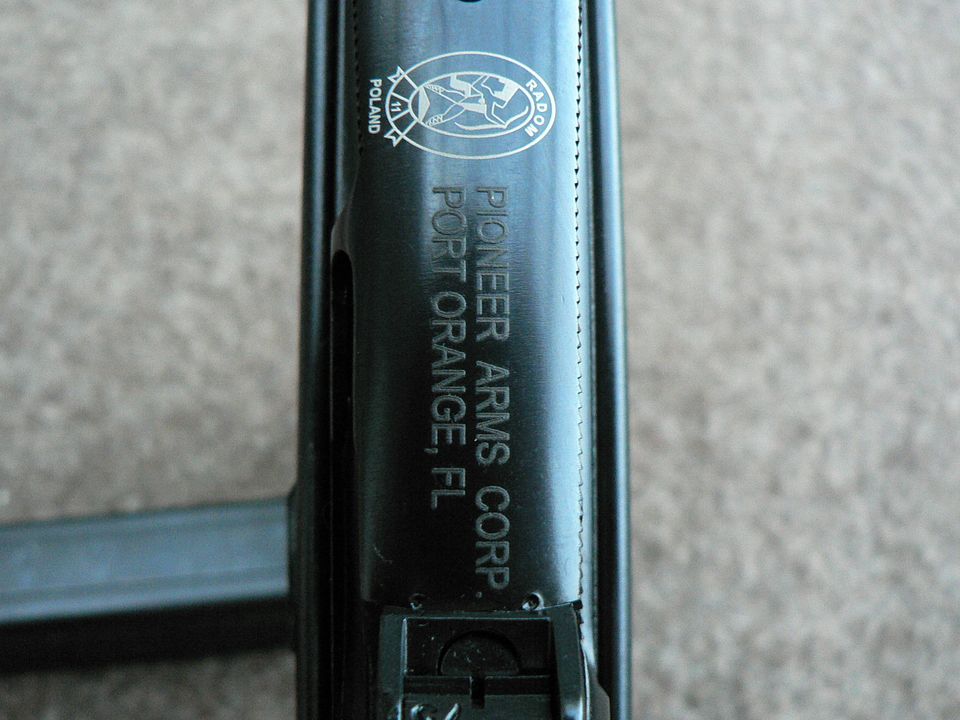
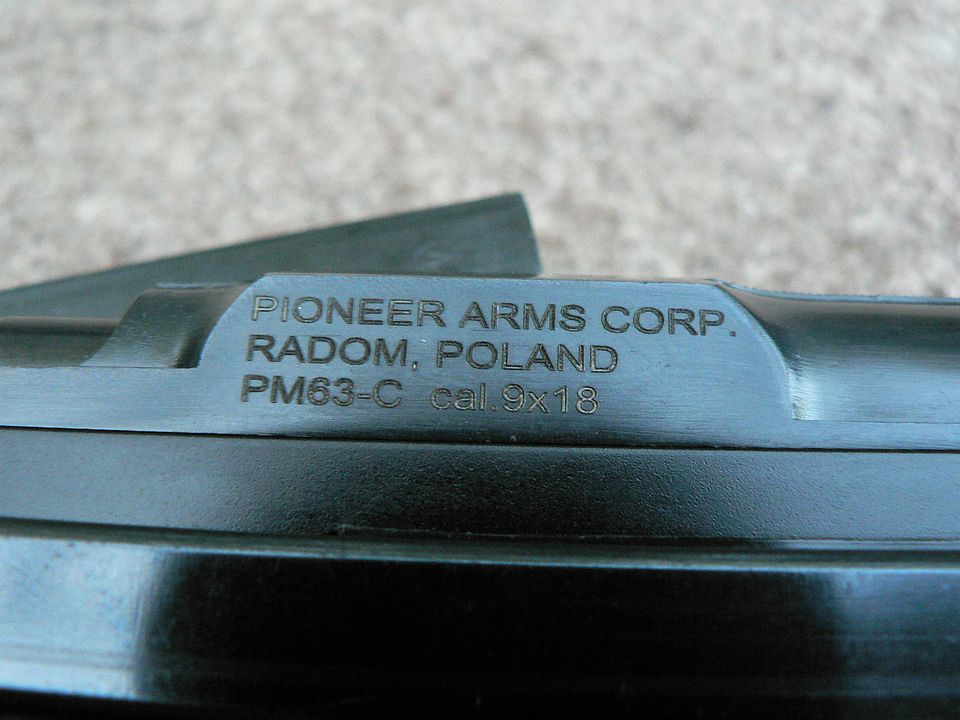
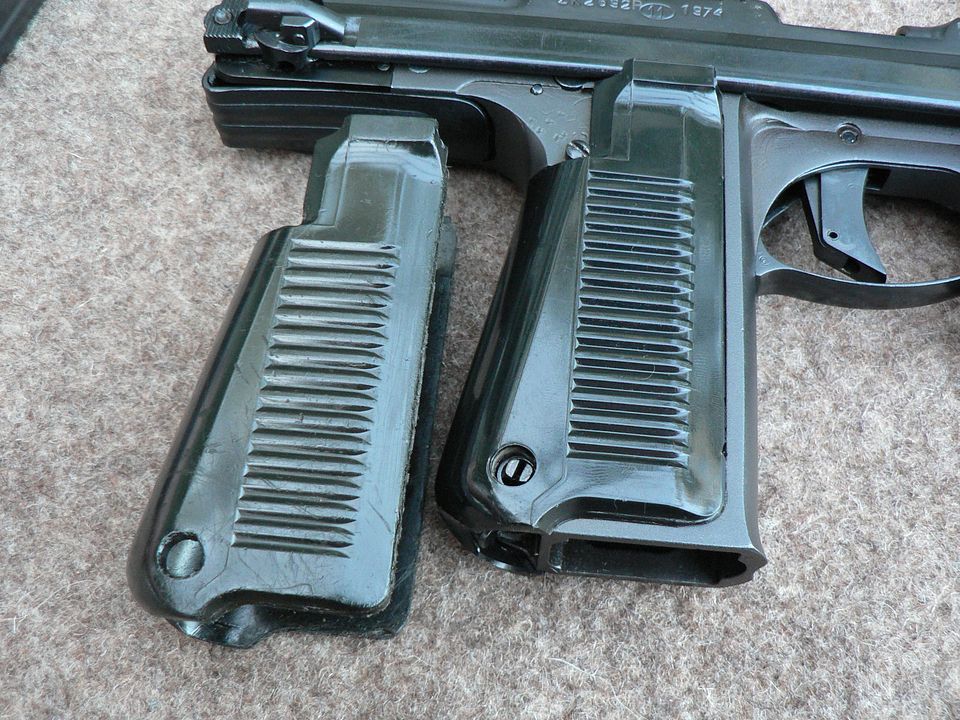
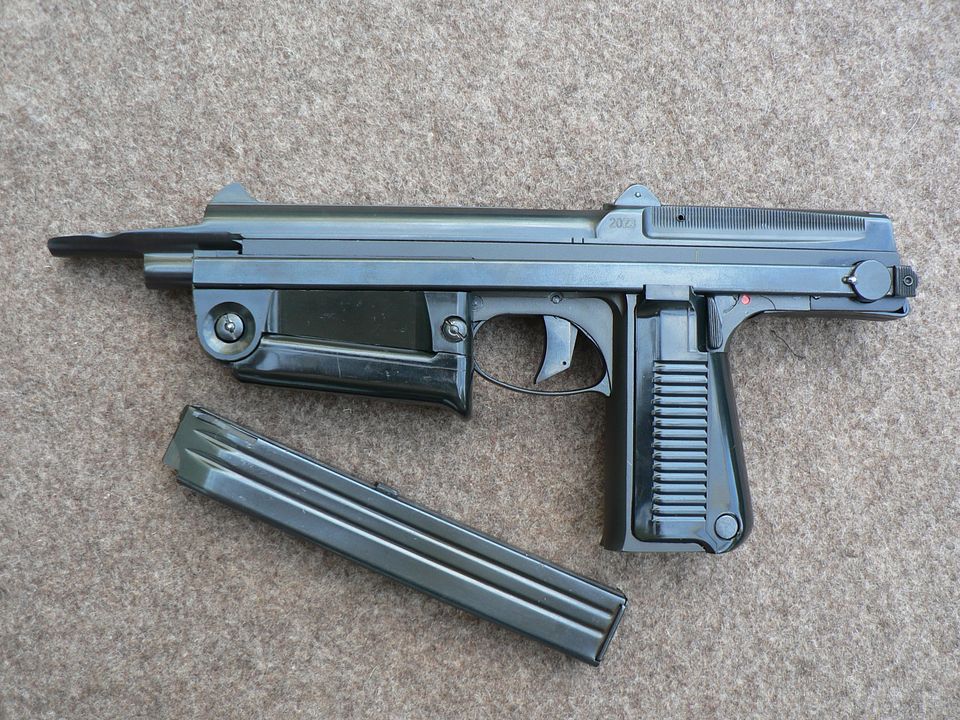
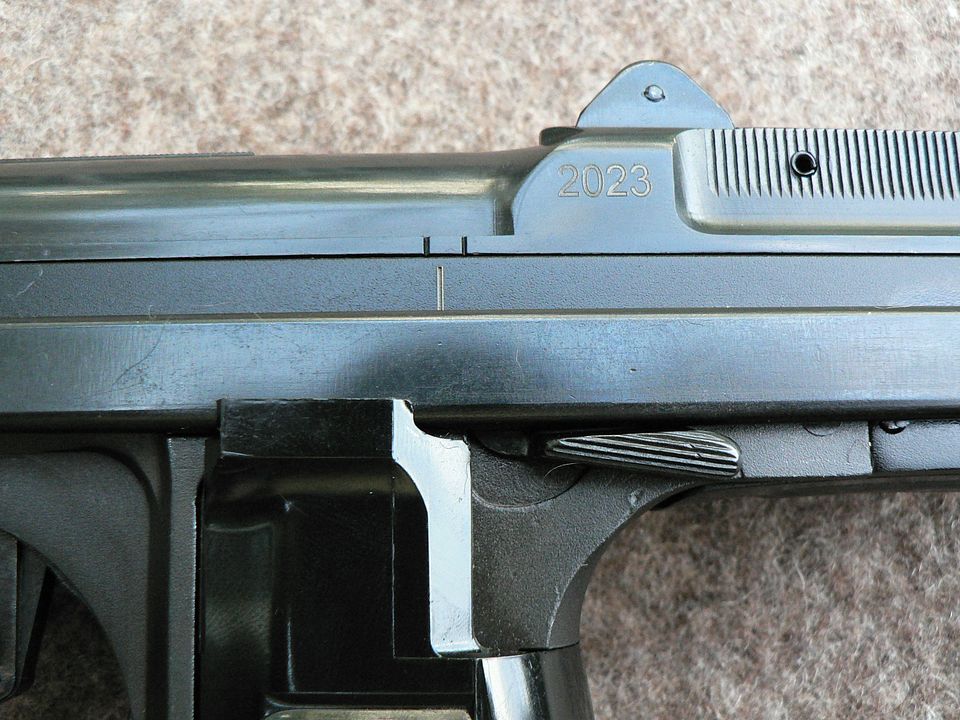
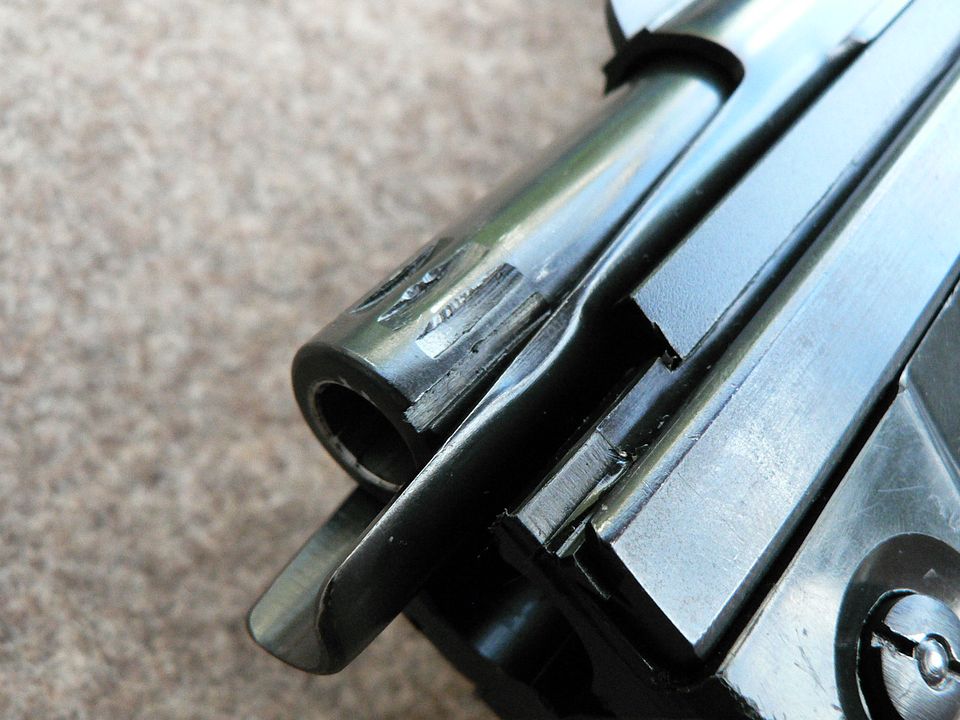
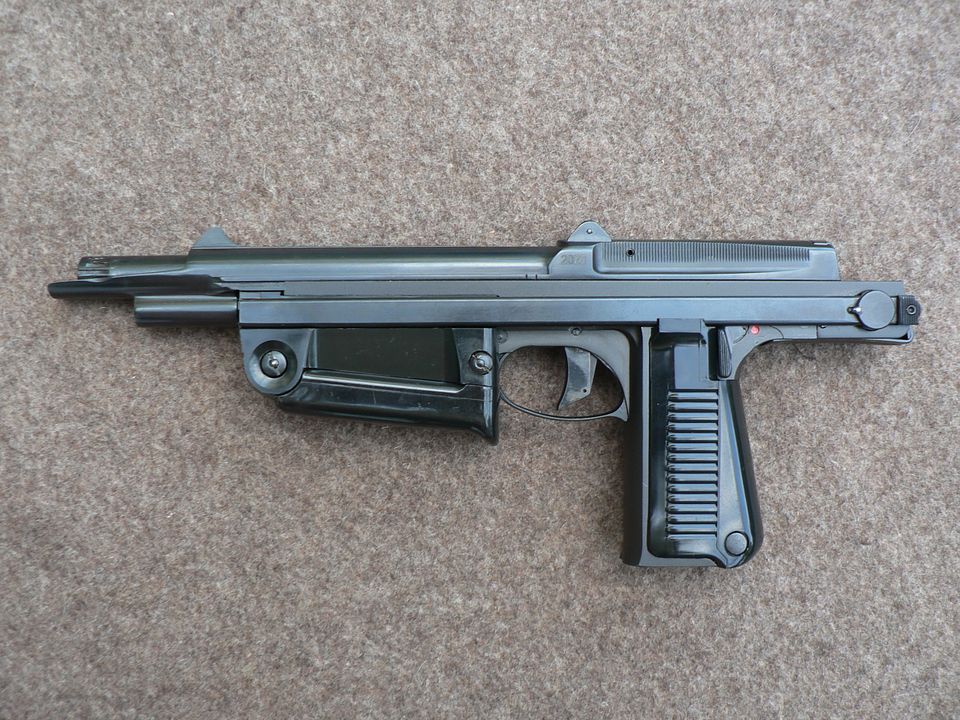
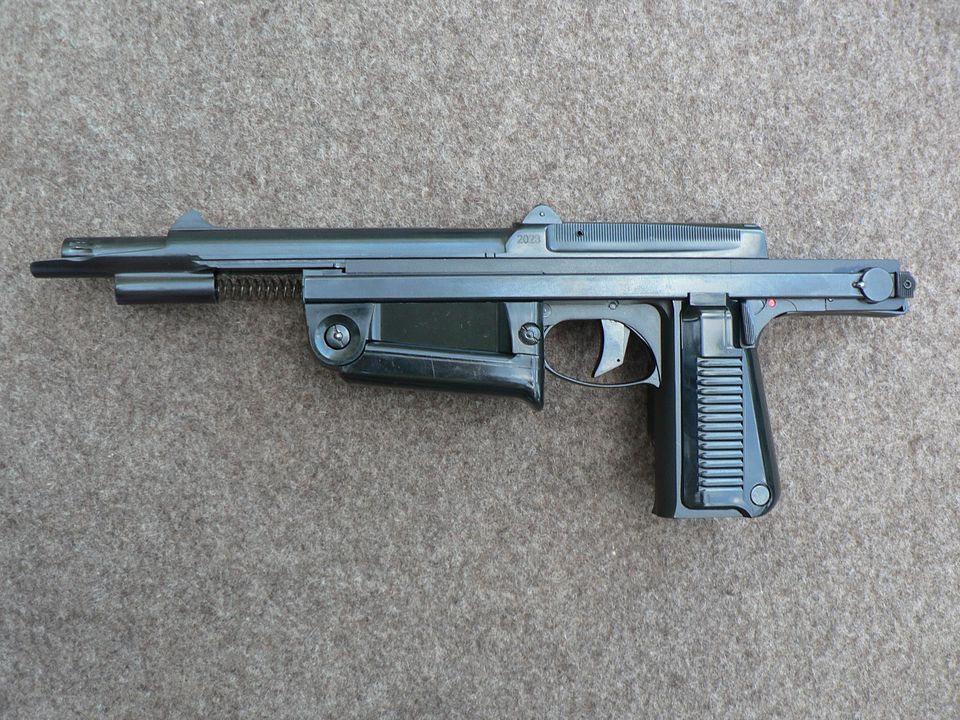
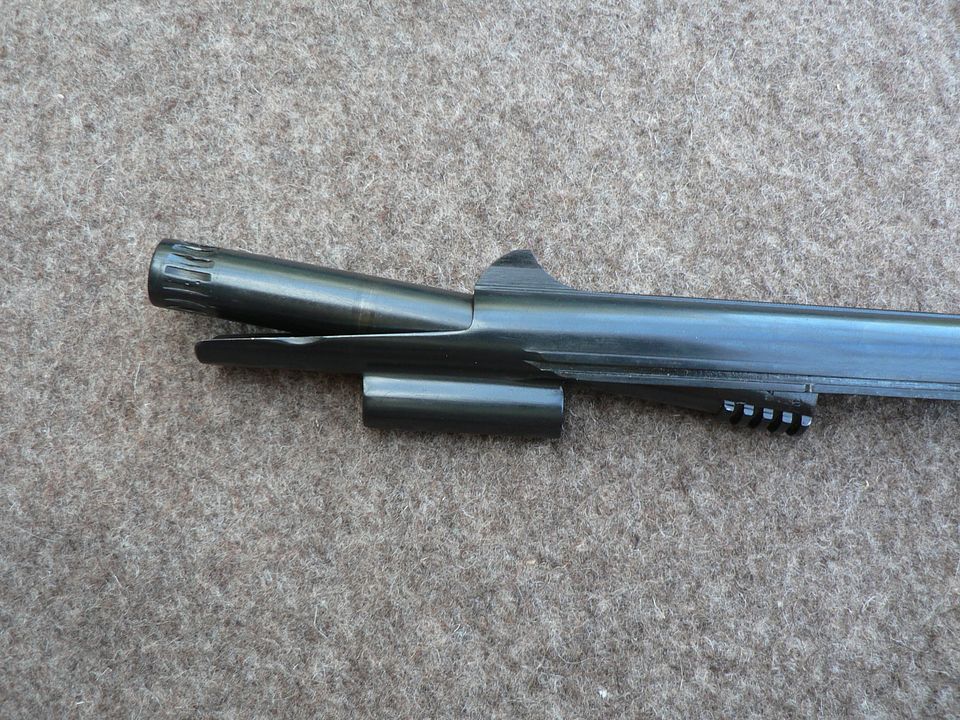
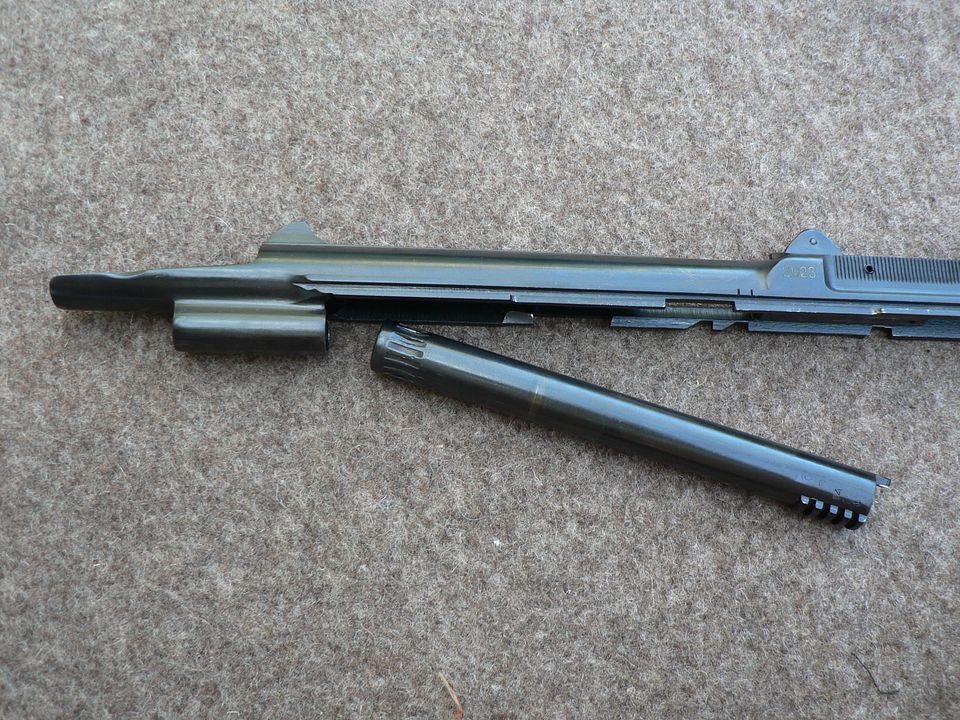
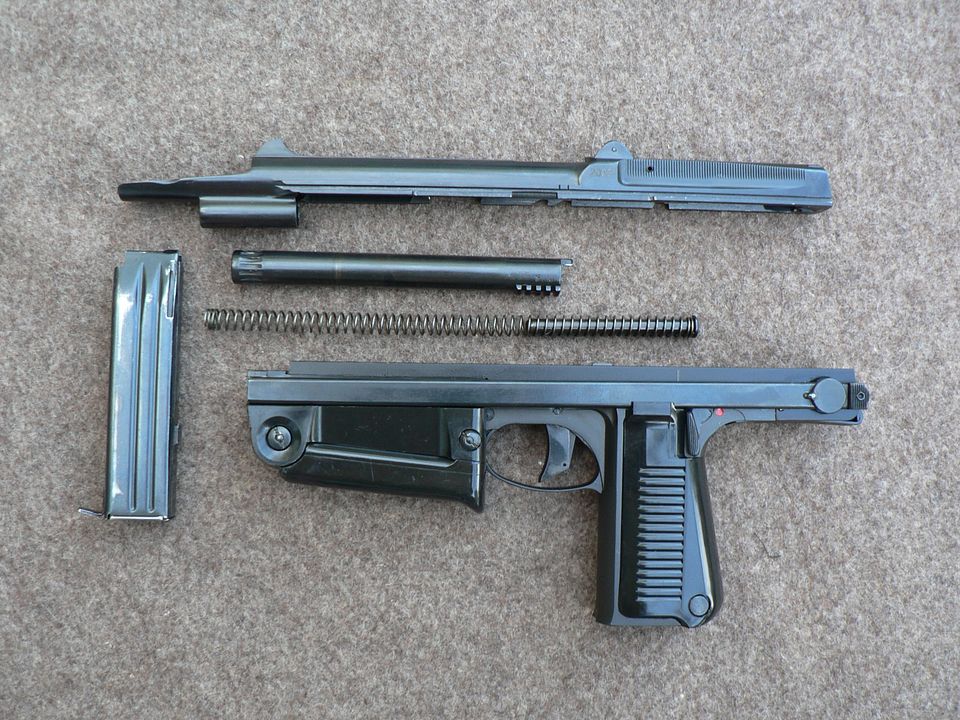
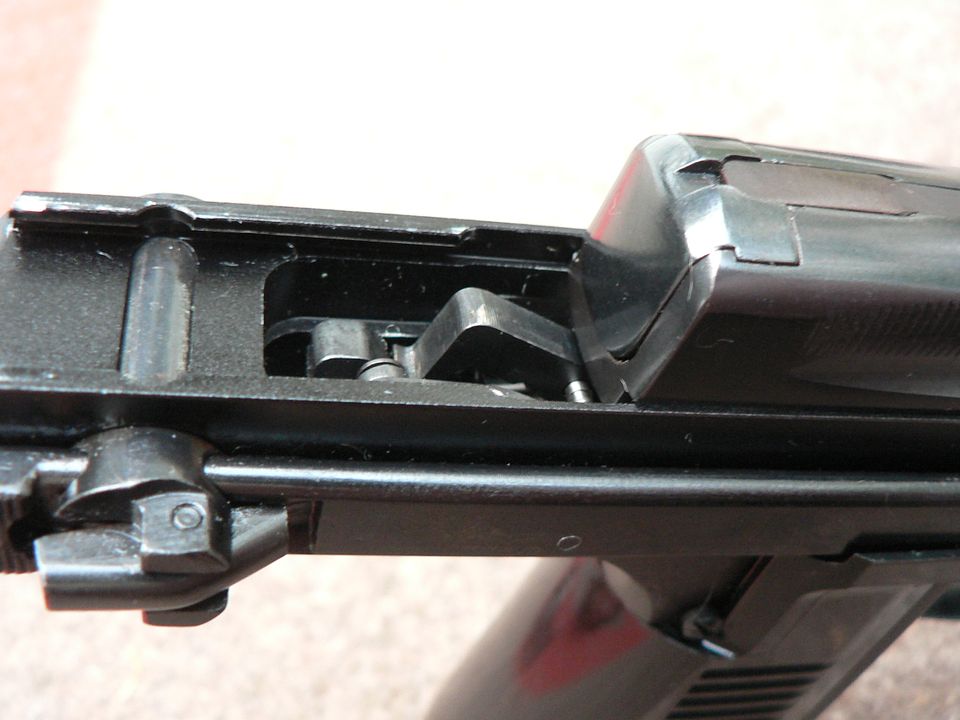
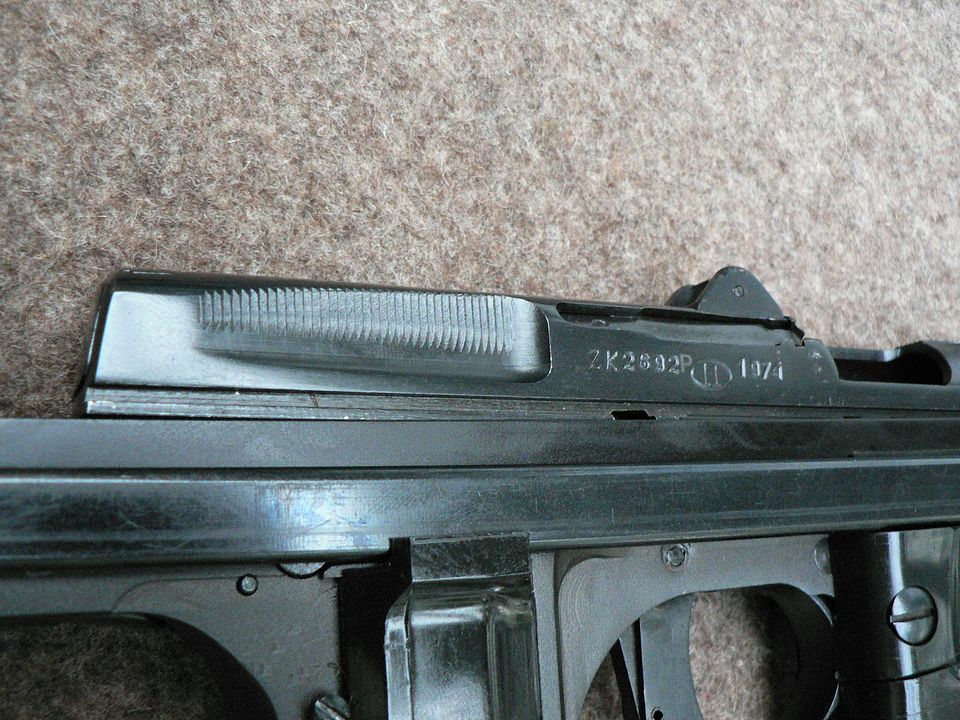
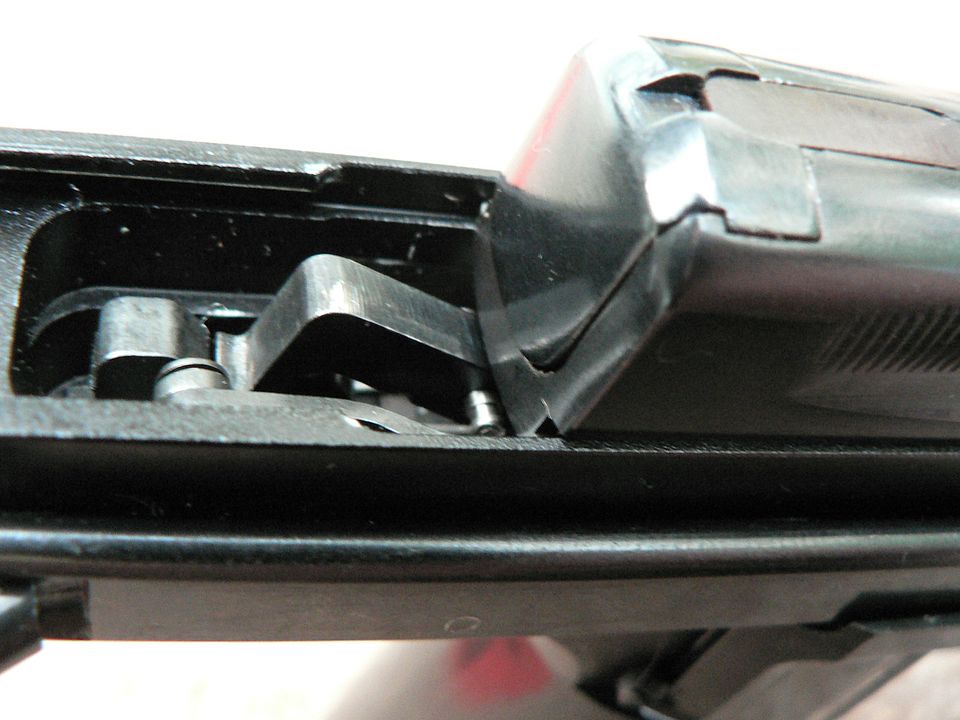
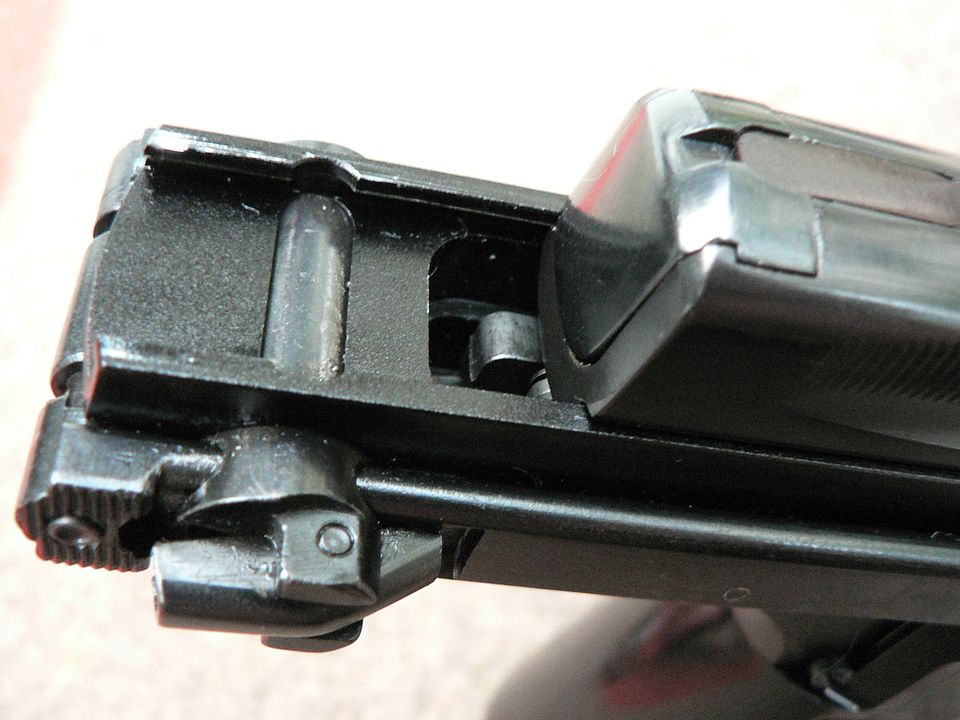
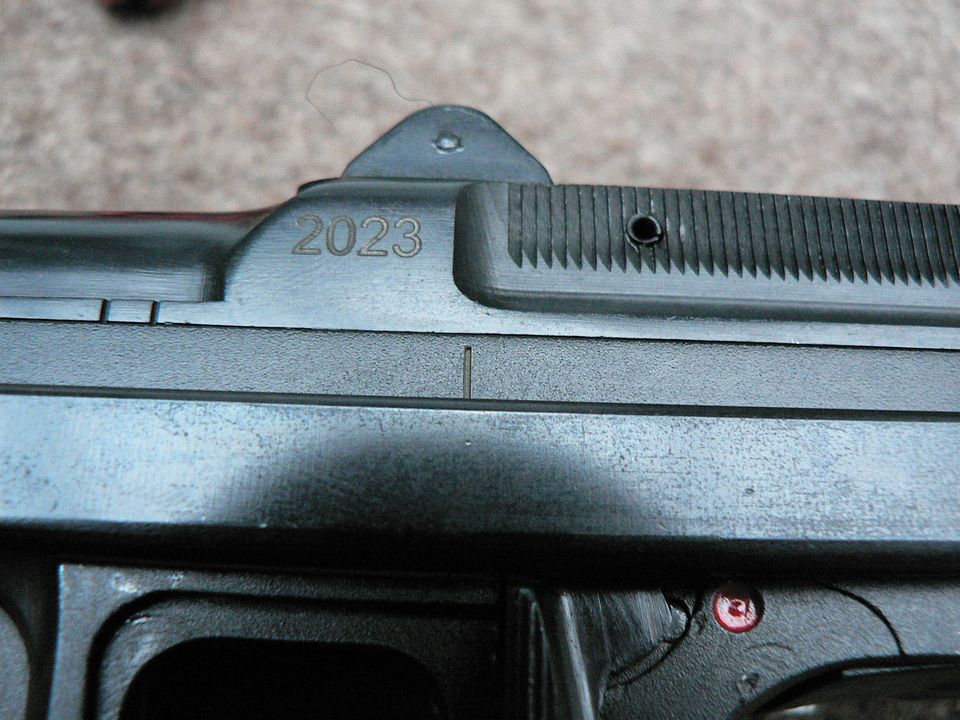
    After a years long hiatus because the early ones had serious issues, Pioneer is now importing what they are unofficially calling the Gen 2 version. Where the early ones were parked, the new ones are blued just as the original PM-63 was. There is very little information about this new version out there so I plan on doing a detailed write-up about it soon. I bought this as a collectible so I don't plan on shooting it. That means I won't be able to tell you about accuracy, reliability or durability, but what I will provide is an in-depth look at the one pictured above compared to the original parts kit also shown above. While the parts kit is just that, a cut up machine pistol, it's complete so I can show you what's been done to remanufacture the Pioneer Arms offering as a legal semi-auto. As always, we'll disassemble the thing and get up close and personal with it, describing what does what, what I like, what concerns me, and my overall thoughts. I've been chasing after this "pistol" for almost ten years now so I'm eager to get into it. I think it's going to be fun and I hope you'll join me!
     

    303_enfield

    Ultimate Member
    May 30, 2007
    4,696
    DelMarVa
    Hmmm, I still have mags from the RAK I had in Iraq. What's the price point?

    Found some in stock


    Now, how to get it on the list.
     
    Last edited:

    joppaj

    Sheepdog
    Staff member
    Moderator
    Apr 11, 2008
    46,725
    MD
    That is truly an odd looking firearm. As always I look forward to your in-depth write up.
     

    Combloc

    Stop Negassing me!!!!!
    Nov 10, 2010
    7,267
    In a House
    Time to get going on this. Tonight we'll take a brief look at what's in the box when you pick your pistol up from your FFL and then move on to the finish. But first, a little background about this product is in order.

    I'm not going to focus on the History behind the PM-63 machine pistol; that's amply covered on the internet. Instead, we're interested in the history of this semi-auto only version which Pioneer Arms interchangeably calls the "PM63-C" or "PM-63C". I'm not privy to all the details but what I do know is that Pioneer started advertising these about 10 years ago. No, that's not a typo.....that's a decade. Stories of them "coming soon" came and went for 6 years until, about 5 years ago, Centerfire advertised them at $1399 but they never got any in. Fast forward another year and a very few showed up out of the blue at Classic Firearms, with an advertised price of $799 and they sold out immediately. But would be buyers were almost immediately disappointed when they got an email from Classic saying they had screwed up on the advertising and the actual price was $1299. Yeahhhhhhhhh.........oooooookay.

    Well, I missed the boat but I quickly discovered that was a blessing in disguise. First off, the pistol had a rough parkerised finish instead of the nice Polish bluing they originally had. Second, it seems many people had problems with reliability and durability. The pistols often wouldn't go into battery without tapping the back of the slide, parts, especially the hammer, were not properly hardened and deformed, field stripping was so hard you almost had to beat it apart with a hammer, and probably other things I've not heard about. No, thank you.

    Then, a second small batch showed up some time later that I didn't even hear about until recently. Those had a blued finish and were supposed to have had the bugs worked out. I don't know exactly when they were imported nor do I know the cost. However, one person has stated in this post on another forum that theirs works fine and they are happy with it.

    Finally, in late April of this year, an FFL posted on a forum I frequent that he had just gotten 22 in an "early release" of pistols in a deal he worked out with Pioneer Arms and that Classic Firearms would have some within a week. Better still, he posted some pictures. I figured I'd take a roll of the dice and checked Classic every morning. Sure enough, about a week later, there they were, early in the morning at $899. I jumped on it and managed to snag one. They were sold out within about 15-20 minutes. Since then, they have come and gone and come and gone again. As of this typing, both Classic Firearms and Atlantic Firearms sell them. Stock seems to be hit or miss but more hit than miss. I have a hunch this will be another one of those firearms that is available for a short while before disappearing forever. If you're going to get one, now is the time and that's why I'm writing this, so that you, the reader, can decide if you want one or not before they are no more.

    There's one last thing I want to say before we get into the pictures. Personally, I bought this as a collectible, nothing more. I collect military firearms and I especially love Combloc jobbers. While I may take it to the range at some point, I'll be just as happy if I never do. What I do know is that someone on another forum whom I trust has bought one and he says he's close to 1000 rounds now with no issues other than "one finicky mag" and he's posted pictures to prove that, at least, the semi-auto parts are not deforming. Pioneer is unofficially calling these newest examples "Gen2" with changes to both the fire control group and frame, although they do not specify what those changes are. So, as I type this, I'm cautiously optimistic that they've worked out the bugs and I'm proceeding from the standpoint of assuming the parts durability and reliability problems have been corrected. Maybe I'm naive, I don't know.

    Let's begin.


    When your new buddy arrives, it'll most likely be in a cardboard box just like mine:


    When you open it, you'll probably wonder why they used such a large box. It just seems inefficient to me:


    This is the scene once you're unpacked:

    At the top left, we have a Pioneer Arms sticker with the owner's manual below. Moving right, we have a four piece cleaning kit, a 15 round magazine, a chamber flag, and a 25 round magazine. I'll let you figure out where the firearm is in the photo.

    We're not going to go over every page in the manual but I do want to look at a few.
    First it the cover page:

    They make it clear you're not supposed to use reloaded ammo. Does anyone even reload 9mm Makarov??

    Inside is a little about the History of the PM-63 and some technical specifications:


    I got a chuckle when I noticed that the disassembled view shows the select fire version:

    The giveaway is the sear catch hanging down from the front of the slide. That's removed on the semi-auto version.

    Most of the rest of the manual, explains that you'll shoot your eye out if you're not careful, you'll get lead poisoning if you eat the ammo, disassembly, reassembly, corrective action in the event of a stoppage, more don't shoot your eye out stuff, storage, yada, et cetera, et cetera, et cetera. The only two exploded drawings supplied cover the semi-auto conversion parts.
    The first one shows the parts in the frame:


    And the second, the parts in the slide:


    The cleaning kit:

    Starting from the left, we have a bore/chamber brush which looks like a little tree in fall, a cleaning jag, a multitool, plastic screw top for oil bottle, and finally, the empty plastic oil bottle.
    Surprisingly, the brush and jag will not screw onto the cleaning rod of my 1983 Polish AKM; it's a different thread pitch.

    In addition to serving as a cleaning rod with a folding "T" handle, the tip of the rod acts as a pin punch:


    One end of the handle is a screwdriver:


    The other end has several tools built into it but I've only figured out one of them (another form of screwdriver):

    I've been trying to find a vintage Polish military PM-63 manual. If I could scare one up, I'm certain all would be revealed.

    I discovered something really neato. If you disassemble a magazine and remove the follower, you can pair the follower up with the brush and make a miniature house with adjacent tree. If you look carefully, you can see that the house even has windows and a little chimney:


    Were you to get a bunch of magazine followers and brushes, you could build a tiny village underneath your tree at Christmas. Neato!!
     
    Last edited:

    Combloc

    Stop Negassing me!!!!!
    Nov 10, 2010
    7,267
    In a House
    In this post, we're only going to look at the outside of the pistol. Lots of people, myself included were very disappointed when the first batch came in with the rough parkerized finish. It was originally blued, it looks better blued, we want it blued! Well, now it is. BUT, my worry was that they'd muck it up and polish a bunch of the edges and details off. Fortunately, that worry was unfounded as these pictures will show.

    If you look along the slide in this first picture, you'll notice it has a high gloss, deep black finish:

    No, it's not pre-war Walther PPK Quality but it's pretty darn nice. Later, once we have this thing disassembled, we'll compare this bluing to a slide still sporting the original finish. Although a different color, they compare favorably. We'll break out a 99% condition P64 pistol for comparison purposes too.


    I'm happy to report that they didn't polish any of the edges or details off either. I don't know what method they used to reblue but whatever they did, it looks great. Check out how crisp the antiglare strip is on top of the slide:


    And the shark fin front sight is as sharp as it ever was:


    The grasping grooves are still sharp too:


    Everywhere on the slide, the bluing is rich and the edges crisp. They've really preserved the Craftsmanship these older Polish military firearms were known for. I can find absolutely nothing to complain about with regards to finish.
    Rear of the slide:


    Bottom of trigger guard:


    Bottom of compensator/fingerguard and recoil spring socket:


    Top of compensator/finger guard:


    Stock latch:

    We'll talk about the inoperable stock later.

    Tack weld rendering stock inoperable:

    We'll discuss that later too.

    Butt plate folded into rear of frame:
     

    Combloc

    Stop Negassing me!!!!!
    Nov 10, 2010
    7,267
    In a House
    This last post for tonight will look at most of the exterior markings.


    The "2023" appears to be laser etched but I'm no expert. I'll just say it's uniform and very shallow. When you rub your thumb across it, you can feel it but very little. This batch is the first I've seen marked with a year.

    The importer mark at the top rear of the slide feels about the same as the year mark:

    The logo behind it is so finely applied that i can't feel it save for a slight drag when I rub my finger across it. It's a modified version of the logo used by Interarms, also based in Radom. I looked up their website:
    The PM-63C appears to be a joint venture between Interarms and Pioneer. It's only a guess but I suspect that Interarms manufacturing the new part of the frame (more on that later) and the semi-auto parts while Pioneer is taking care of metal finish and final assembly. Again, that's only a guess. Whatever the case, it's clear this pistol is a joint venture between the two.

    The manufacturer's mark on the right side of the slide feels about the same as the importer mark and the year mark:


    On the right rear of the slide is the original Circle 11 mark, year of manufacture, and original serial number. Pioneer added a "P" prefix to create a new serial number for legal purposes. As with the rest of the slide, the stamps seem to be as crisp as they were in 1974:

    I've already been asked several times if this is considered a 49 year old firearm and if those dated 1973 and before are C&R. Nope. These are considered newly manufactured firearms even though the vast majority of the parts were made decades ago.


    Next, we'll look at some of the original inspection marks placed there when this was originally manufactured during the height of the Cold War. To do that, we'll bring in an old parts kit for comparison.
    First up are some marks on the right side of the frame behind the pistol grip. These are from the new pistol:

    Now, these examples have been mostly obliterated during remanufacture. I've seen some where they are more intact but not on this one. You can faintly see a couple partial diamond marks that are so common on Polish firearms of this era.

    For comparison, here is the same area on the parts kit:

    Partial stamps like this are VERY common on Warsaw Pact equipment. These look A-OK to Ivanski.

    Most of this stamp was erased when Pioneer refinished the trigger but there is no question this is original.


    The same area from the parts kit:

    There is also another stamp on the other side of the parts kit trigger that has been erased completely on the PM-63C. Further scrutiny of the above pictures will reveal that, where a solid pin was used and peened in place at the bottom of the parts kit trigger, Pioneer has opted to use a cheaper roll pin. If I were running the show, that'd still be a solid pin.

    Another inspection stamp seen at the front of the recoil spring socket on the PM63-C:


    Similarly, we find a partial stamp in the same area on the parts kit slide:

    Although we'll note other stamps here and there, we aren't going to cover every single little stamp as we go. Warsaw Pact equipment is generally replete with inspection stamps and this example is no exception. I only point these out to illustrate that the PM-63C has not been so reworked that it's been "sanitized" of stamps. We Combloc collectors like to inspect and ponder all the little marks and this offering still has PLENTY of them to discover.


    The last two pictures for tonight are the left and right sides of the pistol grip. Remanufactured or not, ultimately these are surplus firearms and the furniture is no exception. So, while the furniture it came with is pretty nice for being so old and used, it still has its fair share of scratches. This is compounded by the fact that it's neither Bakelite nor hard plastic but rather a soft, almost rubbery plastic. It feels just like that used on a Mauser manufactured P38 I have that was made right at the end of the war when plastic as we know it was just coming into use. It scratches and dents fairly easily so it's going to show wear if you use it. Anywho, I managed to find and install a NOS grip so it's going to look better than what you are most likely going to get on your pistol. DON'T EXPECT yours to look new. So, here are the left and right sides of the grip it came with compared to the NOS grip that I've since installed:


    That's it for the moment. I can't work on this every evening because I have lots of balls in the air at the moment. BUT, I will continue to work on it on a regular basis and it will get done. I have a lot to cover. We're going to look at the innards, compare it to an original, look at what you can expect when you buy accessories, compare it to some other PDW's size wise and discuss anything else that crosses my mind. So, check back from time to time. You might find something that interests you.
     

    Combloc

    Stop Negassing me!!!!!
    Nov 10, 2010
    7,267
    In a House
    Before we start looking at components, we need to disassemble the thing. There are some videos online but they involve early import examples which were problematic to say the least. One guy I watched said it took him "30-40 pounds of pressure" to push the slide forward during disassembly. Another guy said it took him "over an hour" to get his apart. Consequently, they don't show how to properly field strip the pistol very well (or at all). Well, as I said earlier, these new pistols are the "Gen 2" version and those problems have apparently been corrected. I'm happy to report that mine comes apart very easily and I'll now walk you through it step by step.

    The PM-63C has a typical European heel release magazine and we start by removing it from the pistol. Disassembly is impossible otherwise:


    Next, we need to take a look at the left side of the pistol. Left of frame is forward:

    The safety is the little lever behind the pistol grip. Currently, it's pointing down and is in the "OFF" position as indicated by the visible red dot. Above and just ahead of the safety lever is a vertical line on the frame. We're going to need that line in just a moment. There are also two vertical marks on the slide just below and forward of "2023". We're going to need those in a moment too.

    Okiedokie. Make sure the safety is in the "OFF" position. Pull the slide to the rear until the mark on the frame is between the two marks on the slide and hold it there:


    While keeping the marks lined up, rotate the safety lever to the rear and up into the "ON" position. This will lock the slide in place:

    NOTE : You may have to move the slide forward or back a hair while rotating the safety lever but rest assured, the lever will rotate into the "ON" position with the mark on the frame somewhere between the two marks on the slide. Once you've done it once or twice, you'll get the feel for it lickety-split.

    Now, we move to the front of the pistol. With the slide now locked partially to the rear, we can see the exposed barrel:

    You will notice a long longitudinal notch at the 12 o'clock position. This is telling us the barrel is locked to the frame. All the other short notches are there so that you can grip the barrel with your finger tips.

    Turn the barrel clockwise about 90° until it stops. It will now be at about the 3 o'clock position:

    The barrel is now unlocked from the frame.

    Moving back to the safety lever, hold the slide in place and rotate the safety back down to the "OFF" position:

    The slide is now free to move again.

    Ease it forward until it stops. It will be at this position:

    There is still some slight spring tension but the slide has stopped because it has encountered the internal hammer.

    While grasping the pistol grip with both hands, reach up with a thumb and push on the rear of the slide until pops forward and over the hammer. It won't take much pressure, maybe 7-10 pounds. Continue moving the slide forward until the front guide rails on the slide just clear the corresponding guide rails at the front of the frame, no more. The slide will be in this position when that point is reached:


    Here's a closeup of the left front guide rail in the proper position:


    Now, tip the slide down and pull it away from the frame. You can either remove the drive spring with the slide or leave it in place in the frame, it matters not:


    Set the frame and drive spring with its guide rod aside; we're finished with those.

    Place the slide and barrel assembly in front of you bottom up:


    Now we need to remove the barrel. Notice that the barrel is rotated in the slide such that the five lugs which lock it to the frame prevent it from moving forward or back:


    While holding the slide with one hand grasp the muzzle of the barrel with your other hand and turn the barrel approximately 90° until the locking lugs on the barrel point upwards:

    The barrel is now unlocked from the slide.

    Move the barrel forward until the rearmost locking lug just clears the bearing surface machined inside the slide:


    Turn the slide on its side and tilt the rear of the barrel down:


    Pull it to the rear and away from the slide:


    The pistol is now field stripped for inspection and cleaning:


    DO NOT, DO NOT, DO NOT pull the trigger while the pistol is disassembled and let the hammer fly forward so that it bangs into stuff (we'll cover what that stuff actually is later). Just like an AR15, the hammer is intended to strike the firing pin and only the firing pin. Letting it fly into anything else is GOING TO BREAK SOMETHING sooner rather than later. You can lower the hammer gently but there really is no need to ever do this except for an occasional cleaning underneath it when it gets gunky in there from shooting. Don't abuse your little buddy.

    DO NOT ATTEMPT REASSEMBLY UNTIL YOU READ THE NEXT POST!!!
     
    Last edited:

    Combloc

    Stop Negassing me!!!!!
    Nov 10, 2010
    7,267
    In a House
    Reassembly is the exact opposite of disassembly. However, there are a couple things to take note of or you're going to get frustrated. Go slow and deliberately and you'll be fine and dandy.

    First, when you're installing the slide on the frame, you're going to get to this point where the rear of the slide encounters the hammer.........STOP AT THIS POINT AND THINK:


    If you just keep pushing the slide to the rear, the hammer is going to lift the rear of the slide so high that the rear guide rails on the slide, instead or engaging the rear guide rails on the frame, will ride OVER them in instead. Meanwhile the front guide rails on the slide and frame are already engaged. At this point, you've got everything all bound up and it all comes to a screeching halt. It looks like this:

    if you go gorilla and just keep pushing it's just going to bind up tighter. Eventually, something IS going to give, probably the front guide rails on the frame. DON'T LET THIS HAPPEN TO YOU.

    Here's how you prevent it. Again, the rear of the slide has just encountered the hammer. STOP PUSHING!:


    At this point, wrap one hand around the rear of the slide and frame and firmly squeeze. Once you have a good squeeze going on, use your other hand to continue pushing the slide to the rear and over the hammer:


    Once you've cleared the hammer, you can relax your squeeze and you're home free. Here, we see the slide pushed far enough to the rear that the hammer has been pressed down and the rear guide rails are engaged:

    Continue with reassembly to completion.


    As with any firearm, it's probably not a good idea to store it with the hammer in the cocked position. Now, if this were an all military grade firearm, I'd say you're fine do dry fire it. But, this is NOT an all military grade firearm and you need to treat it as such. DON'T DRY FIRE IT. Instead, decock it. Let me show you how.

    DECOCKING THE PM-63C MUST ONLY BE DONE WITH THE PISTOL UNLOADED. THERE CAN BE NO ROUND IN THE CHAMBER. DECOCKING WITH A ROUND IN THE CHAMBER IS ASKING TO DIE!!!

    Is that clear enough?

    OK, you've just finished putting you pistol back together and you are going to put it away. The chamber is empty and you don't want to store it cocked. Pull the slide to the rear until the disassembly mark on the frame approximately lines up with the rear of the bulge in the slide as shown here:

    While holding the slide in this position, pull the trigger and gently ease the slide forward. Your pistol should now be decocked. You might have to try it a few times until you find the sweet spot but you will.


    Now that we've covered how to properly disassemble the PM-63, we can get to the really fun part and start perusing all the bits! We'll start with that in the next post
     
    Last edited:

    Combloc

    Stop Negassing me!!!!!
    Nov 10, 2010
    7,267
    In a House
    There are lots of grammatical errors in the above two posts but it's late so I'll clean it up later. All of the information is accurate though.
     

    Combloc

    Stop Negassing me!!!!!
    Nov 10, 2010
    7,267
    In a House
    Thank you sir.

    Tonight we'll start looking at components now that it's apart.

    First up is the barrel:

    Chrome lined, it's chambered in 9x18mm Makarov and measures just a hair under 5 15/16ths inches from breech face to muzzle.

    The number you see at about the midpoint was applied by Pioneer:

    If I understand EU law correctly, every major component is required to have a unique identifying number. Why they chose to use a number other than the pistol's serial number is a mystery to me but that's the direction they went. My assumption is that this is the 35th barrel they "converted" in 2023.

    When I say "converted", I mean that Pioneer took original, communist era barrels and removed the original serial number before rebluing them and applying the new number. Here, we see the reworked barrel that came with my pistol compared to one I bought elsewhere still showing its original serial number:

    You can clearly see where the original number was ground off. Interestingly, even the original barrel appears to have been refinished at some point in the past by applying the classic Warsaw Pact black paint over the original bluing. I'd like to point out here that barrels are not necessarily interchangeable from pistol to pistol and are probably hand fitted. The barrel with the original serial number will fit into neither the Pioneer slide nor the parts kit slide. However, the Pioneer marked barrel fits into both. But the painted barrel is serial numbered so it clearly fit into the slide of PM-63 serial nr. AM00924.

    The left rear of each barrel is where you'll find all inspection marks:

    Also clearly visible are the five Browning style lugs that lock the barrel to the frame when the pistol is assembled. As should be obvious by now, the PM-63 is a blowback design.

    Breech end:

    That's not bluing wear you're seeing but rather chrome plating. The extractor notch is visible as is a little projection that fits into a cutout on the slide when the action is closed. I've seen this before on other pistols but I'm unsure of its purpose. Maybe it enhances reliability? Maybe is serves a safety function as it would stop the slide from closing unless the barrel is properly rotated into the fully locked to the frame position? I simply don't know but I'm sure one of you folks does so PLEASE enlighten me. I'd appreciate it.

    The muzzle end showing more traces of the chrome plating:


    Even though Pioneer is reusing original barrels, the rifling is as new:

    I actually prefer an original barrel as it's probably better made than a new one would be.
     

    Users who are viewing this thread

    Latest posts

    Forum statistics

    Threads
    275,615
    Messages
    7,288,569
    Members
    33,489
    Latest member
    Nelsonbencasey

    Latest threads

    Top Bottom