Enfield No4 Mark 1

The #1 community for Gun Owners of the Northeast

Member Benefits:

  • No ad networks!
  • Discuss all aspects of firearm ownership
  • Discuss anti-gun legislation
  • Buy, sell, and trade in the classified section
  • Chat with Local gun shops, ranges, trainers & other businesses
  • Discover free outdoor shooting areas
  • View up to date on firearm-related events
  • Share photos & video with other members
  • ...and so much more!
  • ken792

    Ultimate Member
    Sep 2, 2011
    4,491
    Fairfax, VA
    I didn't know there was such a thing as an Ishapore made No. 4. I always assumed they ran with the No.1 until 2A. :shrug:
    They never made them, but they did rebuild them. I have no idea if they ever made replacement furniture though.

    Indian rebuild marked No. 4 rifles span all the manufacturers, not just POF.
     

    shootnfishndorf

    Active Member
    Mar 17, 2016
    346
    Waldorf
    Anyone got any links or sites where I can find a bundle like this ...or at least a site (US preferred)...that would have all of the parts...I'm trying to not have a dozen tiny orders from a dozen different sites if I can help it. SARCO is out of stock...
    Screenshot_20240214-154302.png
     

    shootnfishndorf

    Active Member
    Mar 17, 2016
    346
    Waldorf
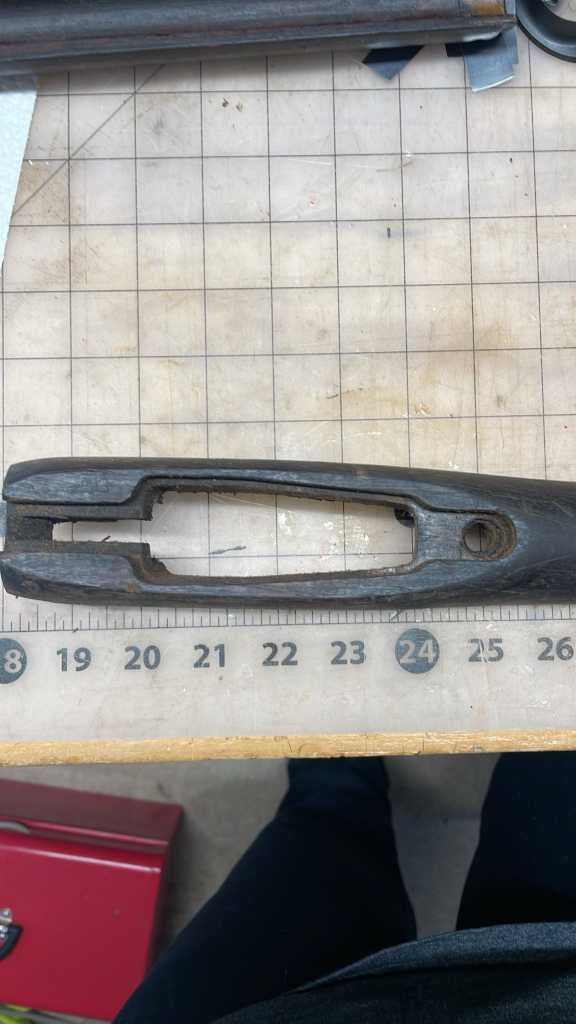
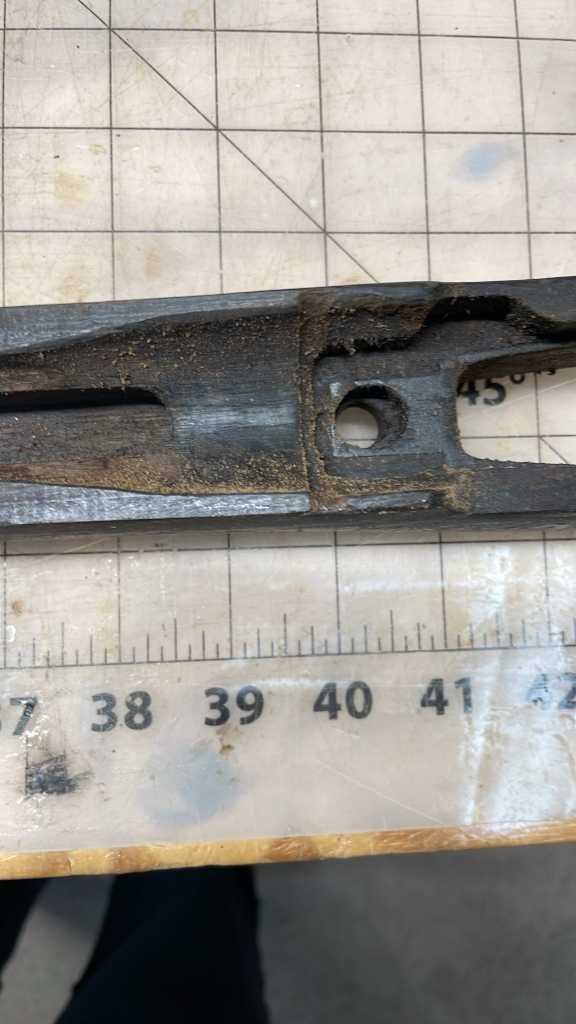
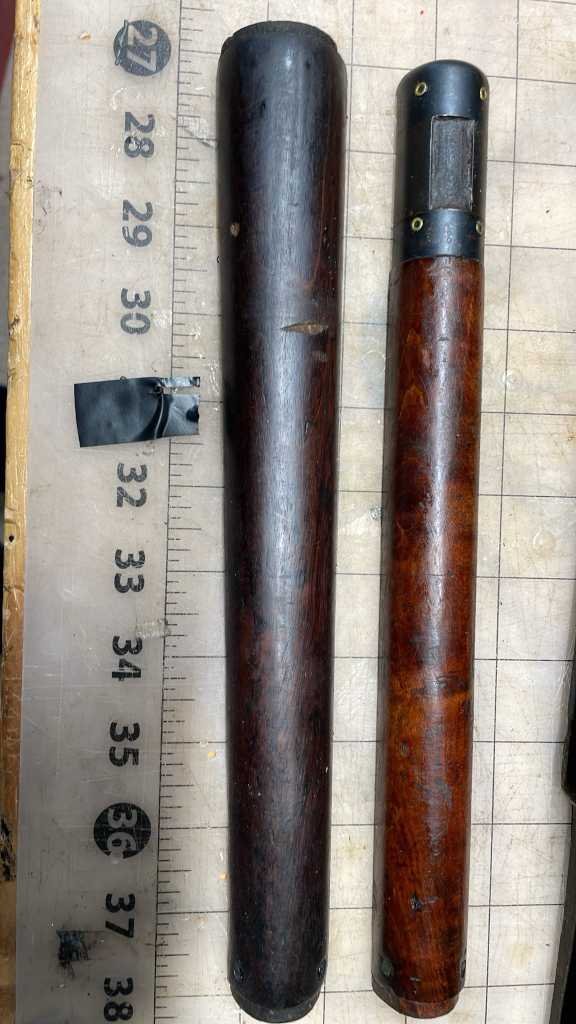
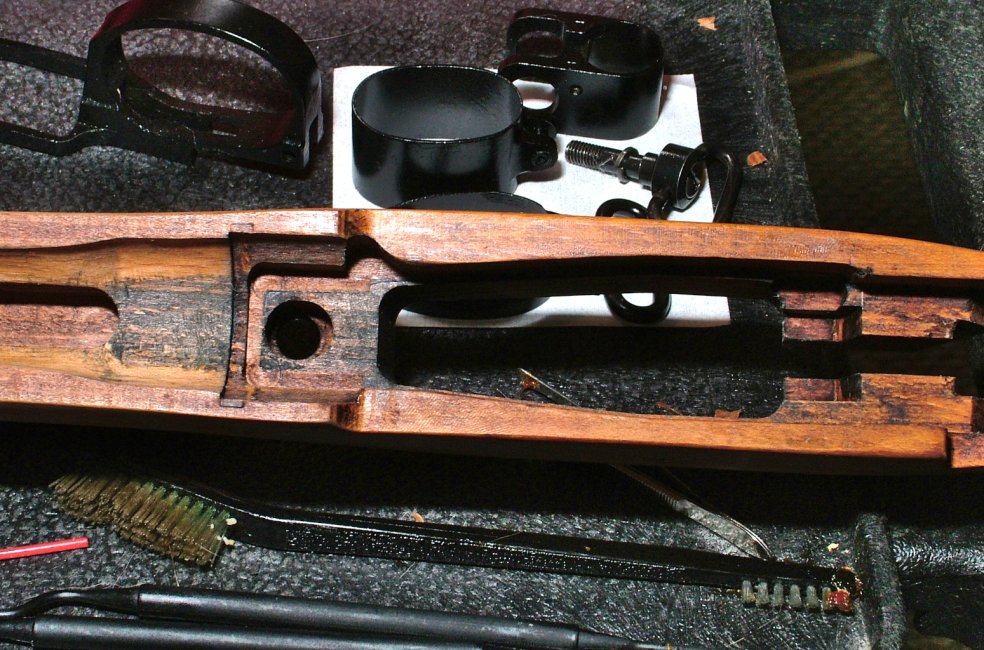
    Received the furniture. Wife was nice enough to send some pics to me while I'm gone....doesn't look rotten.
     

    Attachments

    • ResizedImage_2024-02-18_15-07-15_12.jpeg
      ResizedImage_2024-02-18_15-07-15_12.jpeg
      56.2 KB · Views: 27
    • ResizedImage_2024-02-18_15-07-15_10.jpeg
      ResizedImage_2024-02-18_15-07-15_10.jpeg
      42.6 KB · Views: 30
    • ResizedImage_2024-02-18_15-07-14_7.jpeg
      ResizedImage_2024-02-18_15-07-14_7.jpeg
      45.3 KB · Views: 29

    shootnfishndorf

    Active Member
    Mar 17, 2016
    346
    Waldorf
    Excited to get home and see what it takes to "clean" them up...
     

    Attachments

    • ResizedImage_2024-02-18_15-07-14_9.jpeg
      ResizedImage_2024-02-18_15-07-14_9.jpeg
      46.4 KB · Views: 17
    • ResizedImage_2024-02-18_15-07-15_11.jpeg
      ResizedImage_2024-02-18_15-07-15_11.jpeg
      59.5 KB · Views: 19

    Doco Overboard

    Ultimate Member
    BANNED!!!
    Looks good. Theirs a small round steel collar that goes in the main screw hole at the front of the magazine opening.
    Your going to have to transfer that from the old stock or pick one or more of those up. They're pretty common.
    You can see the imprint of the contact of the bedding on one of those stock pics. Notice that the out line of the action body is prominent and the bottom third of the barrel reinforce can be seen.
    Thats just what your after.
    The collar gets selected to make sure all the action bearings transfer just like what your seeing.
    When you place the fore end onto the barreled action, never pull down from the front to remove it.
    Drive it downwards from the rear to separate the two pieces other wise the sear lugs at the rear of the body will degrade the "draws".
    They are the most important feature of the stock set you displayed. They should look like this at the rear of the stock innards.The two black spots.
    Maybe you can get a similar picture to understand what sort of shape they're in but based on what you have so far I bet they're decent.
    You can use Purple Power spray cleaner to clean the wood off, which will make it gray, like weathered wood to some extent and then feed warmed BLO turpentine and some bees wax into the wood fibers and all the resulting stock oils and color will come right back into it immediately.
    No sandpaper, that's what ruins things if you want an authentic look.
    remember that fore stock should snap into place when the action is lowered into it and never pry downwards at the front to remove it.
    Tap it downwards at the rear, astride either side of the body just in front of the wrist socket.
    Stand the parts up on a trash-bag and hose them off with a bottle of Purple Power. All that crud will run right out of the wood like a river. Let dry and feed BLO into it.
    After a while of applying oil/wax you'll get a nice built up finish that looks authentic.
     

    Attachments

    • IMG_2324.jpg
      IMG_2324.jpg
      70.9 KB · Views: 20
    • IMG_1278.jpg
      IMG_1278.jpg
      68.3 KB · Views: 19

    shootnfishndorf

    Active Member
    Mar 17, 2016
    346
    Waldorf
    Looks good. Theirs a small round steel collar that goes in the main screw hole at the front of the magazine opening.
    Your going to have to transfer that from the old stock or pick one or more of those up. They're pretty common.
    You can see the imprint of the contact of the bedding on one of those stock pics. Notice that the out line of the action body is prominent and the bottom third of the barrel reinforce can be seen.
    Thats just what your after.
    The collar gets selected to make sure all the action bearings transfer just like what your seeing.
    When you place the fore end onto the barreled action, never pull down from the front to remove it.
    Drive it downwards from the rear to separate the two pieces other wise the sear lugs at the rear of the body will degrade the "draws".
    They are the most important feature of the stock set you displayed. They should look like this at the rear of the stock innards.The two black spots.
    Maybe you can get a similar picture to understand what sort of shape they're in but based on what you have so far I bet they're decent.
    You can use Purple Power spray cleaner to clean the wood off, which will make it gray, like weathered wood to some extent and then feed warmed BLO turpentine and some bees wax into the wood fibers and all the resulting stock oils and color will come right back into it immediately.
    No sandpaper, that's what ruins things if you want an authentic look.
    remember that fore stock should snap into place when the action is lowered into it and never pry downwards at the front to remove it.
    Tap it downwards at the rear, astride either side of the body just in front of the wrist socket.
    Stand the parts up on a trash-bag and hose them off with a bottle of Purple Power. All that crud will run right out of the wood like a river. Let dry and feed BLO into it.
    After a while of applying oil/wax you'll get a nice built up finish that looks authentic.
    Thank you so much for that. Just picked up the phone to start searching on cleaning and refinishing. Perfect timing. Ordered PP degreaser, BLO and bees wax. It will be home before I am...I will post some pics when I get to cleaning them. You guys have been a huge help...the prompt responses and information shared is amazing....
     
    Last edited:

    Doco Overboard

    Ultimate Member
    BANNED!!!
    Thank you so much for that. Just picked up the phone to start searching on cleaning and refinishing. Perfect timing. Ordered PP degreaser, BLO and bees wax. It will be home before I am...I will post some pics when I get to cleaning them. You guys have been a huge help...the prompt responses and information shared is amazing....
    That Purple Power specifically, works like a champ.
    Dont panic by the appearance when it dries. It'll look like barn wood from the desert or something until some oil gets reintroduced back into it.
    Cut the oil back with some turpentine initially to get penetration and then go straight oil for when the grain begins to fill up. Wax on top to get the last coats something to set up on.
    Use a fresh razor blade to scrape, not sand the exterior of the woods to clean them up a little if you choose. A razor pulled downwards will keep the surfaces flat and cut the fibers, not tear at them.
    It looks like they sent pretty much walnut stock parts so thats a + you'll have a nice rifle once you get everything sorted.
     

    BFMIN

    Ultimate Member
    Nov 5, 2010
    2,810
    Eastern shore
    It may just be a trick of the light but that "Main Screw Hole" has me concerned.
    It looks oval, not round?
    That would indicate the action had pounded the recoil shoulders & compressed them, allowing the entire action to have shifted rearwards.
    Other than that not too shabby at all.
    You're going to need to get & fit the "collar" too & length is critical as the entire basis for bedding the L-E action is a "fixed, limited crush" of the stock wood between the barrelled action & the Bottom Metal.
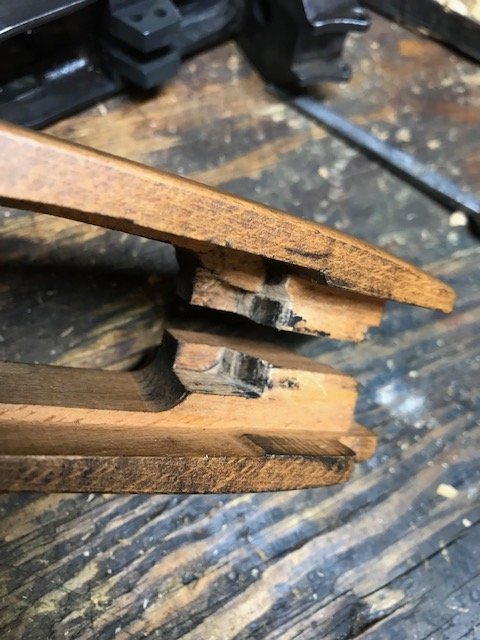
    For comparison this is my mint, unfired No4 Mk2 when I was initially unwrapping & prepping it for use. It probably had a total of 1 or 2 rounds , fired at the factory for function testing, at this point. Its not even Civilian Proofed by London or Birmingham Proof houses as was still military property & so exempt from "Blue Pill proof" testing, which is only required for civilian firearms in the U.K.
     

    Attachments

    • Lee Enfield main screw socket.JPG
      Lee Enfield main screw socket.JPG
      1.9 MB · Views: 17
    Last edited:

    TI-tick

    Ultimate Member
    BANNED!!!
    MDS Supporter
    It may just be a trick of the light but that "Main Screw Hole" has me concerned.
    It looks oval, not round?
    That would indicate the action had pounded the recoil shoulders & compressed them, allowing the entire action to have shifted rearwards.
    Other than that not too shabby at all.
    You're going to need to get & fit the "collar" too & length is critical as the entire basis for bedding the L-E action is a "fixed, limited crush" of the stock wood between the barrelled action & the Bottom Metal.
    Perhaps the OP should meet up with a pro to get a good result, vs shot in the dark? Or one of those live video things. Zoom or what have you.
     

    BFMIN

    Ultimate Member
    Nov 5, 2010
    2,810
    Eastern shore
    That's something I'd highly recommend.
    Its his rifle & he can do as he wishes. But to me common sense when you're setting of high pressure & temperature detonation close to your face caution is a good idea.
     

    shootnfishndorf

    Active Member
    Mar 17, 2016
    346
    Waldorf
    That's something I'd highly recommend.
    Its his rifle & he can do as he wishes. But to me common sense when you're setting of high pressure & temperature detonation close to your face caution is a good idea.
    If I get stumped, I will always ask for assistance. I've fired the rifle a handful of times...it it's stock configuration, and then after I replaced it with nylon.
     

    Growler215

    Ultimate Member
    Dec 30, 2020
    2,470
    SOMD
    I did something similar with 3 Chinese SKSs. Replaced the original (serialized) wood stocks and the (unserialized) wood handguards with Choate Monte Carlo stocks (drilled on front of forend to accommodate original cleaning rods) and matching handguards. No intention of ever switching back, but I kept the wood stocks/handguards in case some future heir wants to sell them.
     

    Users who are viewing this thread

    Latest posts

    Forum statistics

    Threads
    275,609
    Messages
    7,288,337
    Members
    33,487
    Latest member
    Mikeymike88

    Latest threads

    Top Bottom