Little bit of building the next 1911

The #1 community for Gun Owners of the Northeast

Member Benefits:

  • No ad networks!
  • Discuss all aspects of firearm ownership
  • Discuss anti-gun legislation
  • Buy, sell, and trade in the classified section
  • Chat with Local gun shops, ranges, trainers & other businesses
  • Discover free outdoor shooting areas
  • View up to date on firearm-related events
  • Share photos & video with other members
  • ...and so much more!
  • Magnumite

    Ultimate Member
    Dec 17, 2007
    6,586
    Harford County, Maryland
    Poking the fire a little bit.

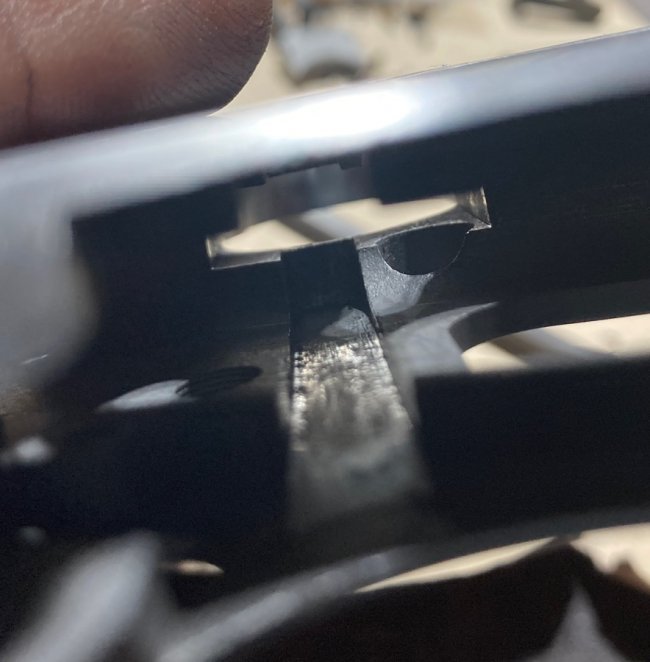
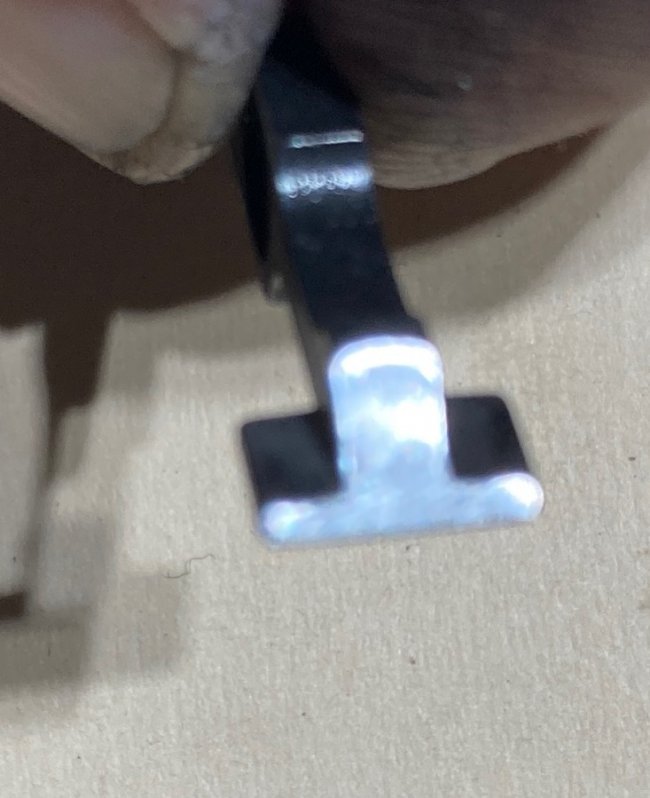
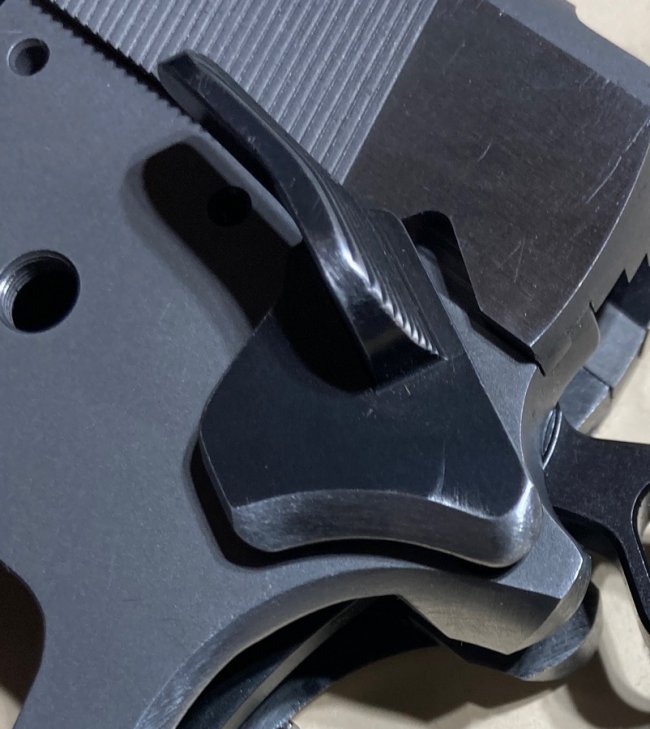
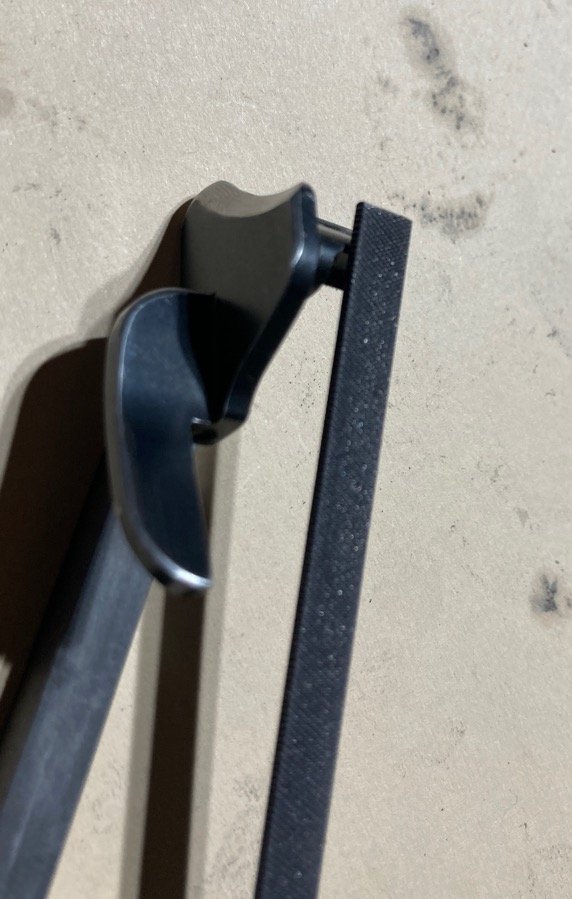
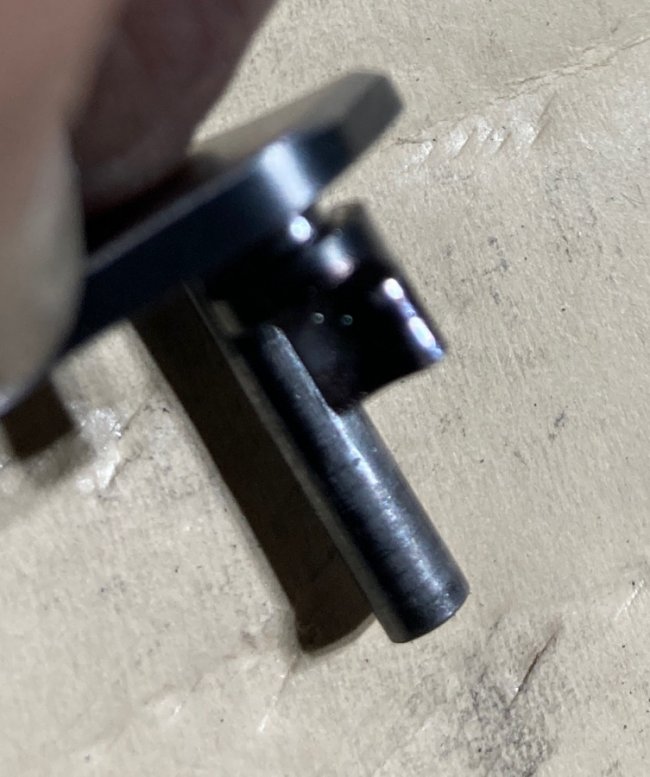
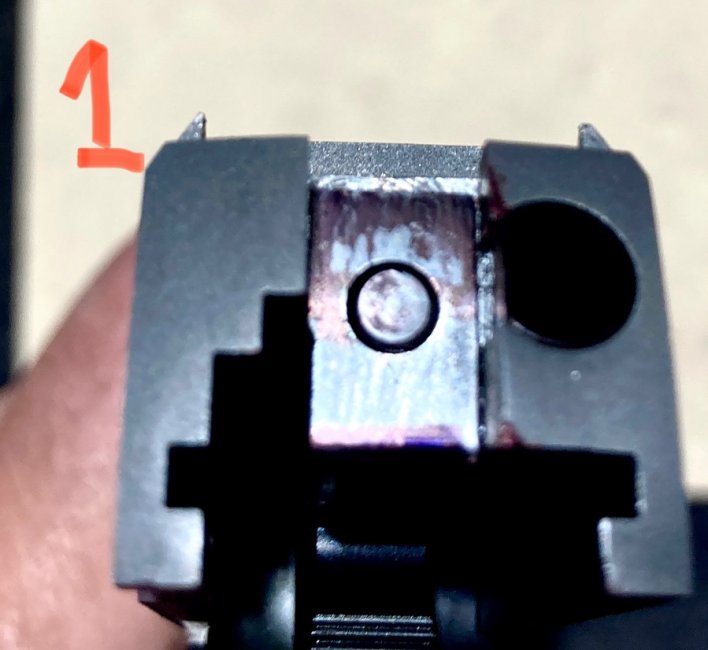
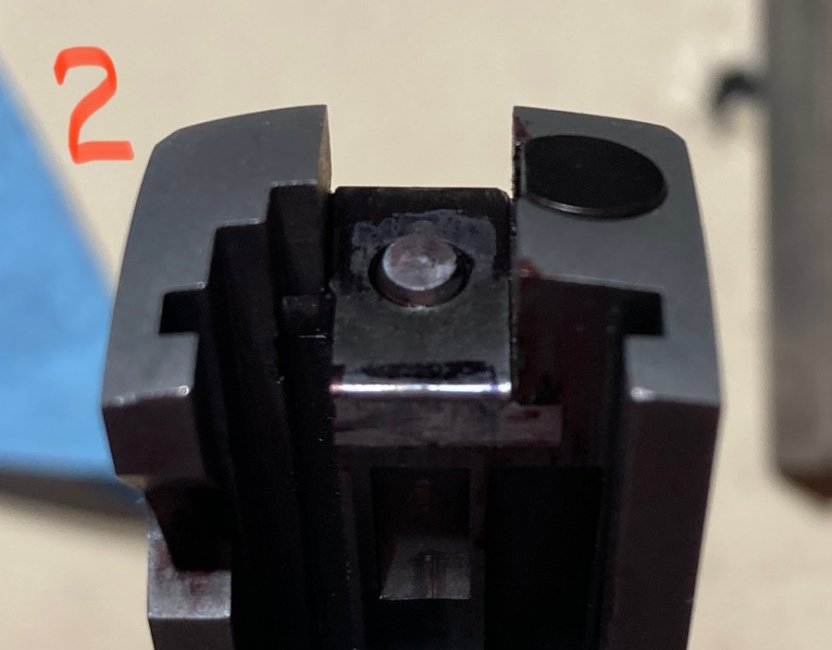
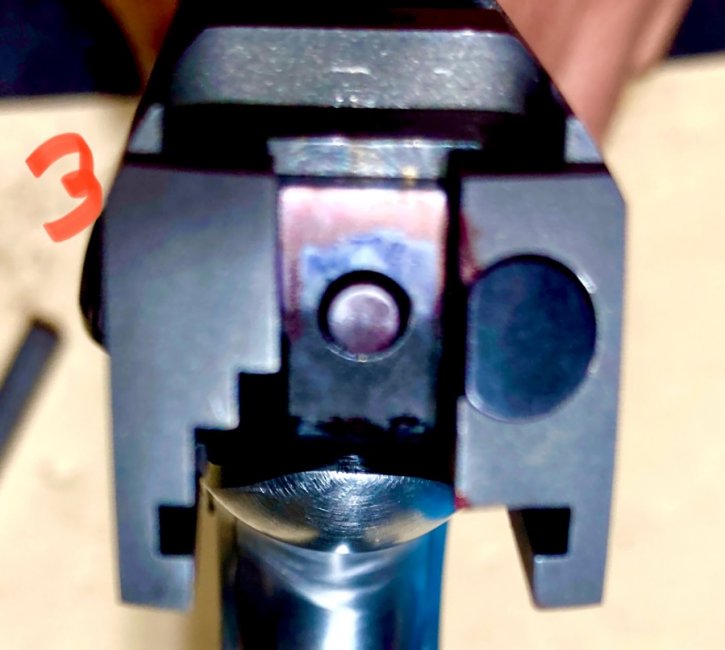
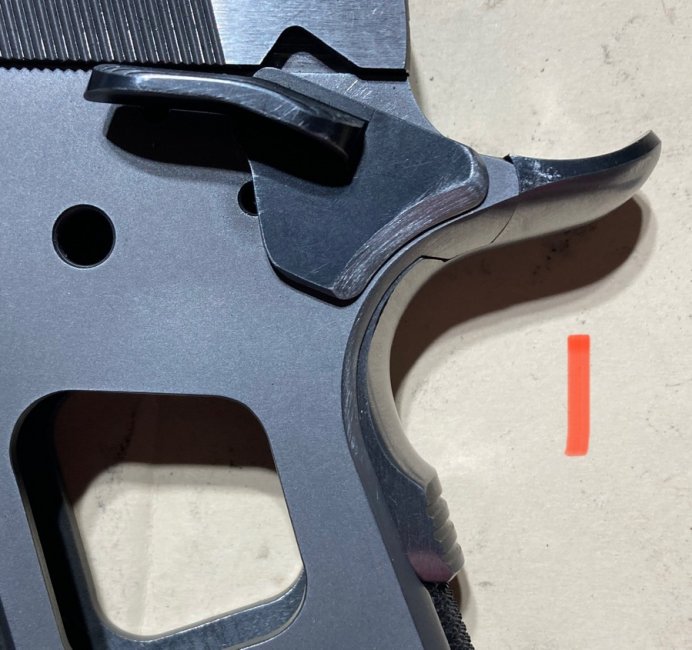
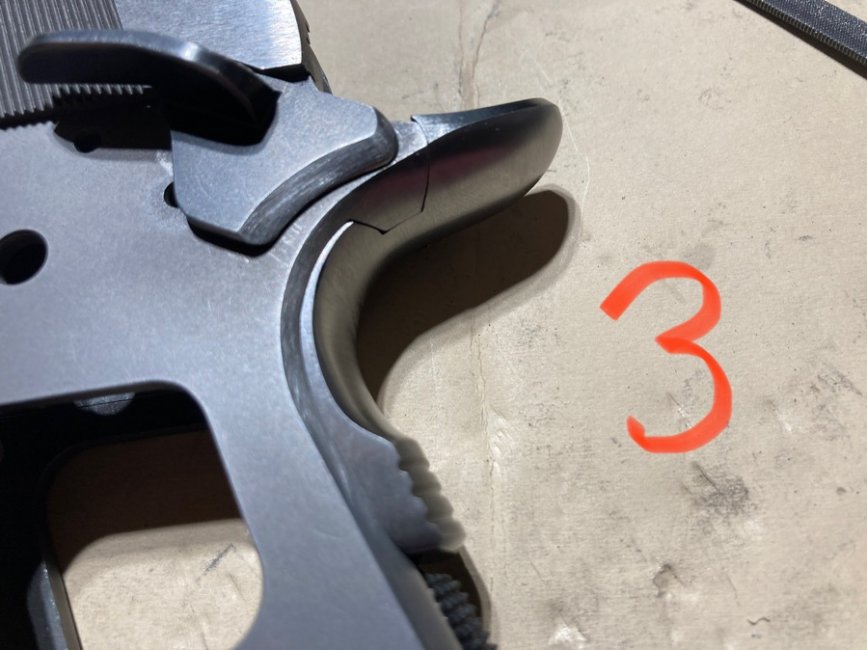
    Fitted an EGW flat bottom firing pin stop precut for BoMar rear sights. All upper corners and edges were beveled and smoothed to facilitate install with tighter fitting. All vertical corners relieved and smoothed.

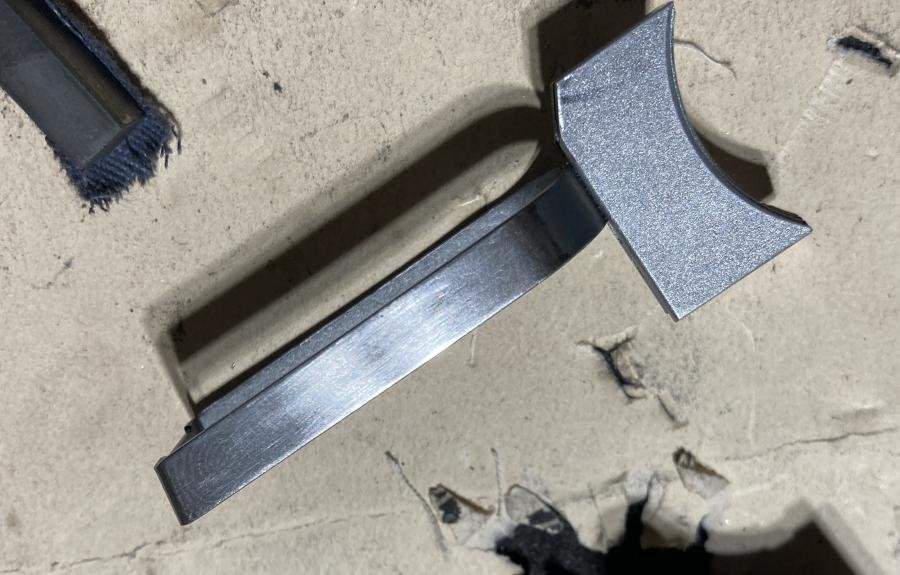
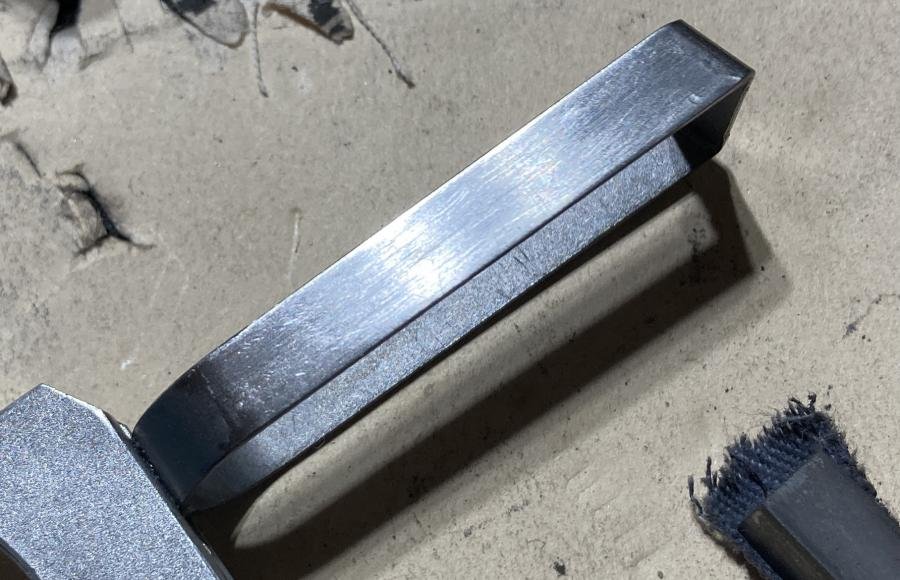
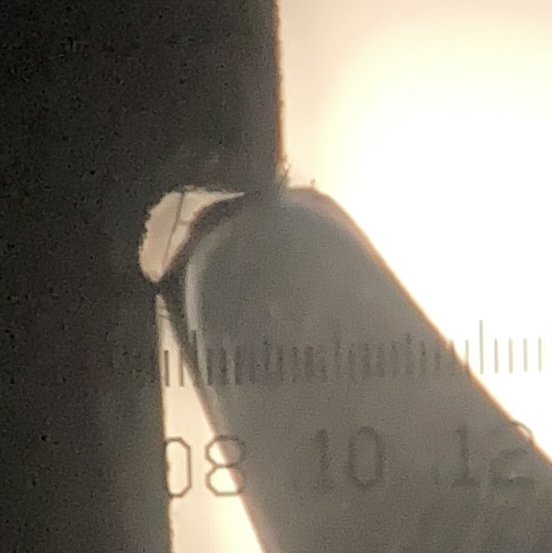
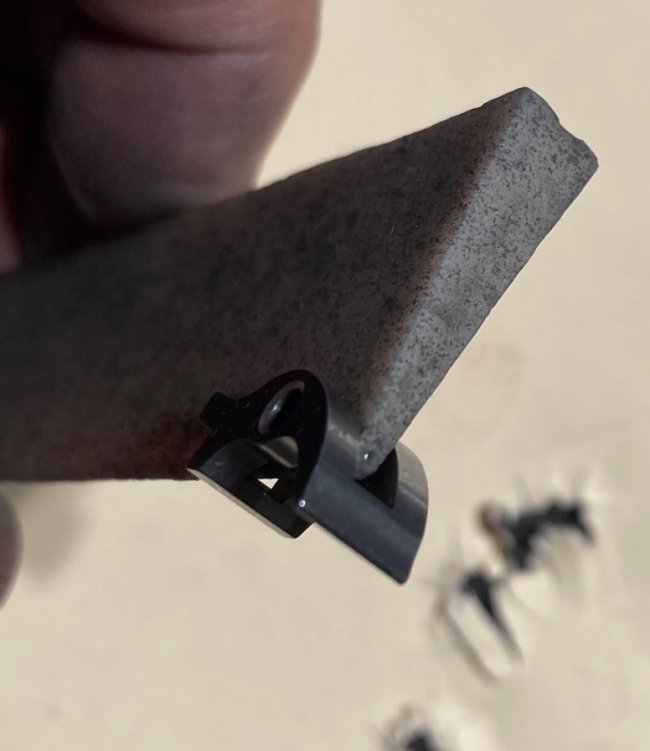
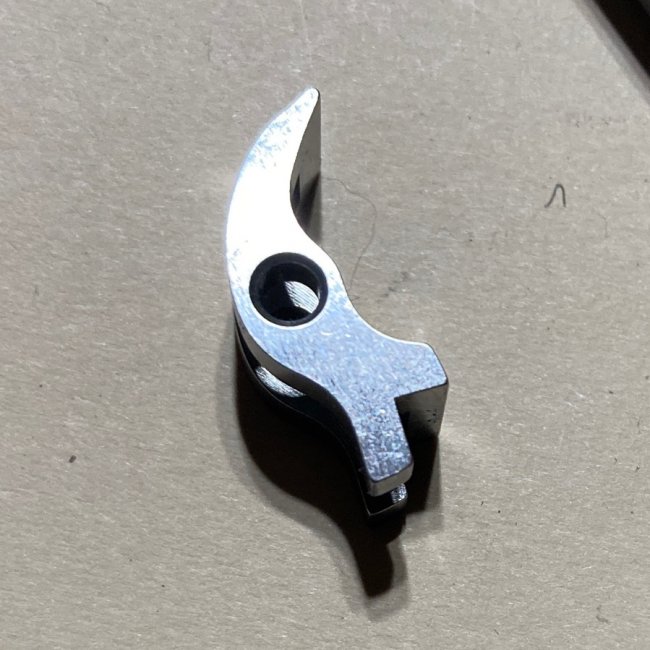
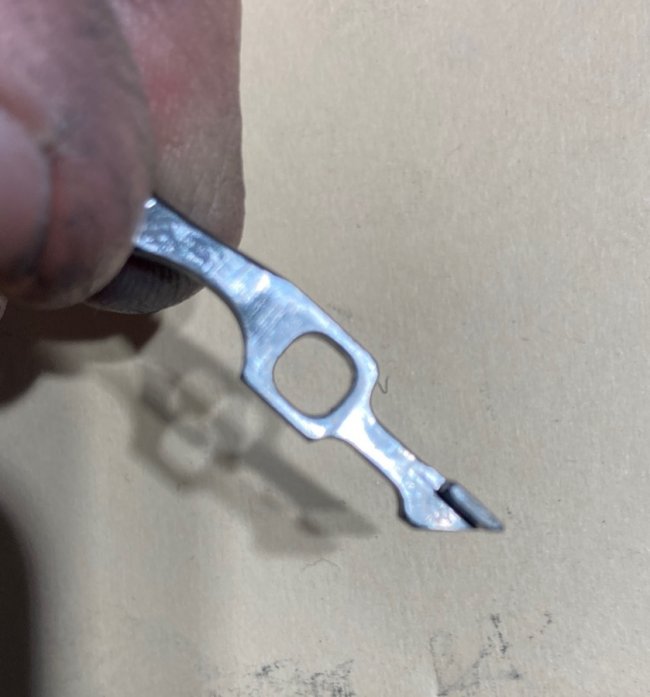
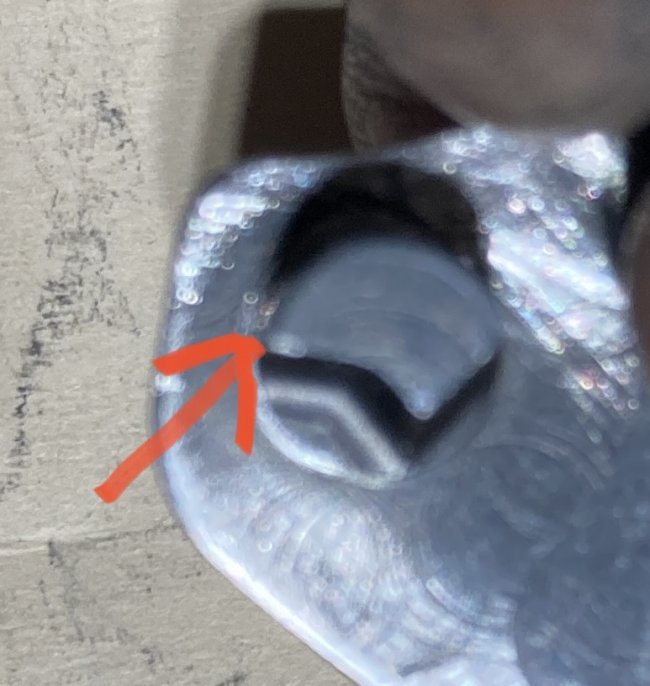
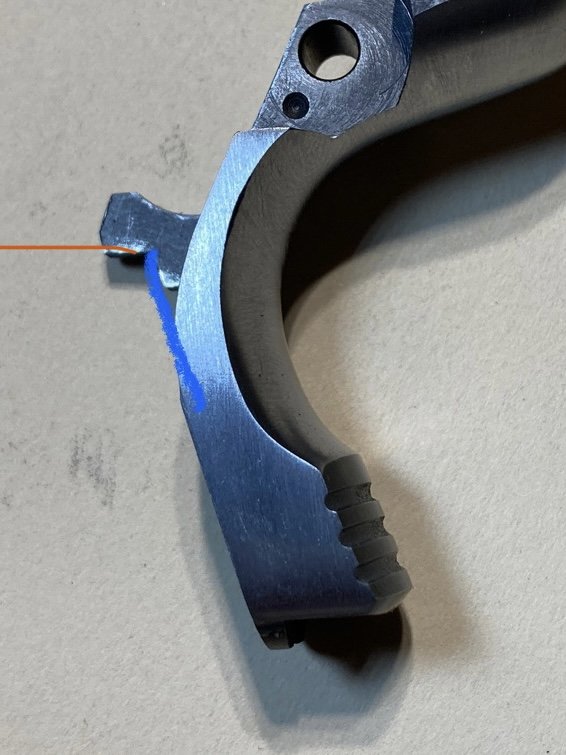
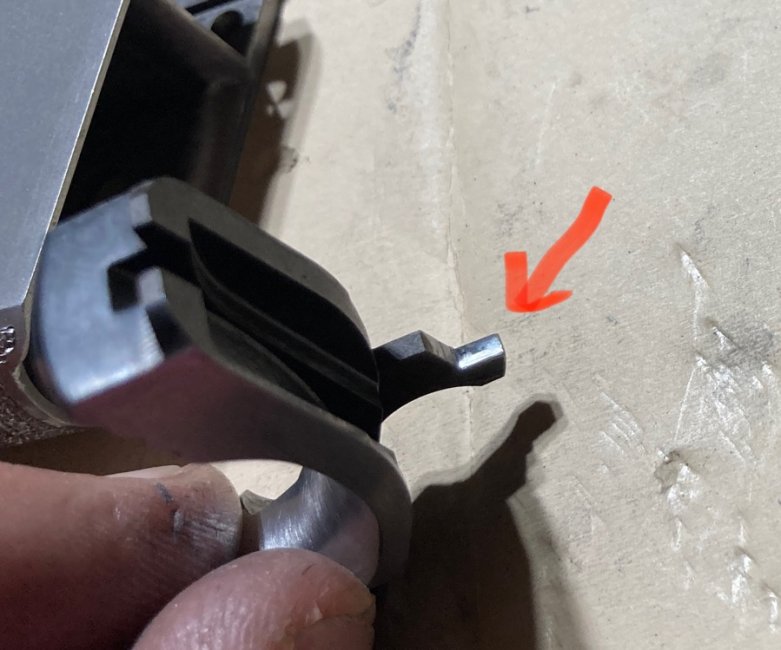
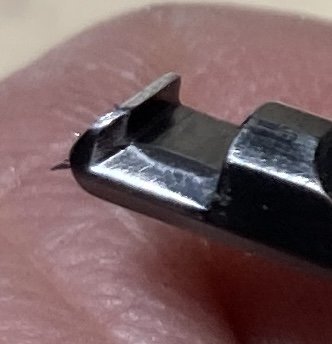
    Extractor tip tuned, before and after pics.

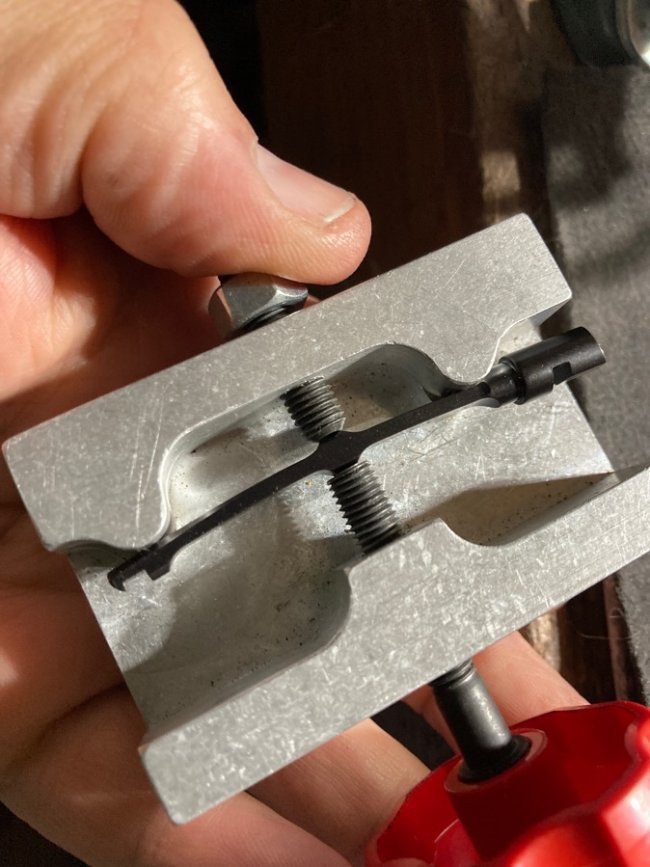
    Adjust extractor tension. With tension applied to the extractor I rap the back of the adjuster to set the tension. This is akin to hitting the vise when laterally tightening the slide rails
     

    Attachments

    • 48995394-2DFA-4940-92B0-BF4D44D4CAA4.jpeg
      48995394-2DFA-4940-92B0-BF4D44D4CAA4.jpeg
      95.2 KB · Views: 127
    • 80D06146-921B-41EB-87CB-10614016C20D.jpeg
      80D06146-921B-41EB-87CB-10614016C20D.jpeg
      77.7 KB · Views: 129
    • EC1919AA-B6F7-42E9-9DDC-29AE9F70AF3A.jpeg
      EC1919AA-B6F7-42E9-9DDC-29AE9F70AF3A.jpeg
      14.2 KB · Views: 124
    • D3757D40-050B-412F-A663-A3E9D2F4D4B3.jpeg
      D3757D40-050B-412F-A663-A3E9D2F4D4B3.jpeg
      13.9 KB · Views: 122
    • BBBA145E-4CAA-4A84-9C3A-ECD895FBB7F9.jpeg
      BBBA145E-4CAA-4A84-9C3A-ECD895FBB7F9.jpeg
      90.2 KB · Views: 125
    • 56678D47-7E6C-4664-B8E7-4C69A3841181.jpeg
      56678D47-7E6C-4664-B8E7-4C69A3841181.jpeg
      62 KB · Views: 125

    Magnumite

    Ultimate Member
    Dec 17, 2007
    6,586
    Harford County, Maryland
    LOL…they my favorites, too. The first 1911 I built has BoMars with the .110” front andrear sight post/notch widths respectively. That slide was cut by none other than Al Marvel…way back.
     
    Last edited:

    Rockzilla

    Ultimate Member
    Feb 6, 2010
    4,563
    55.751244 / 37.618423
    Marvel the master.
    Have full rib BoMars on several 1911" s, Bar-Sto barrels
    Ones a pin gun.. Hooked on their sights.. like your builds
    1911 builds are up there with the HK's and others. All it takes
    Is time and patience.

    I know you've heard this over and over.

    Great work, keep on pounding ;);) I'll send you some of my frames:D

    -Rock
     

    Magnumite

    Ultimate Member
    Dec 17, 2007
    6,586
    Harford County, Maryland
    Frames…Yes! Frames!
    Al Marvel was a master…for sure. He didn’t believe in unnecessary ‘fluff’.

    A little more to add…
    Smoothed out the trigger track in the frame using a Brownells ceramic trigger track stone. All the ‘gravel’ doesn’t need to be stoned out, just smoothed. Before and after pics and the stone ‘in action’. Pics of the stone in the trigger shoe cutout…top, bottom, and both sides.
     

    Attachments

    • 7C203844-BF7B-4823-96B8-2E9D03A54208.jpeg
      7C203844-BF7B-4823-96B8-2E9D03A54208.jpeg
      64.1 KB · Views: 91
    • 96562FDA-FD29-46BA-95D2-F307996B1202.jpeg
      96562FDA-FD29-46BA-95D2-F307996B1202.jpeg
      111.3 KB · Views: 88
    • 8D4EB0EA-19AD-44BB-A61F-475DB5913814.jpeg
      8D4EB0EA-19AD-44BB-A61F-475DB5913814.jpeg
      80.6 KB · Views: 89
    • 35479E3F-12B6-44D3-9C6A-86160B010C69.jpeg
      35479E3F-12B6-44D3-9C6A-86160B010C69.jpeg
      75 KB · Views: 91

    Magnumite

    Ultimate Member
    Dec 17, 2007
    6,586
    Harford County, Maryland
    A little trigger time…

    Beveled the corners of the shoe to prepare for fitting.
    Pic with arrows shows right side section (red arrow) with the corner broken, left side (green arrow) with corner as produced.
    Smoothing and polishing the inside corners along the bow with round Arkansas stone.
    Polishing the back of the bow where disconnector rides and reciprocates.
    Outer sides and curves polished but not shown.
    The back and sides of the bow were polished with a dremel polishing pad with white polishing compound. I’ll get some pics.
     

    Attachments

    • A78437B7-BB17-4680-81D0-8A97095CFE49.jpeg
      A78437B7-BB17-4680-81D0-8A97095CFE49.jpeg
      79.8 KB · Views: 88
    • BB52FB85-26A4-4213-809D-31613A9CB28F.jpeg
      BB52FB85-26A4-4213-809D-31613A9CB28F.jpeg
      89.5 KB · Views: 87
    • D6F98291-7760-42FB-9EF0-5650C1CD5EEE.jpeg
      D6F98291-7760-42FB-9EF0-5650C1CD5EEE.jpeg
      56.8 KB · Views: 87
    • 72D29354-EA3D-4367-A163-BEAD6F851FFA.jpeg
      72D29354-EA3D-4367-A163-BEAD6F851FFA.jpeg
      62.2 KB · Views: 85
    • C689BA85-8B8B-497F-B21A-C9020E139D69.jpeg
      C689BA85-8B8B-497F-B21A-C9020E139D69.jpeg
      47.3 KB · Views: 89
    • 6FD0DAAB-E532-4051-9A41-D5DF8C4E49A6.jpeg
      6FD0DAAB-E532-4051-9A41-D5DF8C4E49A6.jpeg
      10.4 KB · Views: 86
    Last edited:

    Magnumite

    Ultimate Member
    Dec 17, 2007
    6,586
    Harford County, Maryland
    The box has lots of small parts bags in it. As each part is fitted for function and external blending/configuration it is put in its own bag when removed to prevent damaging dings with other removed parts.
     

    Magnumite

    Ultimate Member
    Dec 17, 2007
    6,586
    Harford County, Maryland
    For those unsure of the true radius concept. Typically, sear faces are cut straight. The hammer hook corner is square. A secondary ‘release’ is cut to clear the corner and ensure a good creep free pull when all else is done well. This set up is seen in the pic with labels “H” (hammer) and “S” (sear) of this post. The negative sear angle is a little too much. It was safe but created a 2-stage type pull so was reduced to half that seen.

    The second pic has a rounded sear nose (true radius). This radius is on an arc whose radius is from the sear pin to the hammer nose. This appears to be more of a hybrid application of the true radius concept. But just checking on the comparator…it works.

    Additionally, a more ‘recent’ modification I have seen is in the corner of the hammer hook notch. A rounded relief is machined into the corner, “cleaning up” any issue from the hook corner. Extreme Engineering uses this and I even saw it on my Tisas US Gov’t hammer. I like this configuration.
     

    Attachments

    • E8A89D71-C3D4-4082-9F59-FBE9E13E7CE7.jpeg
      E8A89D71-C3D4-4082-9F59-FBE9E13E7CE7.jpeg
      24.3 KB · Views: 119
    • 20DC3BB5-2BF4-4ADD-A7C8-902E3522EC5D.jpeg
      20DC3BB5-2BF4-4ADD-A7C8-902E3522EC5D.jpeg
      90.6 KB · Views: 117
    • EC6DB904-2B49-4BE6-B4CF-089E05C8254D.jpeg
      EC6DB904-2B49-4BE6-B4CF-089E05C8254D.jpeg
      14.3 KB · Views: 119

    Magnumite

    Ultimate Member
    Dec 17, 2007
    6,586
    Harford County, Maryland
    Trigger fitting…I got a very good fit. Difference between a 10 minute fitting and a fit over an hour is in preparation and “sneaking up” on the the final fitting stroke.

    No need to get rid of all the ‘gravel’ in the trigger tracks. Just smooth out and even the texture. I was sure to keep the stone parallel to the bow track and shoe cut out in the frame. I put pressire on the ledges and corners to avoid those gremlins causing a dragging, creepy trigger.

    Before and after pics of the trigger track.
     

    Attachments

    • 074259F7-6948-4B5C-B457-25086391EABE.jpeg
      074259F7-6948-4B5C-B457-25086391EABE.jpeg
      79.8 KB · Views: 105
    • DAAD9F06-5C41-45F3-8436-1BC678E50E12.jpg
      DAAD9F06-5C41-45F3-8436-1BC678E50E12.jpg
      39.5 KB · Views: 110
    • 2CDEDCE0-D0CE-40E6-AEC6-A5FE8DF30FAB.jpg
      2CDEDCE0-D0CE-40E6-AEC6-A5FE8DF30FAB.jpg
      43.1 KB · Views: 108
    • DA0C8C2A-8A0A-4800-A0B0-885E60D19F20.jpg
      DA0C8C2A-8A0A-4800-A0B0-885E60D19F20.jpg
      75.4 KB · Views: 103
    • D2EEF696-3E37-4831-B551-DA1D2ECF2350.jpg
      D2EEF696-3E37-4831-B551-DA1D2ECF2350.jpg
      81.4 KB · Views: 102
    • A0F9E9FA-F937-4B6F-B979-B904A979A79F.jpeg
      A0F9E9FA-F937-4B6F-B979-B904A979A79F.jpeg
      25.6 KB · Views: 115
    • 16ACE23C-65BA-40AD-96D2-420C405D4687.jpeg
      16ACE23C-65BA-40AD-96D2-420C405D4687.jpeg
      89.5 KB · Views: 109
    • 1AEE251A-4A8D-4100-A174-DBF86653E9FB.jpeg
      1AEE251A-4A8D-4100-A174-DBF86653E9FB.jpeg
      64.1 KB · Views: 108
    • 49735029-8507-441D-8B17-4634BDF607FF.jpeg
      49735029-8507-441D-8B17-4634BDF607FF.jpeg
      80.6 KB · Views: 106
    • 3A11CB22-64CB-47F5-8E59-5685042A06DD.jpeg
      3A11CB22-64CB-47F5-8E59-5685042A06DD.jpeg
      75 KB · Views: 111

    Magnumite

    Ultimate Member
    Dec 17, 2007
    6,586
    Harford County, Maryland
    Tuning the trigger. Ended with a very crisp, fast pull set at 3.2 pounds with hammer behaving on a slide drop with a 17 pound recoil spring. This trigger could easily go sub 2 pounds without an issue.
     

    Attachments

    • 9242CEF8-9D71-47CD-BAC1-97294C041711.jpeg
      9242CEF8-9D71-47CD-BAC1-97294C041711.jpeg
      94.8 KB · Views: 101
    • D0E408ED-19C5-448C-9BF3-4196C3B95EE5.jpeg
      D0E408ED-19C5-448C-9BF3-4196C3B95EE5.jpeg
      29.4 KB · Views: 104
    • 7B44F5B0-1382-4067-9638-A8255846DEEE.jpeg
      7B44F5B0-1382-4067-9638-A8255846DEEE.jpeg
      21 KB · Views: 103

    Magnumite

    Ultimate Member
    Dec 17, 2007
    6,586
    Harford County, Maryland
    Other steps on the trigger. This sear is a very good sear so many of these steps were minimal.
    The disconnector got its attention.
    Here is what I do..
    - Deburring and smoothing machined edges. Knife edge stone is used inside the sear cut out. Tilt it in opposite directs to smooth and deburr the sear’s cut out. Use honing or other nonadditive enriched mineral oil;
    -Smoothing the sides of the sear;
    -Smoothing the disconnector sliding points of contact;
    -Rounding the knife edge at bottom of disconnector;
    -Beveling corners which rub;
    -Touching up bottom of disconnector window to eliminate drag on sear pin;
    -Careful smoothing of disconnector head. Add relief on front of disconnector head to improve pull;
    Dressing sear and hammer pins. Not much, just a couple light stroke as it spins.
     

    Attachments

    • ACC46233-EC6A-4004-93B6-2FED2E123A27.jpeg
      ACC46233-EC6A-4004-93B6-2FED2E123A27.jpeg
      48.2 KB · Views: 97
    • 7FADA0E3-D27B-47D6-A341-DCAA76F3F2FD.jpeg
      7FADA0E3-D27B-47D6-A341-DCAA76F3F2FD.jpeg
      120 KB · Views: 101
    • B302651D-F329-47BE-9768-B3DE1E0E5879.jpeg
      B302651D-F329-47BE-9768-B3DE1E0E5879.jpeg
      97 KB · Views: 101
    • 19B7D8A2-85F5-42AC-8D9D-F5E25D351600.jpeg
      19B7D8A2-85F5-42AC-8D9D-F5E25D351600.jpeg
      71.3 KB · Views: 100
    • 6B0D4E9B-9C2A-4699-82CC-A02AAE2157D2.jpeg
      6B0D4E9B-9C2A-4699-82CC-A02AAE2157D2.jpeg
      68.7 KB · Views: 101
    • B6F82DB7-51EC-4A15-9362-BFE5B4615BEB.jpeg
      B6F82DB7-51EC-4A15-9362-BFE5B4615BEB.jpeg
      68.7 KB · Views: 99
    • DC722EEC-96DF-45CA-B616-DB8C4B3823B0.jpeg
      DC722EEC-96DF-45CA-B616-DB8C4B3823B0.jpeg
      65 KB · Views: 97
    • 9977338B-E45E-4BF2-8403-997FBE70740E.jpeg
      9977338B-E45E-4BF2-8403-997FBE70740E.jpeg
      48.3 KB · Views: 104
    • 89D642AC-54BE-4CE9-8C69-1CD47B70B4C9.jpeg
      89D642AC-54BE-4CE9-8C69-1CD47B70B4C9.jpeg
      97.5 KB · Views: 98
    • 82677DD5-9C8B-4598-B6FE-AB80B6B3D628.jpeg
      82677DD5-9C8B-4598-B6FE-AB80B6B3D628.jpeg
      44.7 KB · Views: 97

    Magnumite

    Ultimate Member
    Dec 17, 2007
    6,586
    Harford County, Maryland
    Fitting the thumb safety blocking stud.

    This is a blued safety so I just tried to install it and rubbed it against the sear.

    Then I removed it and looked for where the blue rubbed away. The pic is blurry, dang cell phone, but you can see the bright spot on the blocking stud at the arrow.

    Then I filed as pictured. Just a couple strokes being careful to keep the filed area parallel with the other parts of the stud.

    The scribed pic is approximate angle of dressing the blocking surface down. Some use a jig for this. I use the mark and swipe method.

    Here it is after several mark, rub and file events.

    Slow going, getting close. Notice the gap between top of ts and slide ts notch. Only use the amount of pressure to raise the thumb safety as you would when putting the pistol on safe.

    Pert near done. A file stroke and chase it with a stone a couple/few times (as rea’d) until the ts just goes to the top of the slide’s ts notch.
     

    Attachments

    • B81FFF39-1091-4D6C-B8D6-9018321EAA60.jpeg
      B81FFF39-1091-4D6C-B8D6-9018321EAA60.jpeg
      92.8 KB · Views: 94
    • 5845F3E2-35CE-435A-B35C-5A235DD5DFA5.jpeg
      5845F3E2-35CE-435A-B35C-5A235DD5DFA5.jpeg
      75.1 KB · Views: 90
    • ED30CDB9-1E24-48D0-AB7A-092F14C05391.jpeg
      ED30CDB9-1E24-48D0-AB7A-092F14C05391.jpeg
      65.7 KB · Views: 90
    • 5C92EE0C-7BE4-497B-92E2-B113AF5DFD92.jpeg
      5C92EE0C-7BE4-497B-92E2-B113AF5DFD92.jpeg
      26 KB · Views: 84
    • 9E43E48D-B58B-49CB-86DC-E17F35F6CF34.jpeg
      9E43E48D-B58B-49CB-86DC-E17F35F6CF34.jpeg
      83 KB · Views: 93
    • 265E1E46-8800-4CAB-B81E-E4C7C2715A25.jpeg
      265E1E46-8800-4CAB-B81E-E4C7C2715A25.jpeg
      95.5 KB · Views: 92
    • 0C317339-1C46-4400-BEC8-0575B9E6C17B.jpeg
      0C317339-1C46-4400-BEC8-0575B9E6C17B.jpeg
      107.4 KB · Views: 88
    • 3D5099EE-5BC1-4FC1-A95C-FB951B5BA3FC.jpeg
      3D5099EE-5BC1-4FC1-A95C-FB951B5BA3FC.jpeg
      88.2 KB · Views: 89

    Magnumite

    Ultimate Member
    Dec 17, 2007
    6,586
    Harford County, Maryland
    Drama time in 1911 land.

    Now for the drama. Long story short - I found out the rear of the firing pin bore was drilled approximately 0.070” low. After cussing a moment or two I checked the primer strike. It hits center on a good AZoom snap cap. Whew…. So not wanting to take a new part to compromised configuration, I decided to modify the firing pin stop until I make one.

    I acquired this Baer slide with a Baer frame and Kart barrel in 2016 or 2017 not sure which year. They were acquired from a smith in the midwest in a Gunbroker auction..new parts. Yarrite. Getting the 3 components revealed filing and not done well. Emails, phone calls yielded no response. I left a very negative feedback.

    Anyway, I looked them over carefully, but some of the visual cues were not yet burned in my mind. So the set went into the safe. Using a Remington 1911 100th Anniversary slide I found out I got a good fit with the frame and barrel. I wrote that pistol (Baer-emington thread) up on this site. That pistol worked out very well and is one of my favorites. That was early in 2018. The Baer slide stayed in the safe.

    That brings us to the Baer slide in March 2022 (now). Well I learned one of those visual cues.

    So a couple pics of taking my nicely fitted slide stop, ‘dropping it’ the required amount. I had to raise the ejector relief and file up the bottom. I slightly radiused the bottom of the slide stop. Since I was making metal dust, I relieved the top of the firing stop with a forward angle. This puts the initial thrust lower on the hammer during recoil. This dissipates more recoil energy into the hammer spring before the flat bottom of this firing pin stop has effect. All this energy redirection reduces slide velocity and resultant momentum slap against the frame.

    Pic 1 is finished forward relief with one hammer strike.
    Pic 2 is one slide cycle on bottom minimal radius.
    Pic 3 is forward relief with 4 hammer strikes.
     

    Attachments

    • DBCDF3C5-08E2-407A-9187-B03827CE8D08.jpeg
      DBCDF3C5-08E2-407A-9187-B03827CE8D08.jpeg
      69.1 KB · Views: 84
    • 9D588F0A-2B66-4E6F-A31D-2CD62DB85526.jpeg
      9D588F0A-2B66-4E6F-A31D-2CD62DB85526.jpeg
      49.7 KB · Views: 84
    • D9550509-955A-445C-9F84-3810AA856378.jpeg
      D9550509-955A-445C-9F84-3810AA856378.jpeg
      68.5 KB · Views: 80

    Magnumite

    Ultimate Member
    Dec 17, 2007
    6,586
    Harford County, Maryland
    Well…adjusted the grip safety disengage depth. There is a pic with a red and blue line which coincide two surfaces on the grip safety blocking arm. The surface the red line coincides is the grip safety disengagement surface. The surface coincided by the blue line prevents excessive trigger overtravel, thus preventing the hammer following the slide during cycling.

    This post will involve the surface coinciding with the red line. You will see it (during fitting) in the pic with the arrow. As the surface is filed, the amount of grip safety movement required to deactivate the safety is lessened. This is referred to as making deactivation more shallow. Especially important for those who ride the thumb safety.

    The desired mainspring housing needs to be installed. This determines the full safe (rear outward) position of the grip safety. Typically, deactivation occurs in the first 1/3 to 1/2 of the grip safety’s entire travel. Some like a little less, but may over adjust and render the grip safety ineffective.

    I removed everything from the frame and used only the fitted trigger, grip safety, thumb safety and mainspring housing. The pic with the green lettering “released” is the grip safety pulled back in the full safe position.

    Pic ‘1’ is when I filed enough for the trigger to move rearward. This is how many Springfield 1911’s have been coming out lately. The fit is so deep some comment the Springer triggers are excessively heavy and super gritty. It is actually the trigger bow dragging on the grip safety blocking arm. Must be the new help at Springfield.

    Pics 2 - 4 show how the disengagement point moves backward. The mark, fit and file trials went far beyond 4 times, especially when creeping up on the depth of didengagement you are looking for.

    Just before to the point I am looking for, I start correcting any lateral canting. Then make sure the blocking arm filed surface is parallel to trigger movement. Even very slightly higher at the front. Both of these conditions will allow the trigger return if the grip safety is released before the trigger. It happens. If the front of the adjustment surface is lower than the rear, the trigger can be held back.

    When I am finally ‘there’ I finish with a really smooth file, and a smooth paper then a ceramic polishing stone. I keep the sides of the arm deburred during fitting so there is no interference with fitting.
     

    Attachments

    • 1F214D24-C376-420B-B913-EDF3B367FCA1.jpeg
      1F214D24-C376-420B-B913-EDF3B367FCA1.jpeg
      55.9 KB · Views: 66
    • C08F6F50-1166-4704-B5DE-BA41E9EA2A06.jpeg
      C08F6F50-1166-4704-B5DE-BA41E9EA2A06.jpeg
      85.2 KB · Views: 68
    • E8B3E237-0CFE-4708-95E0-5C20EB08EB1D.jpeg
      E8B3E237-0CFE-4708-95E0-5C20EB08EB1D.jpeg
      89.4 KB · Views: 67
    • 56179254-1126-4C20-BC95-57817225835A.jpeg
      56179254-1126-4C20-BC95-57817225835A.jpeg
      119.9 KB · Views: 70
    • 09AE3410-19AE-4F9C-B3F9-3534CB102804.jpeg
      09AE3410-19AE-4F9C-B3F9-3534CB102804.jpeg
      78.8 KB · Views: 64
    • 277CF76F-3269-4035-81E2-9364AC848F22.jpeg
      277CF76F-3269-4035-81E2-9364AC848F22.jpeg
      83.4 KB · Views: 67
    • 0B2EEF70-3124-49FD-90E4-8A6767CFF069.jpeg
      0B2EEF70-3124-49FD-90E4-8A6767CFF069.jpeg
      82.3 KB · Views: 67

    Users who are viewing this thread

    Forum statistics

    Threads
    275,630
    Messages
    7,289,104
    Members
    33,489
    Latest member
    Nelsonbencasey

    Latest threads

    Top Bottom