Magnumite
Ultimate Member
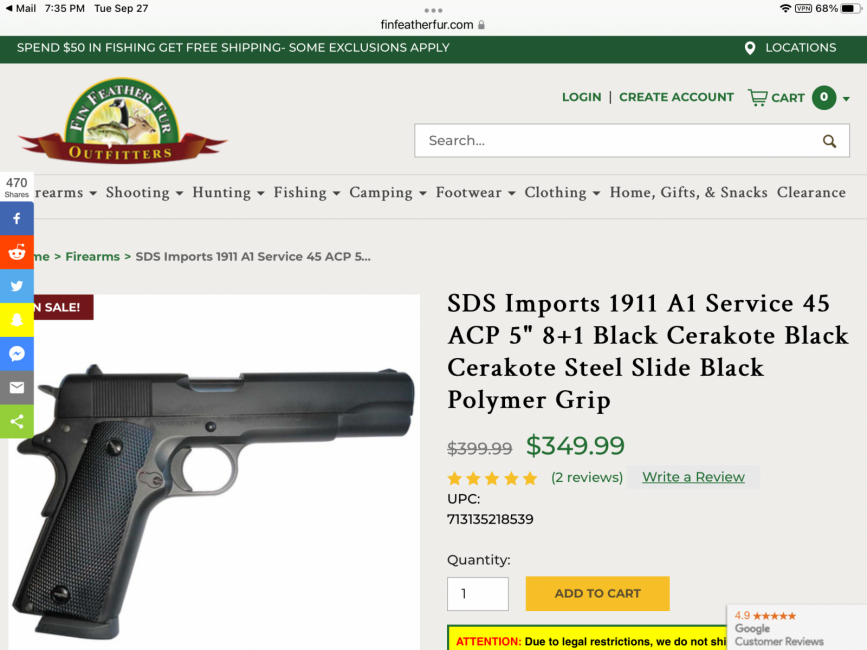
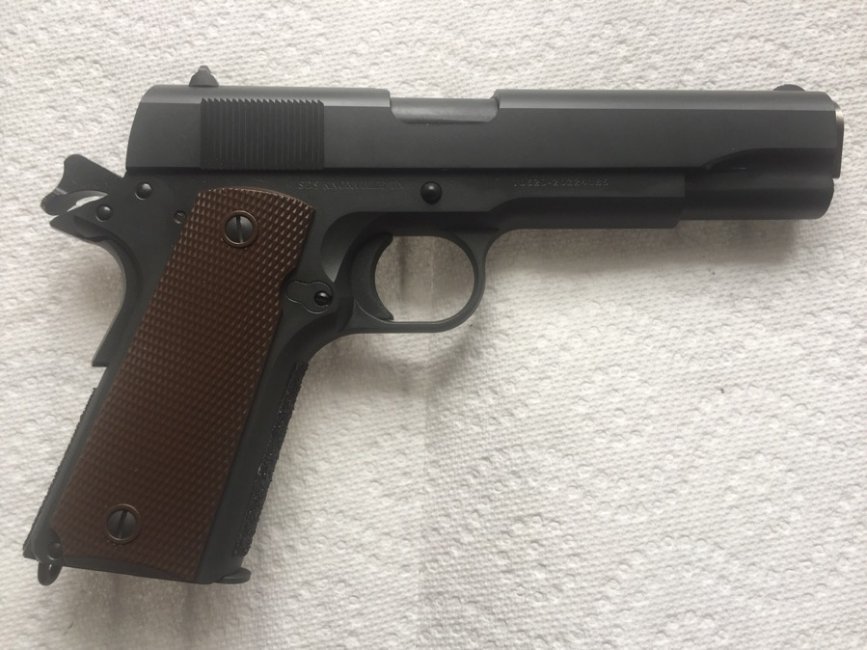
Just bought one, picked it up about two weeks ago. The Mil Spec Defender Springers are in short supply so I thought I would try this one.
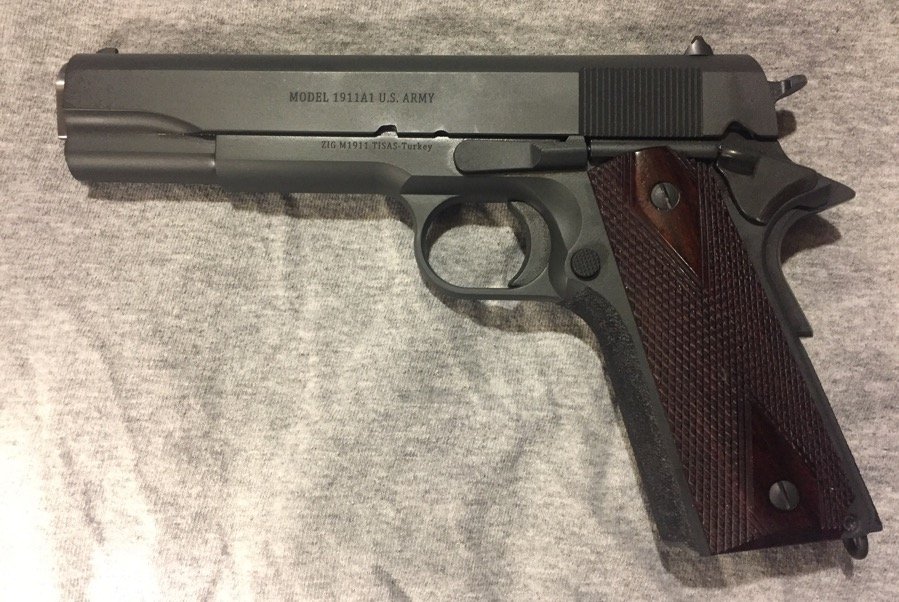
Not a bad pistol. Externally decently fit and blended. Inside...not so much. If you do your own work you can make a decent blaster. I had to do a trigger job to feel comfortable enough to shoot it. Anyway, final target and some before, after and between pics.
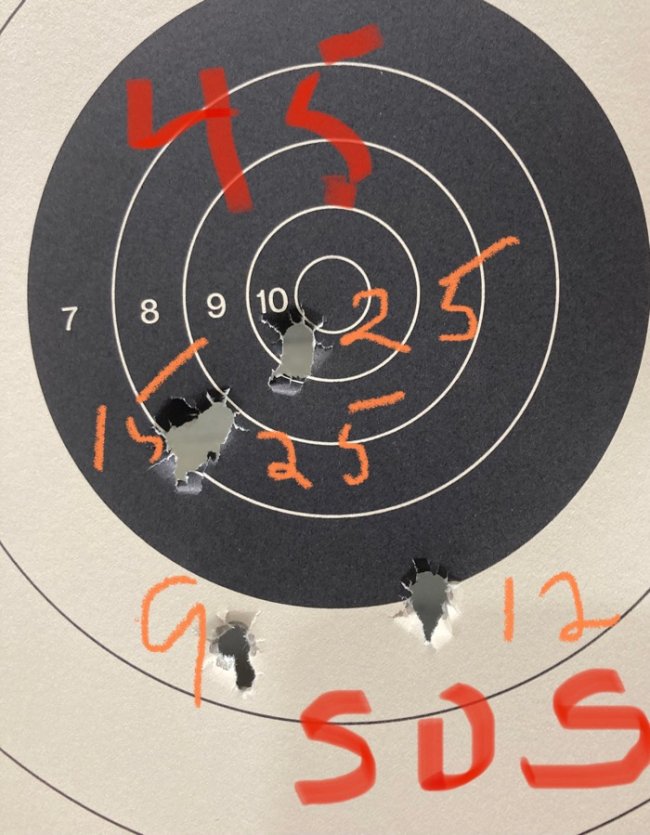
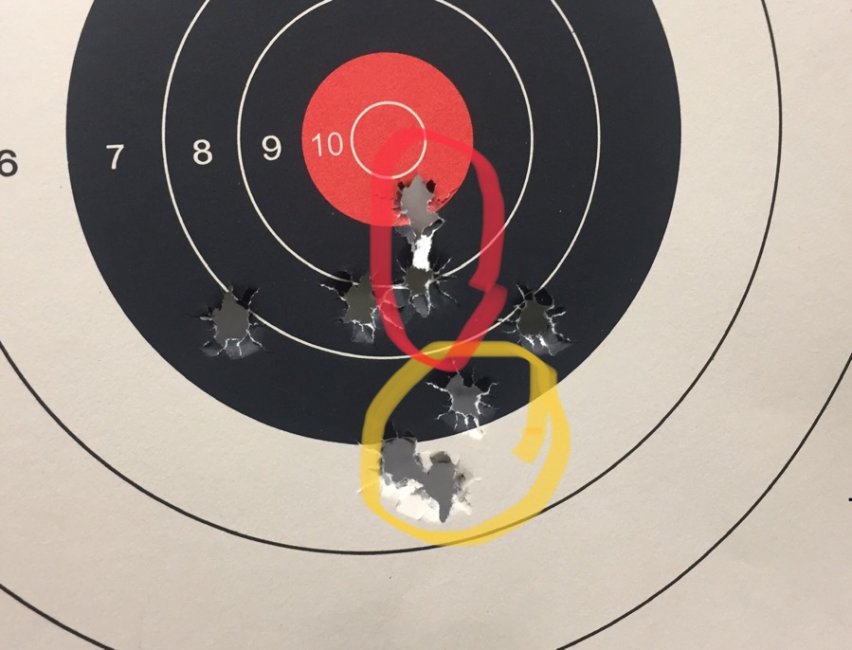
Target, shot standing at:
7 and 10 yards - yellow ring
17 yards - holes unringed
25 yards - red ringed holed
A list what was done.
1.) Polish frame/slide rails, no appreciable metal removed.
Frame/slide clearances as measured with a dial indicator:
vertical: front .006”, rear .004”
rear: front .009”, rear .004”
2.) Deburr trigger track and trigger pad cutout in frame.
Minimize vertical and lateral movement in trigger.
Smooth trigger/frame contact surfaces.
Smooth and polish back of bow.
Deburr and smooth lockwork area of frame.
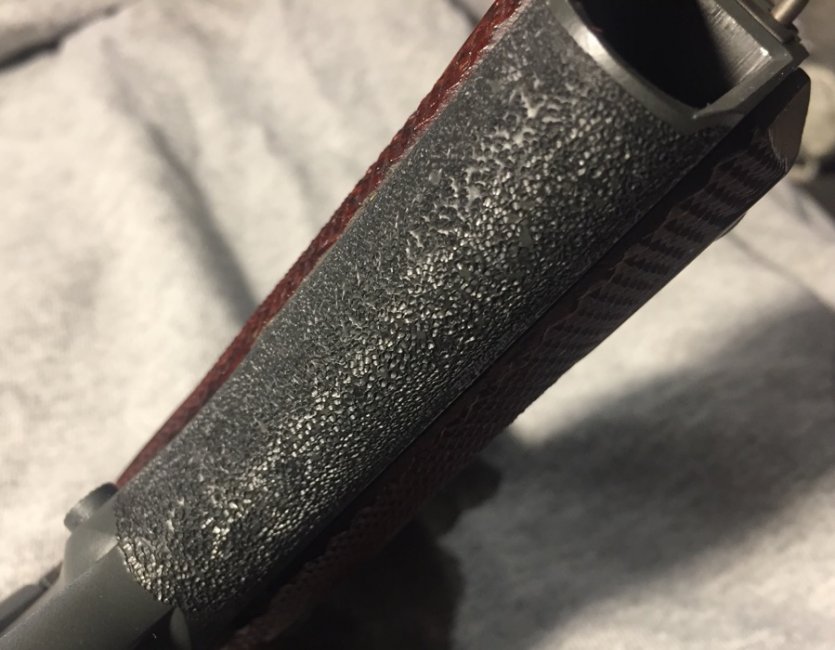
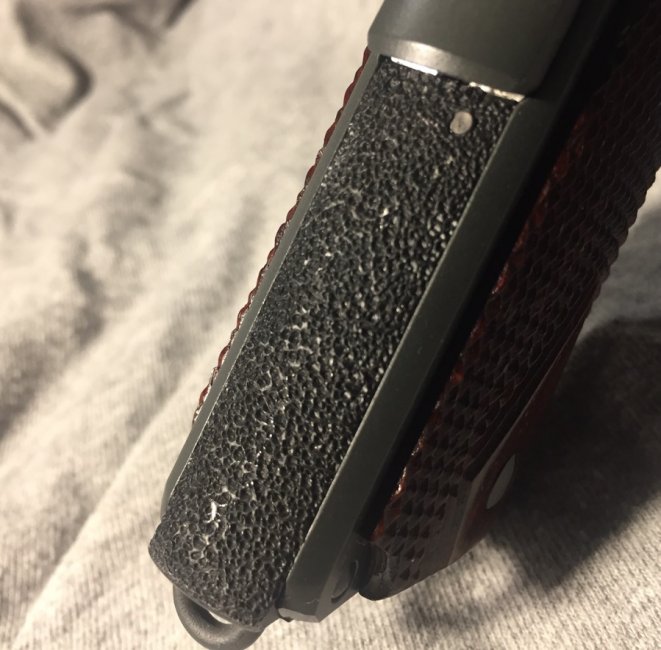
3.) Remove grip screw bushings and stipple front strap.
4.) Mainspring housing: Flatten, blend and stipple.
5.) Reblue stippling on frame and mainspring housing. Install new grip screw bushings.
6.) Action job: Hook height reduced to .018”.
True hammer hooks. Tune disconnector. Correct blade height.
Stone sear nose, correct and polish. sear leg length.
Set pull force: 4 pounds 4 ounces.
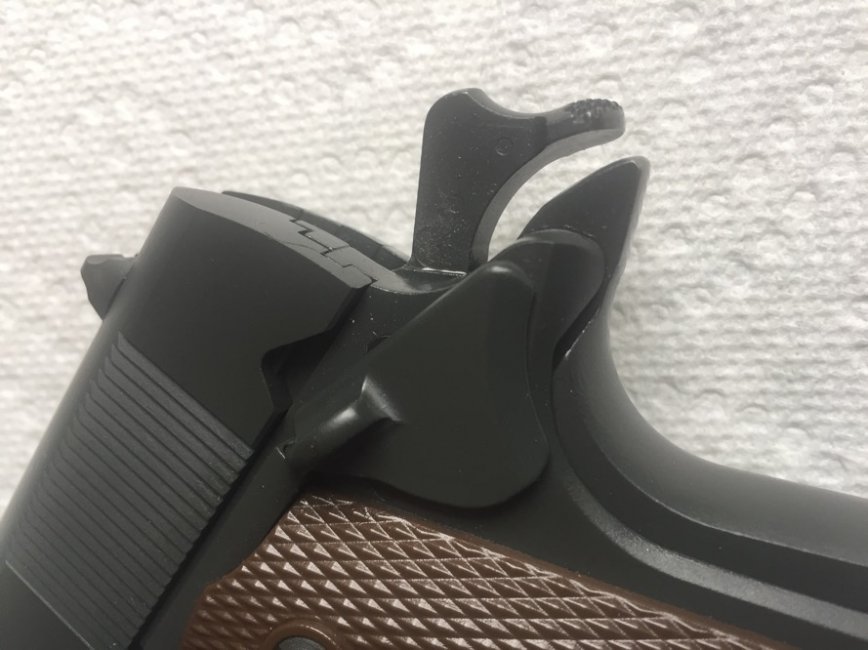
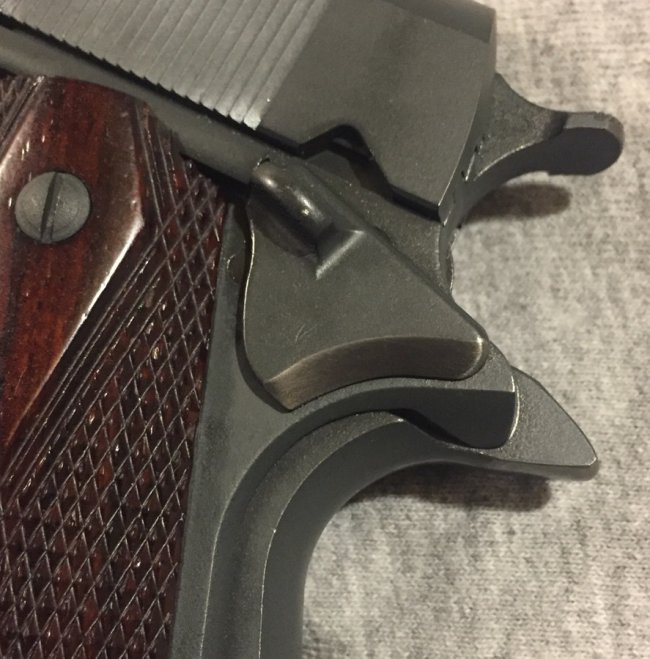
7.) Grip safety: Tune engagement, release position, recontour and defang spur. Bob hammer slightly.
8.) Thumb safety: Adjust engagement, tune/polish release and engagement area. Blend curve and bevel to frame.
9.) Mag catch: Smooth internal and exterior.
Mag catch lock: deburr and polish contact surfaces.
Mag catch spring: clip off 1 1/2 coils.
10.) Fit slide stop, every aspect was needed. Internal lug cutout in frame needed. Work on slide stop definitely needed.
Smooth sharp corners to prevent frame rub.
Add detent installation groove.
11.) Extractor: Tune, polish, adjust.
12.) Firing pin stop: upper bevel added and polished.
13.) Barrel: Measure for max link length (already standing on link).
Select fit link #4) per derived needed length.
Check barrel time: good.
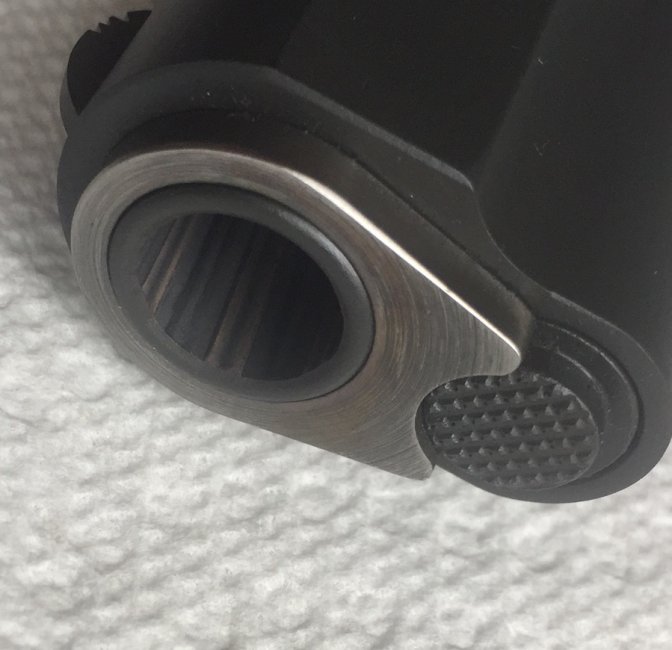
14.) Fit barrel bushing.
15.) Recoil assembly.
Recoil spring: Check for spring bind. Measure - 15 pound.
Recoil spring guide: deburr and smooth.
Recoil spring plug: chamfer mouth and deburr interior.
16.) Installed dd grips..rosewood?
Not a bad pistol. Externally decently fit and blended. Inside...not so much. If you do your own work you can make a decent blaster. I had to do a trigger job to feel comfortable enough to shoot it. Anyway, final target and some before, after and between pics.
Target, shot standing at:
7 and 10 yards - yellow ring
17 yards - holes unringed
25 yards - red ringed holed
A list what was done.
1.) Polish frame/slide rails, no appreciable metal removed.
Frame/slide clearances as measured with a dial indicator:
vertical: front .006”, rear .004”
rear: front .009”, rear .004”
2.) Deburr trigger track and trigger pad cutout in frame.
Minimize vertical and lateral movement in trigger.
Smooth trigger/frame contact surfaces.
Smooth and polish back of bow.
Deburr and smooth lockwork area of frame.
3.) Remove grip screw bushings and stipple front strap.
4.) Mainspring housing: Flatten, blend and stipple.
5.) Reblue stippling on frame and mainspring housing. Install new grip screw bushings.
6.) Action job: Hook height reduced to .018”.
True hammer hooks. Tune disconnector. Correct blade height.
Stone sear nose, correct and polish. sear leg length.
Set pull force: 4 pounds 4 ounces.
7.) Grip safety: Tune engagement, release position, recontour and defang spur. Bob hammer slightly.
8.) Thumb safety: Adjust engagement, tune/polish release and engagement area. Blend curve and bevel to frame.
9.) Mag catch: Smooth internal and exterior.
Mag catch lock: deburr and polish contact surfaces.
Mag catch spring: clip off 1 1/2 coils.
10.) Fit slide stop, every aspect was needed. Internal lug cutout in frame needed. Work on slide stop definitely needed.
Smooth sharp corners to prevent frame rub.
Add detent installation groove.
11.) Extractor: Tune, polish, adjust.
12.) Firing pin stop: upper bevel added and polished.
13.) Barrel: Measure for max link length (already standing on link).
Select fit link #4) per derived needed length.
Check barrel time: good.
14.) Fit barrel bushing.
15.) Recoil assembly.
Recoil spring: Check for spring bind. Measure - 15 pound.
Recoil spring guide: deburr and smooth.
Recoil spring plug: chamfer mouth and deburr interior.
16.) Installed dd grips..rosewood?
Attachments
-
 CF1325A0-589A-4D2A-BA17-00E1EBA60F45.jpeg112.5 KB · Views: 506
 -
 3F7CE5D3-6E13-44F3-BD83-D90ED1E80ACD.jpeg94.3 KB · Views: 467
 -
 3098333E-7A0A-4D19-B097-7C13F5697630.jpeg76.5 KB · Views: 474
 -
 E9BEBF49-DD30-44A2-B5FD-FA6EA017391F.jpeg127.3 KB · Views: 443
 -
 B87B5C75-5CF7-4CBC-AB87-FBBC1A25809C.jpeg87 KB · Views: 455
 -
 5DC3124E-ABCA-456E-917B-234FE297C58B.jpeg95.5 KB · Views: 449
 -
 2D333857-6A6F-4037-BBE2-698BFF232EAE.jpeg67.1 KB · Views: 457
 -
 1A8E57CF-2A25-4F8D-B538-0883338A5F0A.jpeg84.2 KB · Views: 497
 -
 2FC304C6-98D5-495A-930C-6BF3F8F4EBD2.jpeg104.7 KB · Views: 452
 -
 FD656C55-F840-40CC-B4FF-9D7FDC3D55EB.jpeg53.2 KB · Views: 469