Doco Overboard
Ultimate Member
So while collecting parts for another project I wound up with an extra SMLE uncut fore-end that could use some doctoring and be fitted to a rifle and be made serviceable again.
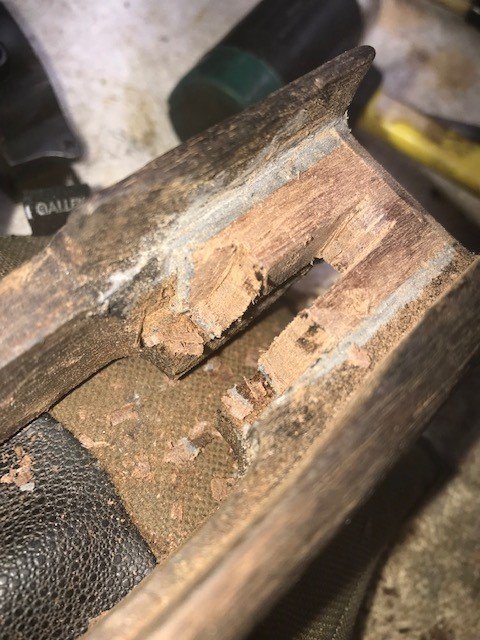
The problem with a lot of these rifles is becuase of age and poor disassembly methods the recoil surfaces at the stock rear take a beating, turn to mush and so on and so forth till they become so loose major stock splitting occurs or they just wont shoot worth damn.
Fitting in a new set of "draws" is not hard to do doesn't take very long to accomplish with common tools, a little patience and some scrap hardwood.
The first part is understanding how the system works. The LE rifles have whats known as sear lugs which support the trigger sear and bents and are located directly above the trigger. They are slightly angled with a taper that becomes wider towards the top of them and act as recoil surfaces becuase the LE action has no real recoil surface in the front of the action to speak of like traditionally found on Mauser style actions.
The second thing to know is that the angle of the lugs are slightly different than that what is found at the stock rear where it meets the front of the wrist socket. If you could draw a line from the sear lugs and the front of the wrist socket it would have to be extended well "way" above the top of the action before they became parallel. I know, what were they thinking right?
The idea is, and its a good one, is that becuase the two angles are different recoil becomes distributed to front flat surface of the wrist socket reducing vibrations and effectively using the thrust of recoil to eliminate it and continue to tighten the timber and metal parts together instead of letting them dance around becoming loose over time.
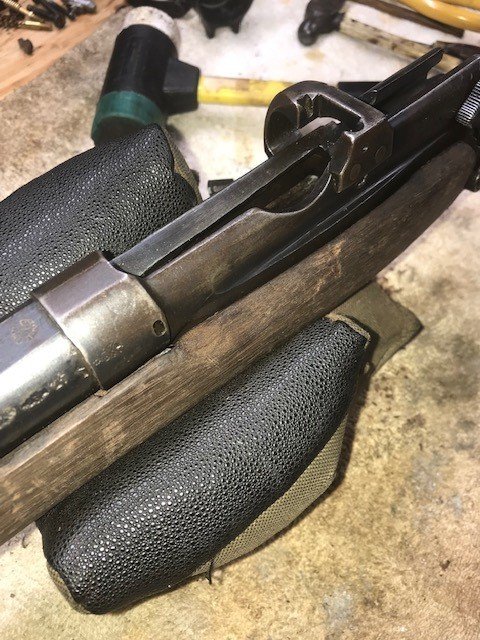
But anyhow, now that were through all that,this beater fore-end should be good for another 100 years and maybe a world war or two.
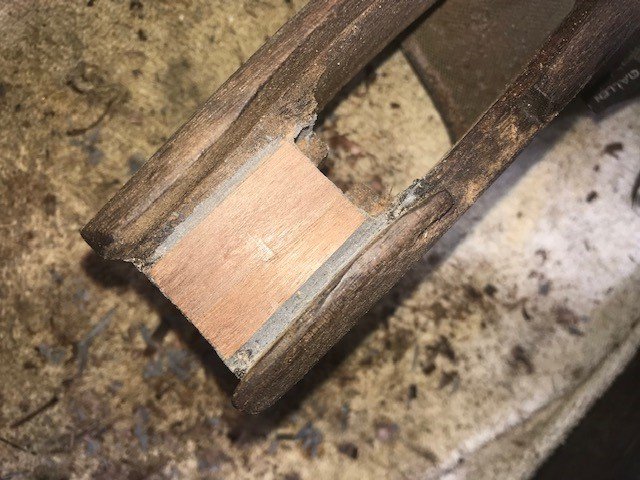
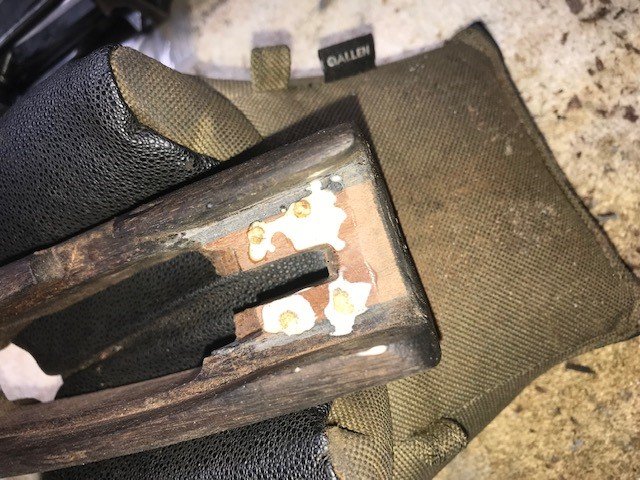
Full disclaimer though, when chiseling out the punky wood instead of using wood glue as the agent to secure the new recoil surfaces and hard ass walnut wood cut from a junk Krag sporter stock. I used acra gel instead. I know, some hard ass old school armorer somewhere probably just puked on his sofa but Im not worried about that today. We got old growth timber here more than likely that we want to keep in the game from here on out.
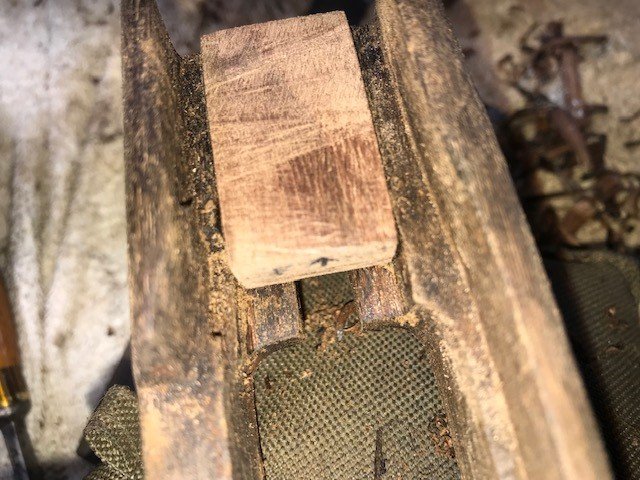
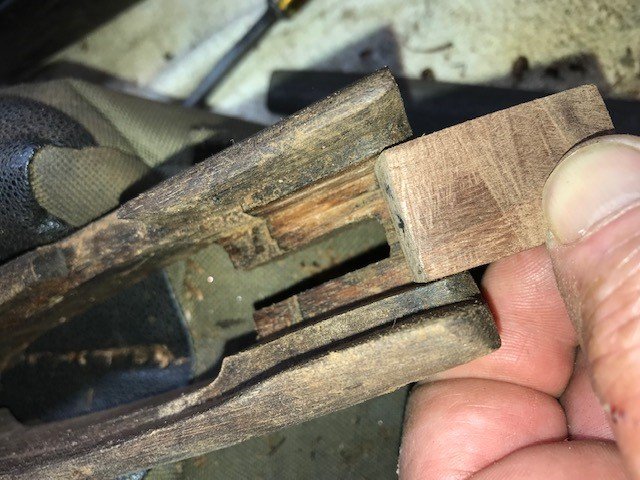
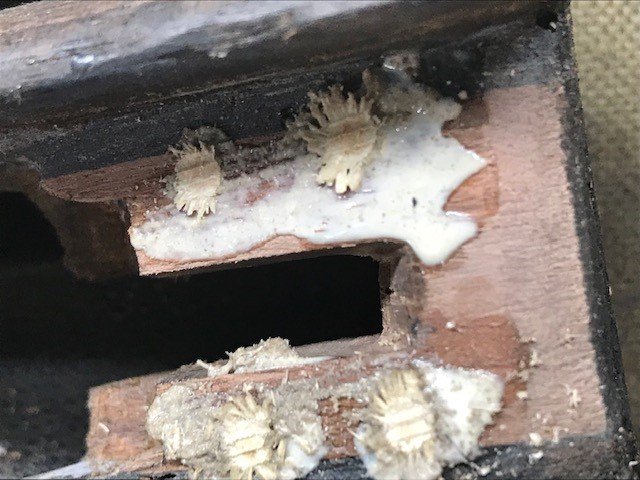
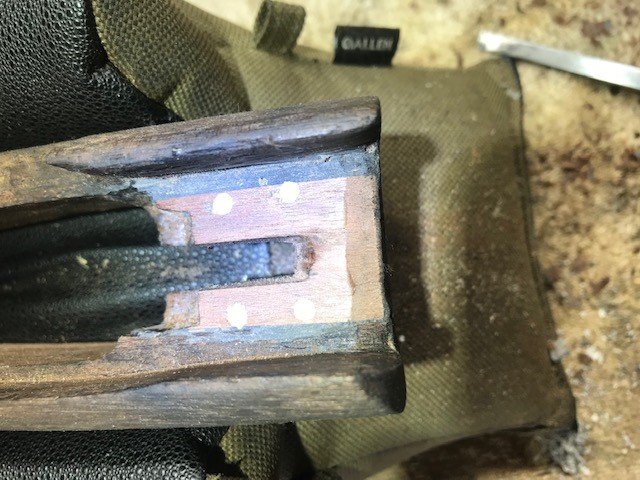
Pare the wood out of the way keeping it flat but at the same time maintaining a small protrusion form the existing stock sides that will be used to maintain the bedding for the rear of the receiver. Make sure to go far enough in width though to be able to drill and drive some hardwood pegs directly down through the patch to stake it to the bedding you just made. We'll use wood glue for that when the time comes and use four instead of two for belt and suspenders approach.
Make a nice patch but be sure to form it with the grain the right way, so when we go to bed a very small chisel will just skim off the wood nice and smooth like a ducks bottom instead of gouging the opposing surfaces of the lugs all to hell and having a devil of a time making that fore-end snap home like a fly swatter on your patio table.
And we'll work off all that excess glass for a neat and tidy job.
Dont forget to clamp, close as you can get for longevity.
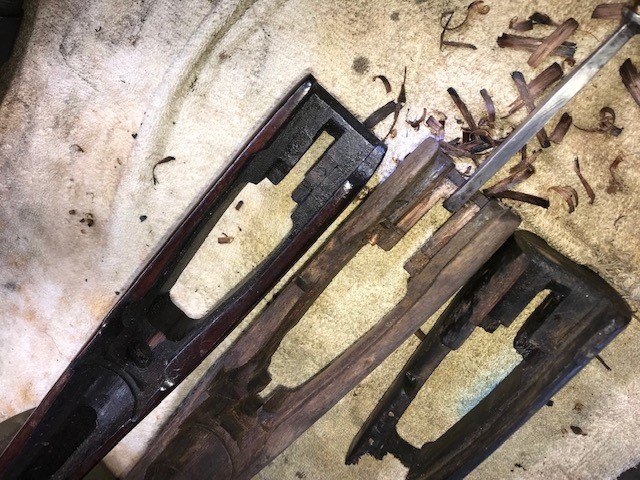
Another way to peg the patch to the fore end is to drill transversly right through the stock and dowel with wood glue. Then make off the ends of the dowel from the exterior sides, or make pegs out of hardwood fit right down through the top. The no4 stock wood in the firts picture (top) is expertly done. The one on the bottom is from an Indian no 1 stock and has a Dutchman made at the rear of the stock to tie it all together that is very well done but I sawed the front of that one off for my other rifle project.
The problem with a lot of these rifles is becuase of age and poor disassembly methods the recoil surfaces at the stock rear take a beating, turn to mush and so on and so forth till they become so loose major stock splitting occurs or they just wont shoot worth damn.
Fitting in a new set of "draws" is not hard to do doesn't take very long to accomplish with common tools, a little patience and some scrap hardwood.
The first part is understanding how the system works. The LE rifles have whats known as sear lugs which support the trigger sear and bents and are located directly above the trigger. They are slightly angled with a taper that becomes wider towards the top of them and act as recoil surfaces becuase the LE action has no real recoil surface in the front of the action to speak of like traditionally found on Mauser style actions.
The second thing to know is that the angle of the lugs are slightly different than that what is found at the stock rear where it meets the front of the wrist socket. If you could draw a line from the sear lugs and the front of the wrist socket it would have to be extended well "way" above the top of the action before they became parallel. I know, what were they thinking right?
The idea is, and its a good one, is that becuase the two angles are different recoil becomes distributed to front flat surface of the wrist socket reducing vibrations and effectively using the thrust of recoil to eliminate it and continue to tighten the timber and metal parts together instead of letting them dance around becoming loose over time.
But anyhow, now that were through all that,this beater fore-end should be good for another 100 years and maybe a world war or two.
Full disclaimer though, when chiseling out the punky wood instead of using wood glue as the agent to secure the new recoil surfaces and hard ass walnut wood cut from a junk Krag sporter stock. I used acra gel instead. I know, some hard ass old school armorer somewhere probably just puked on his sofa but Im not worried about that today. We got old growth timber here more than likely that we want to keep in the game from here on out.
Pare the wood out of the way keeping it flat but at the same time maintaining a small protrusion form the existing stock sides that will be used to maintain the bedding for the rear of the receiver. Make sure to go far enough in width though to be able to drill and drive some hardwood pegs directly down through the patch to stake it to the bedding you just made. We'll use wood glue for that when the time comes and use four instead of two for belt and suspenders approach.
Make a nice patch but be sure to form it with the grain the right way, so when we go to bed a very small chisel will just skim off the wood nice and smooth like a ducks bottom instead of gouging the opposing surfaces of the lugs all to hell and having a devil of a time making that fore-end snap home like a fly swatter on your patio table.
And we'll work off all that excess glass for a neat and tidy job.
Dont forget to clamp, close as you can get for longevity.
Another way to peg the patch to the fore end is to drill transversly right through the stock and dowel with wood glue. Then make off the ends of the dowel from the exterior sides, or make pegs out of hardwood fit right down through the top. The no4 stock wood in the firts picture (top) is expertly done. The one on the bottom is from an Indian no 1 stock and has a Dutchman made at the rear of the stock to tie it all together that is very well done but I sawed the front of that one off for my other rifle project.