?s about 80% Arms Easy Jig

The #1 community for Gun Owners of the Northeast

Member Benefits:

  • No ad networks!
  • Discuss all aspects of firearm ownership
  • Discuss anti-gun legislation
  • Buy, sell, and trade in the classified section
  • Chat with Local gun shops, ranges, trainers & other businesses
  • Discover free outdoor shooting areas
  • View up to date on firearm-related events
  • Share photos & video with other members
  • ...and so much more!
  • 2nd=Good+Substantial

    Ultimate Member
    Mar 17, 2012
    1,631
    The Hereford Zone
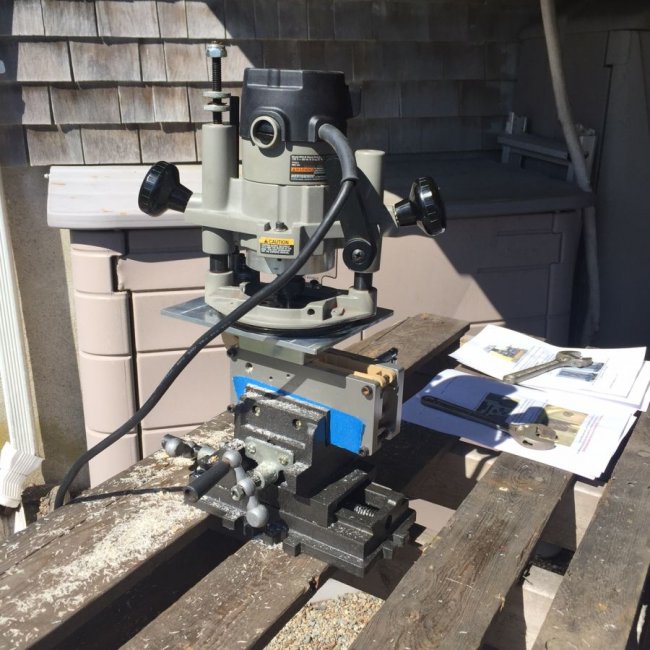
    All the pictures I've seen show a small laminate trimmer being used. I have very nice full size router and other than being heavier I don't see a problem. Any issue using a full sized router?

    For $20 extra, they offer hardened steel drill bushings. I usually spend the extra money for heavy duty when it comes to tools. Is there any downside to the bushings like maybe misalignment?

    Thanks!
     

    Alphabrew

    Binary male Lesbian
    Jan 27, 2013
    40,758
    Woodbine
    Only issue with a bigger router is that it may be a little harder to keep it flat on the platform since the base of the router will hang over the sides a bit. If you are careful, shouldn't be an issue, although a smaller router is better IMHO.

    For the bushings, depends on how many lowers you will make. If you will do a bunch, might be worth getting steel ones. Not sure which I have but I have done several lowers with my Easy Jig and never had an issue with the drill bushings slipping and messing up the depth at which I drill. I do re-check the depth after every hole I drill to make sure the bushings did not slip.

    Love my Easy Jig!

    193355F7-BF99-4583-97B6-40481B413E77_zpscjogzby1.jpg
    [/URL][/IMG]

    ETA: one issue with any router, big or small, is that you can't see what you are milling out because you can't easily see down into the fire control pocket while the router is in place and cutting. You have to go by feel and stay inside the lines. Make sure the router speed is right and take your time, it ain't a race.
     

    Sticky

    Beware of Dog
    MDS Supporter
    Mar 16, 2013
    4,502
    AA Co
    The bushings prevent wear and runout, if you are going to do more than one lower, I'd spend the extra. Otherwise, you are just using the aluminum side plates as a drill guide. If you aren't careful, you can easily egg out the holes over time. My jig has bushings for the FCG holes and it has done many lowers to date with no issues.

    Can't help with the router, sorry.. I use a mill.. lol
     

    Alphabrew

    Binary male Lesbian
    Jan 27, 2013
    40,758
    Woodbine
    Oh, I thought OP meant drill stop bushings, not bushings for the holes you drill into. Totally not needed IMHO, but I'd get them. That option was not available when I got my easy jig. I do have a TM jig that has bushings.
     

    Sticky

    Beware of Dog
    MDS Supporter
    Mar 16, 2013
    4,502
    AA Co
    Oh, I thought OP meant drill stop bushings, not bushings for the holes you drill into. Totally not needed IMHO, but I'd get them. That option was not available when I got my easy jig. I do have a TM jig that has bushings.
    Think they are referring to the side holes, as many are using bushings. For just one lower, I'd probably skip them, but for more than one I'd spring the extra $$ to ensure consistency over time with those hole locations.. they are critical.

    Drill stop bushings are okay, but it's better to stop and measure frequently if you don't have some type of depth measurement on the tooling being used. Like you said, go slow, it's not a race and check often. One small mistake can be costly and frustrating.. ;)
     

    KH195

    Ultimate Member
    Jan 10, 2013
    1,552
    Virginia
    I just did a lower last weekend with the easy jig, borrowed a full size router from a friend since I'm not handy at all and don't have many of my own tools. Not only was it full size, but it was the first time I've ever used a router.....I still found the process very easy. I took my time, watched the video a couple times as I went, and start to finish completed the lower in about 3 hrs. Turned out great too!
     

    max bowtie

    Member
    May 9, 2016
    5
    Mount Airy, MD
    I have an easy jig but halfway through I got tired of not being able to see what I was doing and just put the end mill on a drill press and carefully continued that way (holding the jigs side plates and moving the entire jig instead of a router). Still able to use the top plate as a guide and able to see much better. If you go this route, go slow and be sure to take measurements often. Just my two cents
     

    80% Arms

    Member
    Nov 3, 2015
    2
    Santa Ana, CA
    Our original Easy Jig does not have side plate bushings given that the Easy Jig is already a heavy duty design with extra thick side plates. For 99% of customers, bushing are an added cost with no benefit to them. We have customers who have done a dozen lowers with their Easy Jig with no wear problems. Granted if a person is using a hand drill, and doesn't drill straight, and puts a lot of pressure at an angle when drilling, they can put excessive wear on the side plates. But that is seldom the case. If you plan to use mainly a hand drill, then bushings may buy some extra insurance, but not necessary for most people.

    To accommodate the 1% of customers who plan to mill a large number of lowers, we do offer now the Easy Jig with hardened steel bushings. The original Easy Jig has never had a durability problem. It was built Heavy Duty from the get go. We're now offering the Easy Jig with bushings to accommodate the small number of customers who have plans to mill a very large number of lowers, or who don't mind the extra cost to have the best of the best.

    As far as seeing inside the FCG when milling, you really don't need to see in there. Some routers have LEDs that make it easier to see inside, but I've never found a need to look in the FCG pocket other than when the router is off and you are positioning the end mill inside of a hole. When you turn on the router, you are simply removing material moving the router in a circular clockwise motion. With our custom end mill, it doesn't matter if the end mill touches the templates. It's very easy to mill until you reach the template wall and then follow the template wall by feel for your finishing pass. If you are not using our end mill, then you must be very careful to not touch the template or else the flutes may chew up your jig. But with our end mill, even on the first pass, the flutes are lower than the template so you can mill without looking or any worry about damaging the jig.
     

    shovel1966

    Member
    May 14, 2016
    88
    Springfield, VA
    IMG_4533rz.jpg

    I purchased my EZ Jig before the steel bushing model was offered. I have completed, build, and fired a total of 6 so far. I also use a full sized Porter Cable model 690 router with a plunge base without any issue. The fire control pocket is right in the center of the support plate so the router doesn't get hear the edge and the extra weight of the larger router is actually a benefit as it's easier to control.

    The biggest piece of advice I have is DO NOT RUSH. This is not a race for me. I finish these lowers outside and enjoy this hobby.

    Hope this helps.
     

    Alphabrew

    Binary male Lesbian
    Jan 27, 2013
    40,758
    Woodbine
    View attachment 177662

    I purchased my EZ Jig before the steel bushing model was offered. I have completed, build, and fired a total of 6 so far. I also use a full sized Porter Cable model 690 router with a plunge base without any issue. The fire control pocket is right in the center of the support plate so the router doesn't get hear the edge and the extra weight of the larger router is actually a benefit as it's easier to control.

    The biggest piece of advice I have is DO NOT RUSH. This is not a race for me. I finish these lowers outside and enjoy this hobby.

    Hope this helps.

    What's the story with that tan colored lower?
     

    Sticky

    Beware of Dog
    MDS Supporter
    Mar 16, 2013
    4,502
    AA Co
    What's the story with that tan colored lower?
    Just a hunch, but from the pic it appears to be a poly lower. They are easier to do, but the same comments that he had would apply to any lower in regards to the jig and router.
     

    shovel1966

    Member
    May 14, 2016
    88
    Springfield, VA
    What's the story with that tan colored lower?

    That one is a polymer one from EP Armory in "desert sand" color. I had a white one and a desert sand one I completed that day. I have also done a 6061-T6 forged lower from Juggernaut Tactical with this same jig and also a 7075-T6 billet aluminum lower from Ares Armor (before they changed their name to AWC "American Weapons Components") But......the exact same tooling, exact same instructions and the exact same process is used for all three types of material. Of course the polymer ones take less time and the 7075 take the longest. With that being said, their 308 EZ Jig works just as well and is basically the exact same process, just a little different on the dimensions.
     

    2nd=Good+Substantial

    Ultimate Member
    Mar 17, 2012
    1,631
    The Hereford Zone
    View attachment 177662

    I purchased my EZ Jig before the steel bushing model was offered. I have completed, build, and fired a total of 6 so far. I also use a full sized Porter Cable model 690 router with a plunge base without any issue. The fire control pocket is right in the center of the support plate so the router doesn't get hear the edge and the extra weight of the larger router is actually a benefit as it's easier to control.

    The biggest piece of advice I have is DO NOT RUSH. This is not a race for me. I finish these lowers outside and enjoy this hobby.

    Hope this helps.

    Yes it does help. I have a similar plunge router. I'm definitely looking at this as a "measure twice" or maybe three or four times and go slow project. Thanks!
     

    shovel1966

    Member
    May 14, 2016
    88
    Springfield, VA
    I'm definitely looking at this as a "measure twice" or maybe three or four times and go slow project. Thanks!

    It sure does help to have a dial or electronic digital calipers for measuring, but this jig also has depth gauges built-into the two top templates. These are for setting your depth of the drill bit and the end mill. I still highly recommend measuring with calipers also just to be sure. With the pocket too shallow, the trigger won't pivot far enough to disengage the sear to drop the hammer. With the pocket too deep, you will probably go right through the bottom. It must be almost exactly 1.25" with a smooth bottom of the fire control pocket.

    Good luck and let us all know how it turns out.
     

    Users who are viewing this thread

    Latest posts

    Forum statistics

    Threads
    275,504
    Messages
    7,284,515
    Members
    33,472
    Latest member
    SrAIC

    Latest threads

    Top Bottom