j8064
Garrett Co Hooligan #1
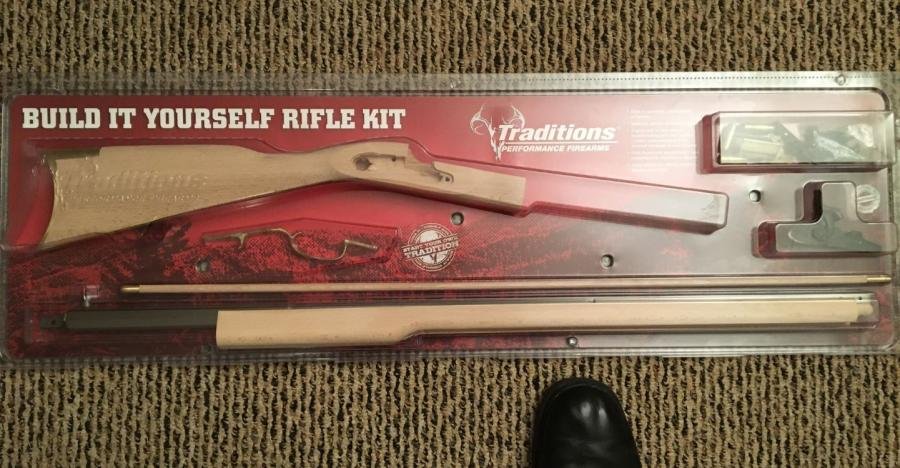
Not too long ago I picked up one of the Traditions Kentucky Rifle DIY kits just for fun. On a snowy or rainy day when we Hooligans can't get to the range it's a project I can tend to a little at a time.
There are some other other threads regarding these kits. They're actually pretty easy to build. And there are plenty of YouTube videos on the process.
Now my disclaimer: I'll likely get "flamed" by Threeband, but that's OK. He knows I have and shoot some high quality stuff too.")
 https://www.mdshooters.com/showthread.php?t=162972&highlight=Traditions+kentucky&page=2
Day One:
I finally opened the Kentucky Rifle package. After watching several YouTube videos I’m pretty comfortable. Lots of tricks to building these kits on the internet.
This is not the first project like this I've done. When the rifle is finished we'll try it out at a Hooligan shoot. It will be fun to have another "White Smoke Stick" at the range.
I'll try to post some progress updates. It's not a hard project if you take your time. If some of you learn a few tricks...great!
")
There are some other other threads regarding these kits. They're actually pretty easy to build. And there are plenty of YouTube videos on the process.
Now my disclaimer: I'll likely get "flamed" by Threeband, but that's OK. He knows I have and shoot some high quality stuff too.
https://www.mdshooters.com/showthread.php?t=162972&highlight=Traditions+kentucky&page=2Day One:
I finally opened the Kentucky Rifle package. After watching several YouTube videos I’m pretty comfortable. Lots of tricks to building these kits on the internet.
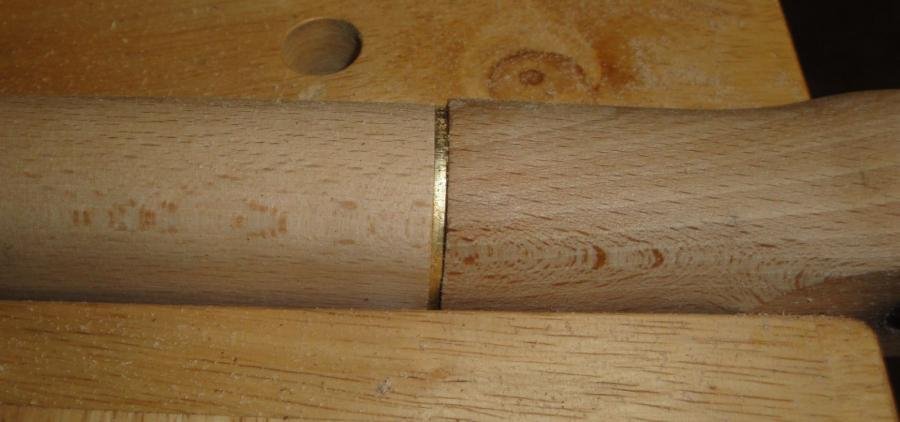
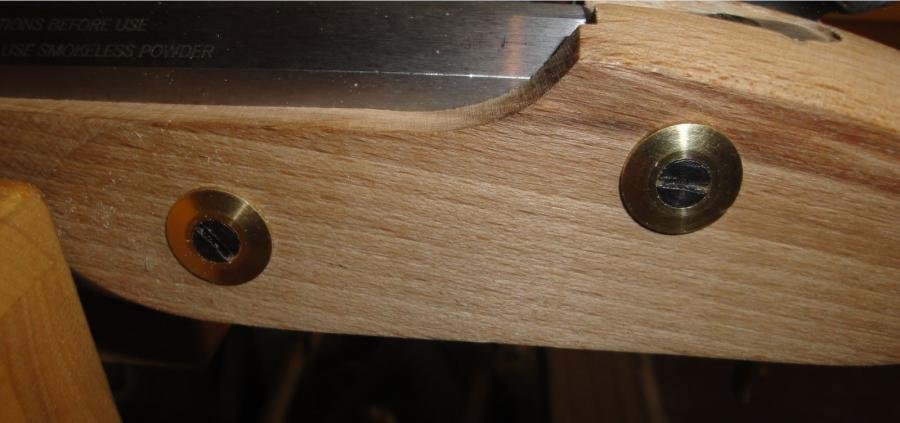
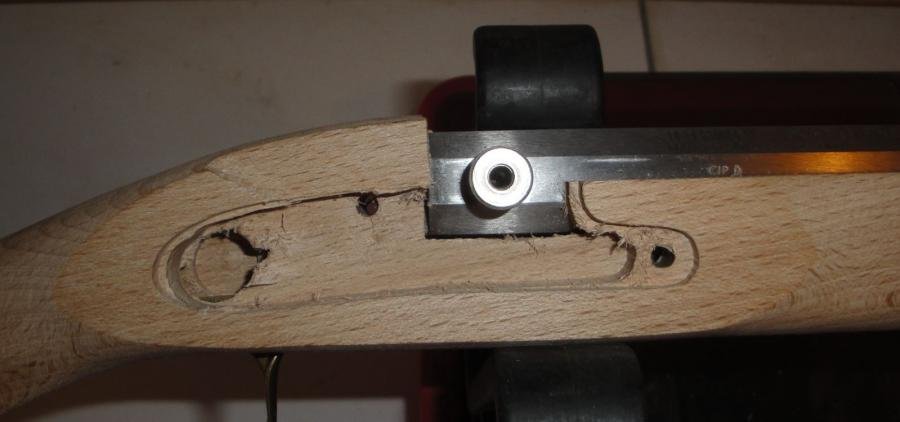
- First issue was the holes for the stock pins were too shallow. Not hard to drill them deeper with a 5/32” bit. The barrel fits the channel pretty well. I’ll get back to the channel after I get all the recesses cleaned up so the parts seat in them correctly.
- I had to start by deepening the barrel tang recess with a Dremel. The tang screw mates with the trigger plate so I had to inlet the recess about 1/8”. There will be plenty of sanding and shaping ahead to blend the stock into the tang.
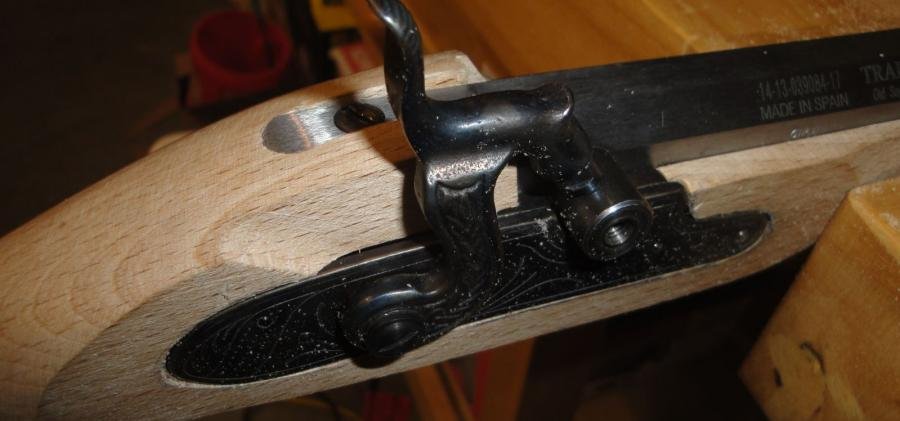
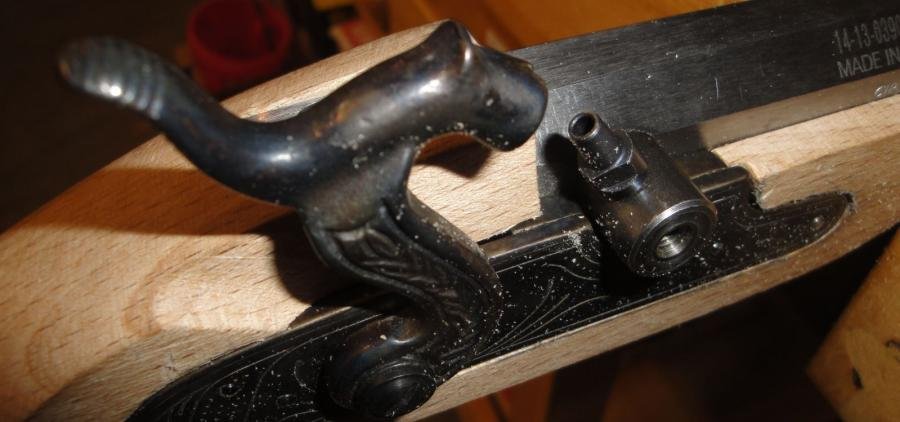
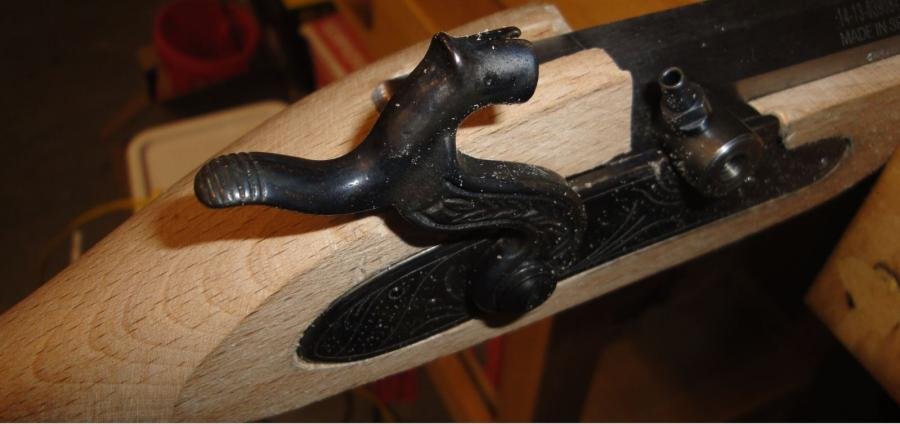
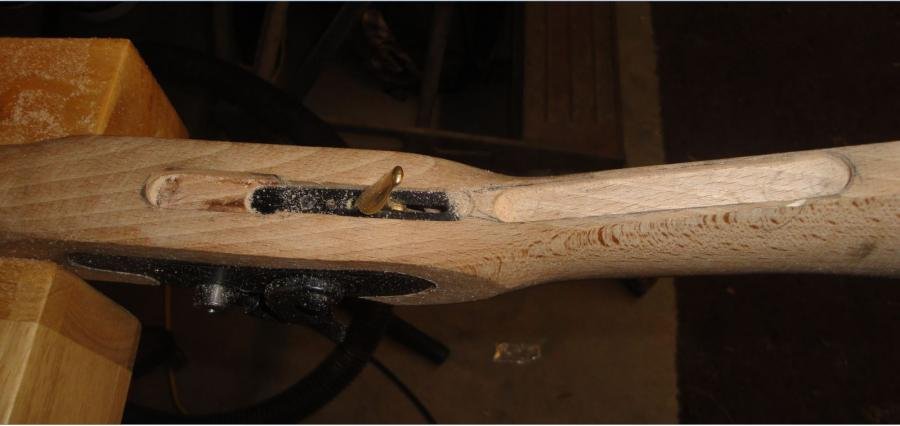
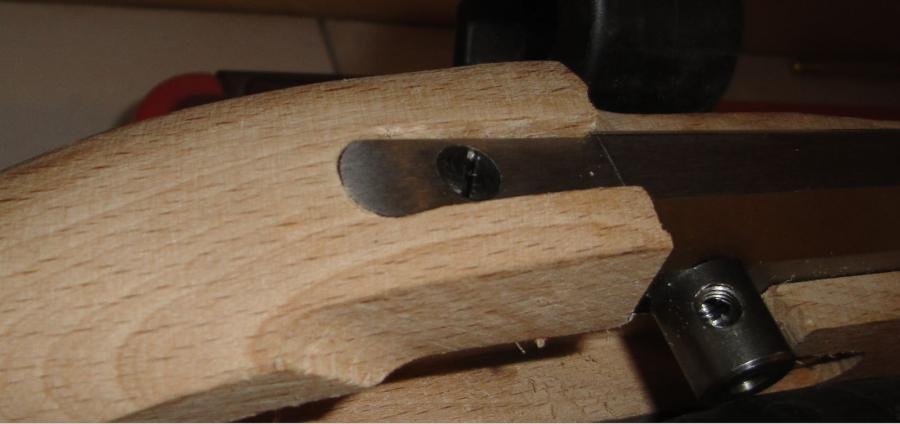
- Rough fitting the lock was real interesting. It isn’t perfect and I’ll go at it differently next time. But it came out OK and it functions. Since this is meant to be a shooter and not a showpiece, function is what counts.
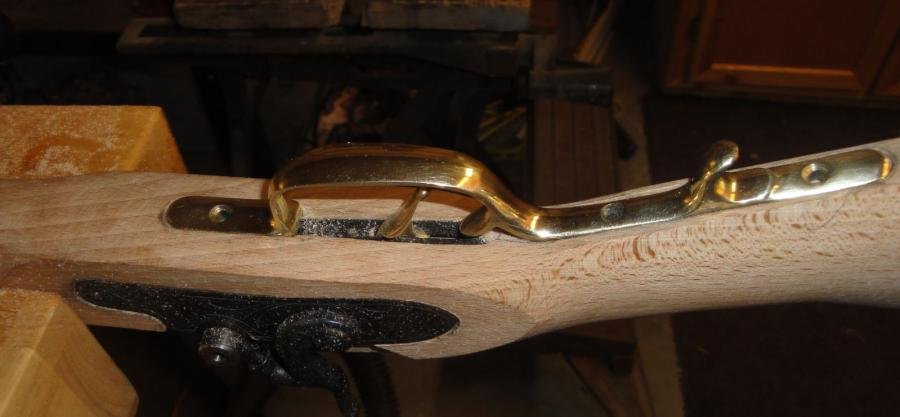
- Fitting the trigger guard will be next. Then the barrel pins. But enough for today.
This is not the first project like this I've done. When the rifle is finished we'll try it out at a Hooligan shoot. It will be fun to have another "White Smoke Stick" at the range.
I'll try to post some progress updates. It's not a hard project if you take your time. If some of you learn a few tricks...great!
Attachments
-
 Kit IMG_2402.jpg84.7 KB · Views: 630
 -
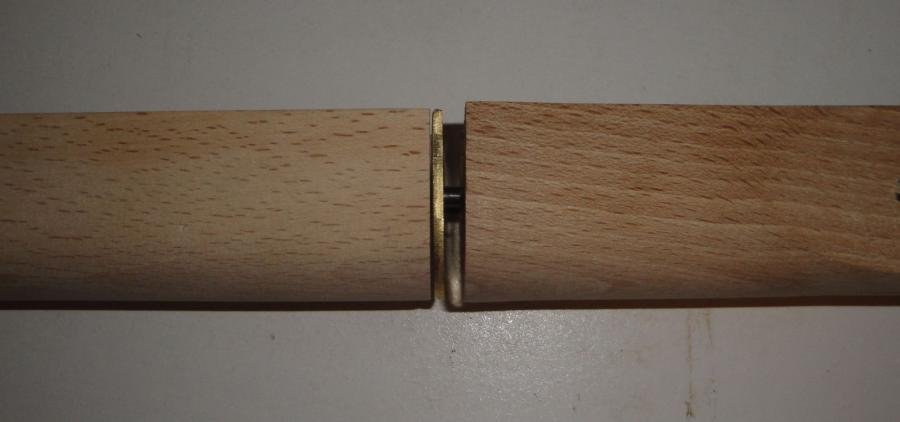 DSC09441 Stock Gap.jpg29 KB · Views: 627
 -
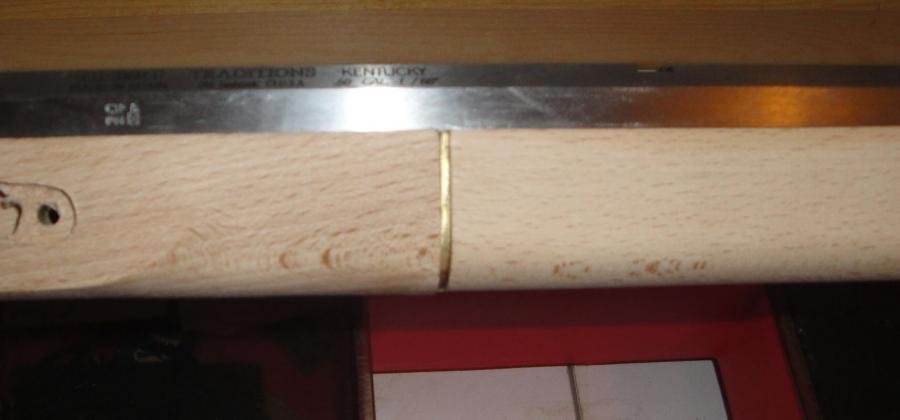 DSC09442 Stock Gap Corrected.jpg26.1 KB · Views: 629
 -
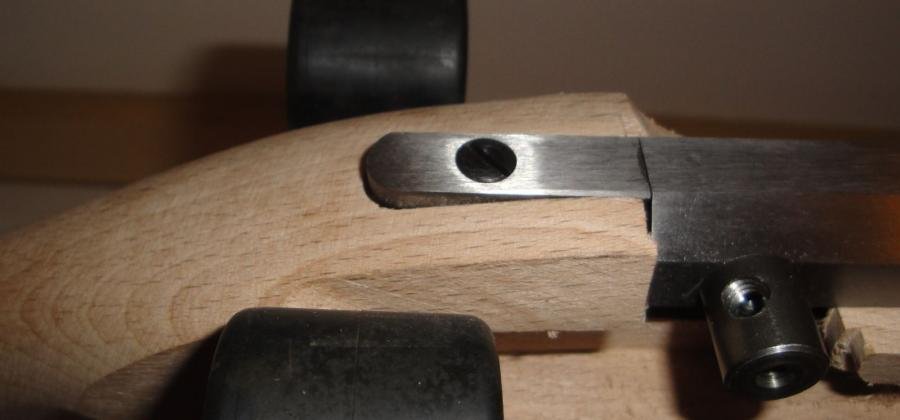 DSC09444 Barrel Tang.jpg31 KB · Views: 632
 -
 DSC09447 Barrel Tang Rough Fit.jpg34.5 KB · Views: 612
 -
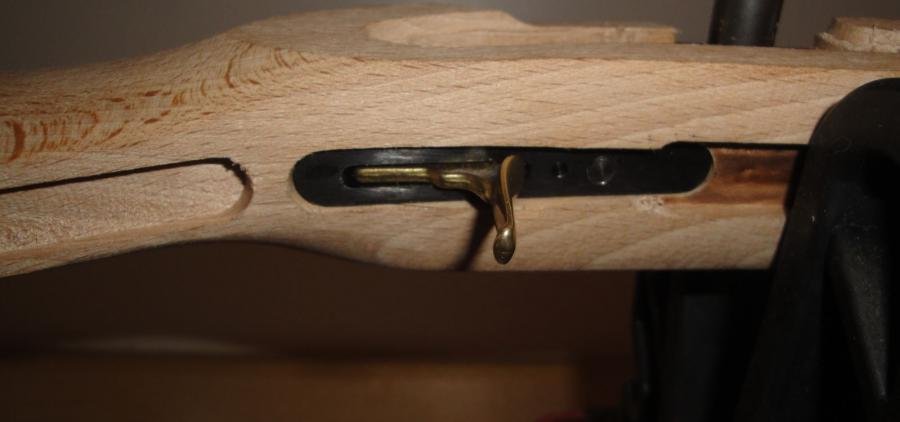 DSC09448 Trigger Fitted.jpg31.2 KB · Views: 636
 -
 DSC09449 Lock Recess.jpg35.1 KB · Views: 643
 -
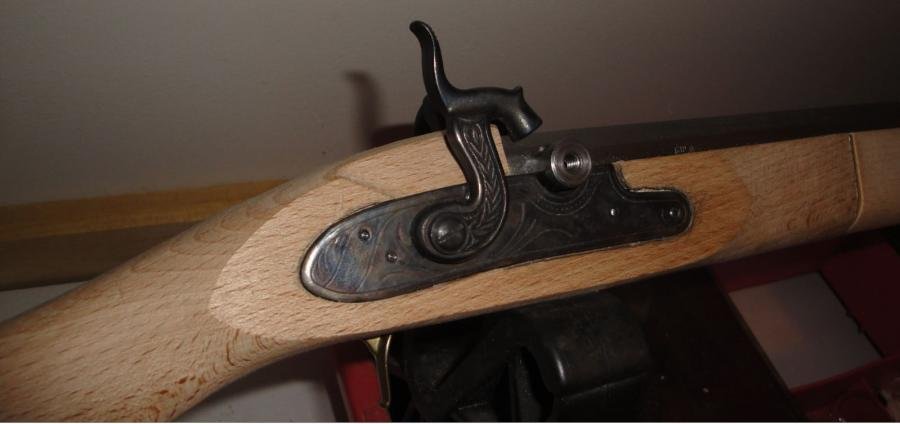 DSC09453 Lock Rough Fit.jpg32.6 KB · Views: 637
 -
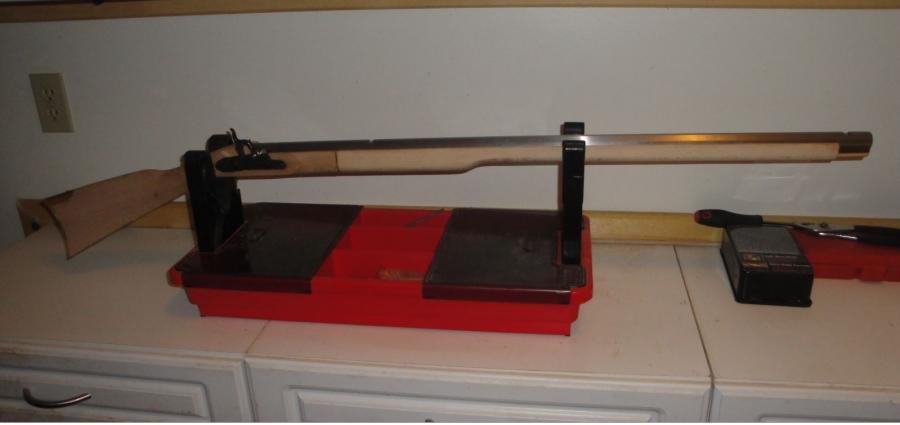 DSC09454 Day 01.jpg25.9 KB · Views: 627