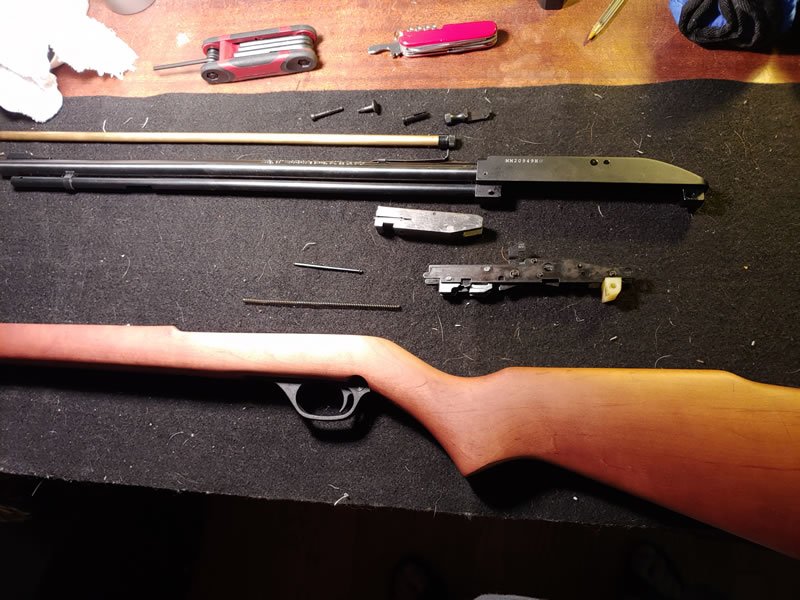
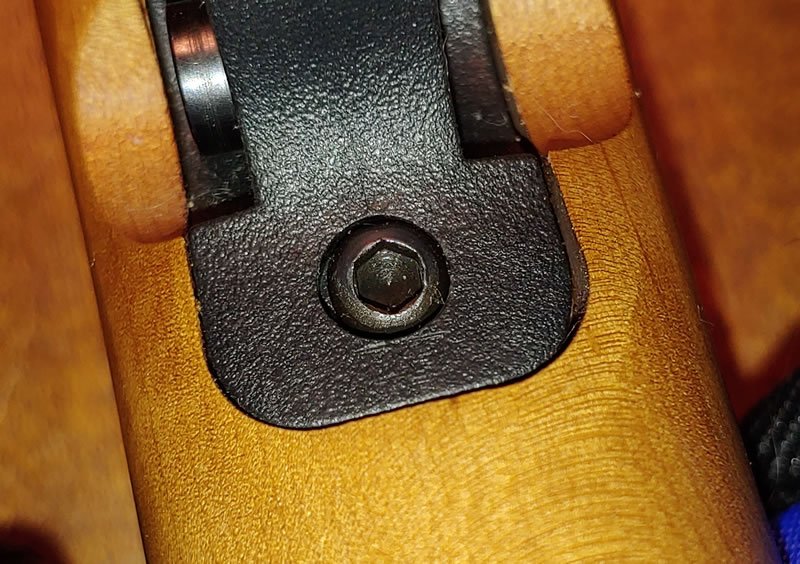
I bought a pair of Marlin 60s about six or seven years ago. I was going to break them down to inspect, clean and lube as I do with all my new guns. I found that the takedown screw heads are unworkable. From the pics, it's obvious that the heads were some kind of hex at some time. However, I've tried both my metric and English sets on them and no dice. They're either some exotic size I don't have or were stripped at manufacture.
Other things came up at that time and I didn't fiddle with them any more. Now I've pulled them out again and want to fix the problem.
All I can think to do is to take a file and cut a slot in the heads so I can use a regular screwdriver to back them out and then replace them. The problem with that is that the rear screw is somewhat recessed and I might not be able to cut into it far enough to get a good bite with a screwdriver. I could also try to wedge a larger wrench in there in the hope it would grab enough to start backing them out.
Before I start anything I wanted to see if the MDS brain trust has any ideas.

")
 Which to try first?