Doco Overboard
Ultimate Member
Heres a do it your self project for those who like that sort of thing. Fitting a Graco adj. pad to get your gun to fit you a little better.
The local gunny has a monthly trap shoot that Ive been participating in that's a lot of fun and a great opportunity to be with more experienced shooters, learn from others increase skills and all of that.
Anyhow I bought a budget shotgun that has a break action for ease of use and well to just get another gun really but anyhow it didn't fit me worth a dam so I had to do something about it to make it better. Lop too short, drop at stock not right for the size of my face etc etc.
First thing is, if you can get a gun that fits you better from right off the bat your way ahead. A first time project like this for me was almost not worth the effort to get it done decently. So if you don't like a lot of grinding gluing or doweling or your worried about messing up your butt-stock up this may not be for you. By picking up a budget gun trying to save a buck all I really needed to do was shop more to find something that fit better but I didn't. The good side is, if I drop this one in the river or drive off with it leaning on my truck or something stupid like expecting it to be returned in the same condition it's not an entirely huge loss, so this is how I did it.
Get your adjustable pad from your favorite supplier. Strip your existing recoil pad and associated parts by setting them to the side. (just get a new recoil pad when you order that needs ground and do it attached to the aluminum parts it's easier later on.)
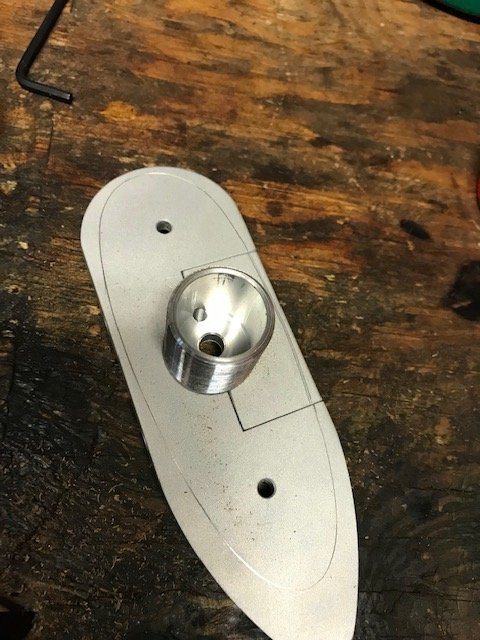
Remove buttstock from the arm so you can access the work better. Sister up the metal parts carefully and using a scriber mark the outline of the metal parts. Once you have the non moveable piece accurately marked,assemble the two plates together so you can transfer the pattern from the stationary plate to the moveable plate.
Use a long parallel clamp to hold the parts in position before you scribe. This is a metric gun so the pre-drilled holes in the plate didn't allow the parts to be fit by screwing the plate into the existing holes to fasten it. Just starting the screws in the existing holes and thinking it's good enough is not a good strategy. Rarely will this ever be able to be done accurately because of the frequent install and removal during fitting and you may have already figured out that some of these steps need to happen simultaneously to get the best results.I foolishly did not order a new recoil pad that could just be ground down to fit the aluminum plates once they done trying to re-purpose the old pad was a severe handicap because its already ground to shape.
View attachment 268280
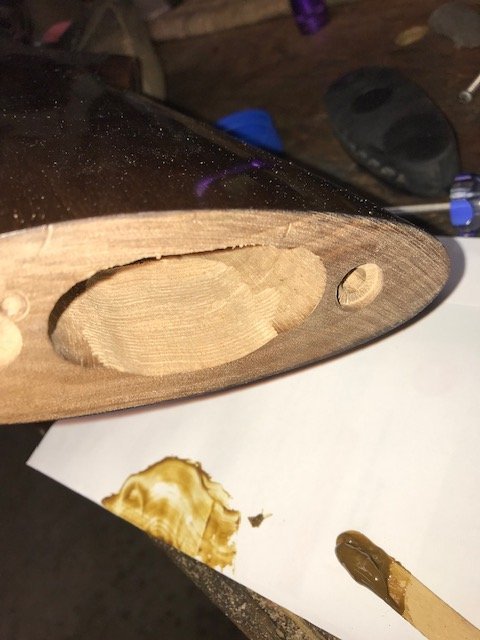
Make sure you have enough clearance in the stock mortise to get the full range of movement for your parts on final install. Simply removing the threaded dog will allow you to do this without holding multiple parts that need to be aligned before you mark the aluminum parts for grinding/cutting. I just used a die grinder with a oblong rasp chucked into the air tool.
View attachment 268281
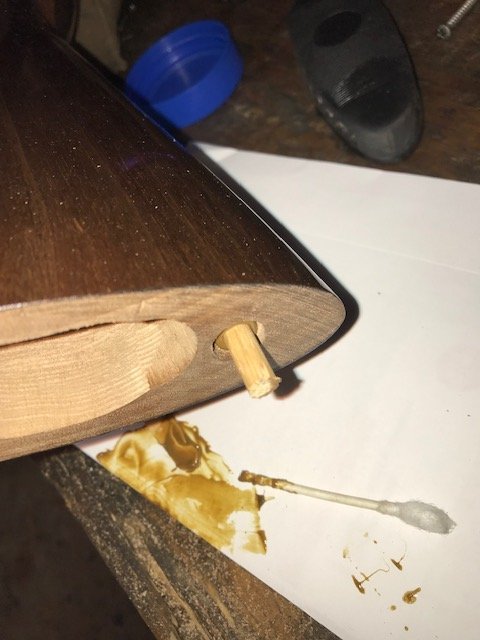
Glass some hardwood dowels in place. Once the glass sets up, use a sharp 1/8" chisel to make off the dowels. Having dowels installed will allow the base plate screws to be firmly set in place. This stock has been counter drilled to accept the old recoil pad. Cutting grooves around the dowels with a bench knife allows the glass to squeeze out some so they don't lift out of the bottom of the hole wrecking the bond.
View attachment 268282
Now the hard part, fitting parts to a stock that has not been finished is obviously a whole lot easier. With a finished stock protect the area with blue painters tape while your handling it.
The aluminum parts have a large amount of metal that needs to be removed before you can begin to approach the scribed lines. Firmly attach the base plate to the stock by drilling new holes in to the dowels while verifying alignment.
Remove the base plate then use a band-saw to remove the bulk of excess material, a bench mounted grinder to get a little closer while frequently checking alignment and then closer with a bastard cut 12" file. The trick is to keep the edges square until you just approach the scribed lines.
Using the squared up table on a powered belt sander with 60 grit paper get right up to the lines you made but not past them by carefully holding the stock off the belt sander to the base plate almost to the width of the line you made.
Remove the base plate and fasten the moveable plate minus the dog together. Use the base plate as the guide to bring the parts equally together.
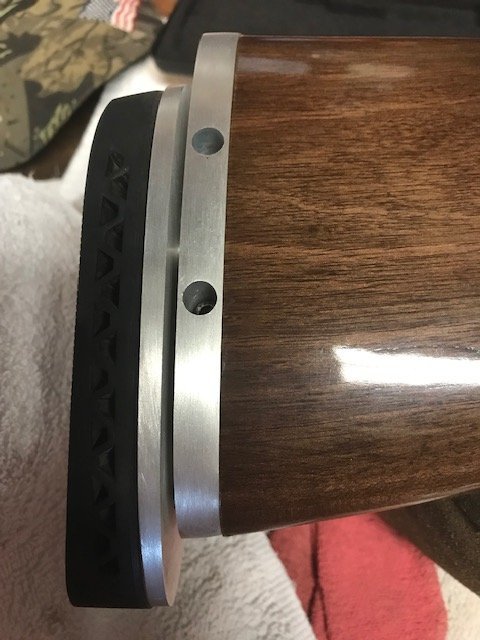
Full stop! Trace the outline of the moveable plate onto the recoil pad with a silver pencil or something you can plainly see. From here on out the recoil pad will be the sacrificial part instead of the finished stock. Fasten to the moveable plate then sand till it fits just right. Using the file dress it to the perfect shape of the stock keeping it square, checking fit frequently and adjusting as necessary. Remove the pad, attach the base plate to the movable plate and dress the parts to remove scratches or errant marks for final appearance. Lightly touching the assembly to the belt sander will produce an even finish.
Once everything has been pieced together, tape a drinking straw to the rib of your gun at the breech. With your eyes closed, shoulder your gun with your head positioned on the stock. When you open your eyes you should be looking right through the straw. If you have about the width of two knuckles to your cheek bone while grasping the wrist the lop should be close for a right handed shooter. Do it again while looking in the mirror to make sure the barrels are vertical. Adjust further to suit your own needs, go try to pick up a few more clays per round if you can. One last thing ,with a new pad you can also adjust pitch as long as your not minus for LOP using this method.
View attachment 268283


