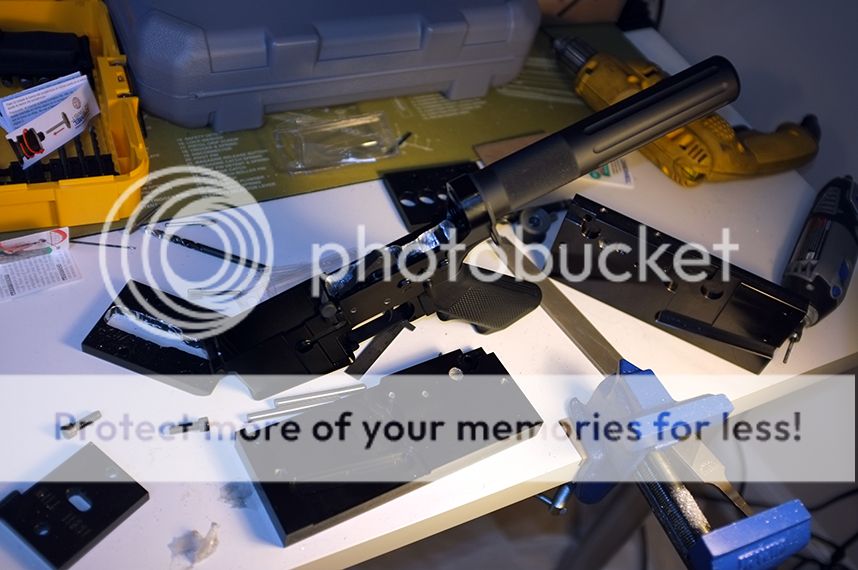
This is not meant to be a guide. I'm just showing my process for completing my 80% lower. There may be a few details that I forgot to include. Also note that the Dremel tool or the bits were not designed to remove large amounts of material. Most of it was removing layers of barley 1 or 2 millimeters with precision. Using it for long periods also overheated the Dremel a few times.
I decided to try to complete an 80% lower with only a Dremel. Mainly because I didn't have access to any other machines and sometimes the hard way is more fun. I figured it would be pretty difficult but doable. I setup an area in the corner of my apartment to try and minimize debris from spreading around. I used a disassembled post office priority box as a little wall to keep little pieces of aluminum from flying away. In total it took about 21 hours, 2 hours every day starting on Monday thru Friday, 6 on Saturday and 6 more on Sunday including cleanup and little breaks. Every once in a while my wrists would hurt from the position I was holding the Dremel in. The table was so low I would be in awkward positions trying to see inside and keep the Dremel straight. At the end when I had to get really close to see what I was doing, I was on my knees with my face straight in the receiver. That's why I had the face mask to keep anything from going in my mouth and nose. There were a few points at the beginning when I wanted to give up. It looked like I would never get done. Especially when the Dremel gave out on me and I had to put more money into something that was already getting pretty expensive.... Anyway... here's the process.
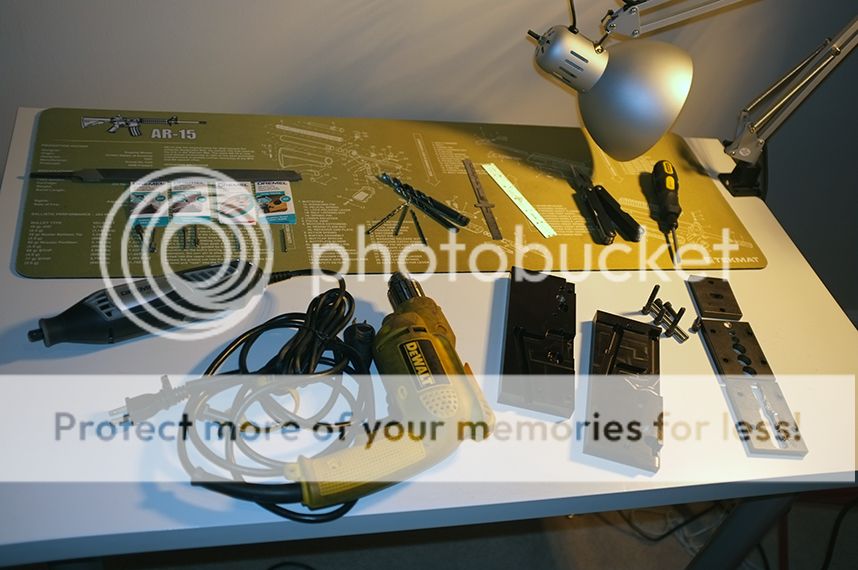
The tools:
Drill
Dremel (2 of them, I broke one...)
Depth ruler
Regular ruler
Multi Tool
Flat head screwdriver
80% Jig
Various high speed cutting Dremel bits (194, 115, 9901, 117) (@ 20,000 RPM for aluminum)
Various drill bits (3/8, 1/8, 3/32, 5/32, 15/64, 7/64)
Lamp
Vise
Safety glasses (!)
Hearing protection (!)
Face mask (!)
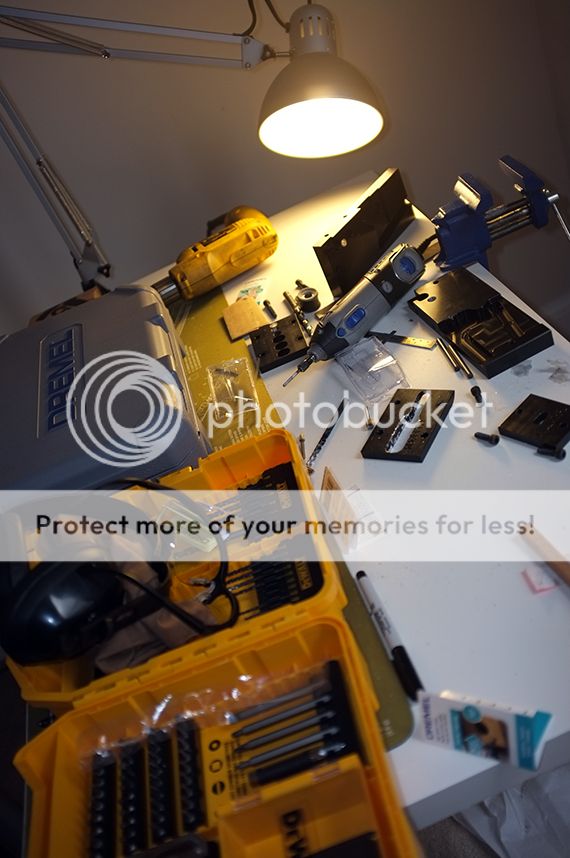
Work Area: You can see in this photo the Dremel wasn't very nice to the top guide of the jig.
1 Hour into work with the Dremel... Instant regret... So I decided to use the drill to drill out most of it. I had to do this carefully since I was doing it by hand. At first I only did the top half of the pocket. I drilled slowly and tried to stay as close to the center so I wouldn't drill into the sides. I used the ruler and the measurements from the blueprint to mark the drill bit so I wouldn't drill too far down. I used very cautious measurements to give me a little extra material because the drill bits would leave little pockets at the bottom. I would remove them later with the Dremel.
Note: I used the hand drill to drill out the pin holes and the hole for the safety selector switch. Pretty easy and straight forward with a hand drill. The jig kept me from screwing this up and kept the bits straight. I didn't take any pictures of this process because it was done when I was getting frustrated with the Dremel and decided to get the drill. I thought I was over my head and I stopped documenting everything for a short time.

I drilled away most of the material but since I didn't use a guide it was kind of all over the place. I used smaller drill bits to drill around the larger holes, that's why I used so many sizes. I then used the Dremel to remove all excess material and create the top of the pocket.

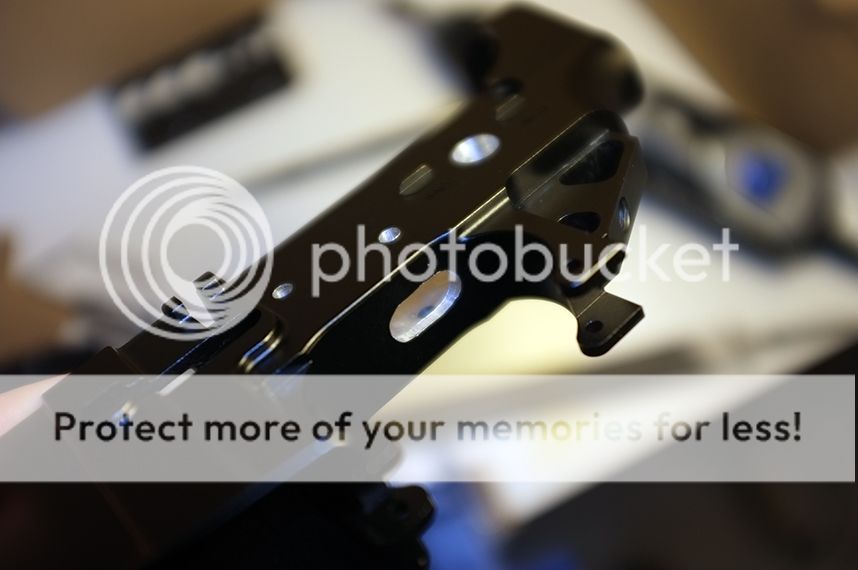
The back was a little difficult because the Dremel would hit the circle where the buffer tube screws in. I had to lower the bit from the Dremel as far as I could without letting the Dremel throw it if I applied too much pressure. I had to keep going back and removing more material because when I tested the upper it would not alight properlyand let the pin close. It was too far forward so I had to remove a little more from sides in the back where it starts to round off.
Annnnd... the Dremel motor is now seized. I had to run to Home Depot and buy another one, I've gone too far to give up...

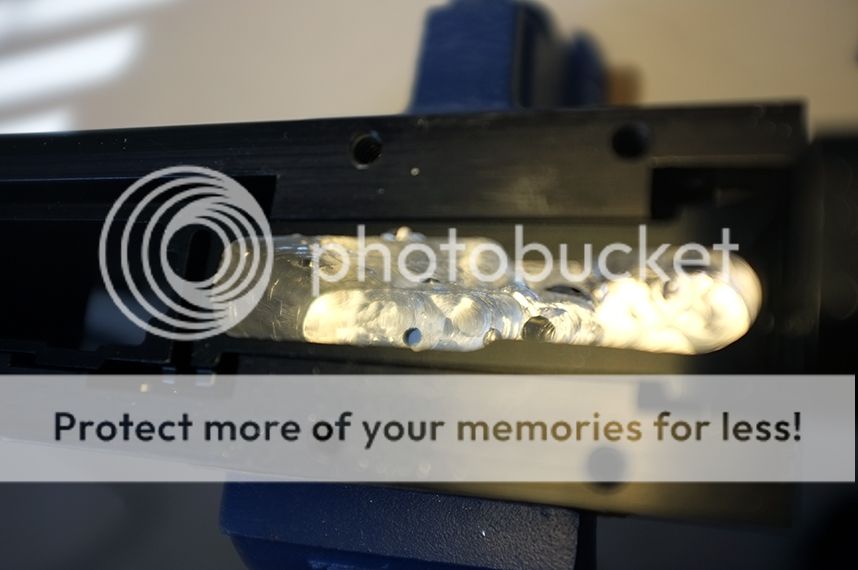
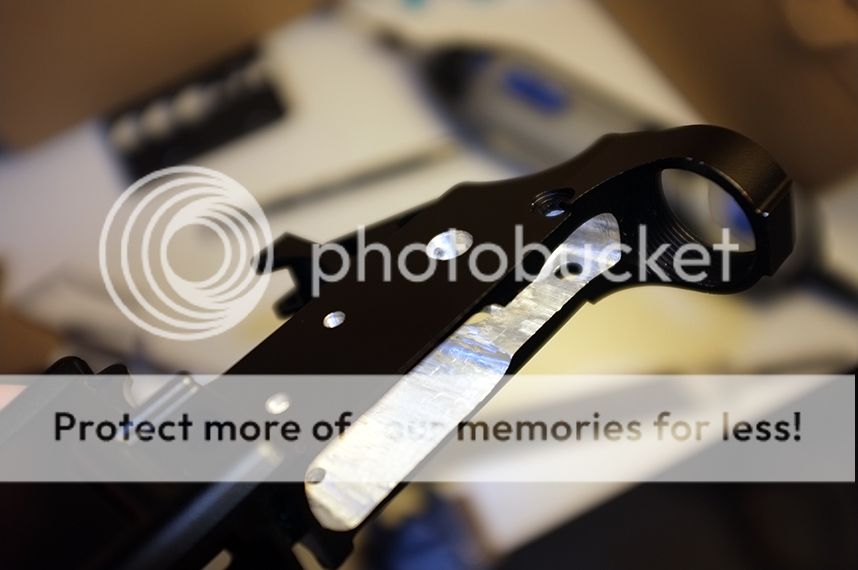
Most of the material was removed at this point but there was still a lot of material left at the bottom and sides. I had to use the Dremel with the High Speed Cutter (115) to remove that. This was the part that took the most time since it had to be very precise without removing too much material from any one spot. I stopped every once in a while to take measurements and make sure I wasn't removing too much from any one spot. At one point I had almost .300 left on the black and .100 on the front. It's hard to see if its even. I could only tell with the depth ruler.

Most of the bottom and sides are done... or so I thought..
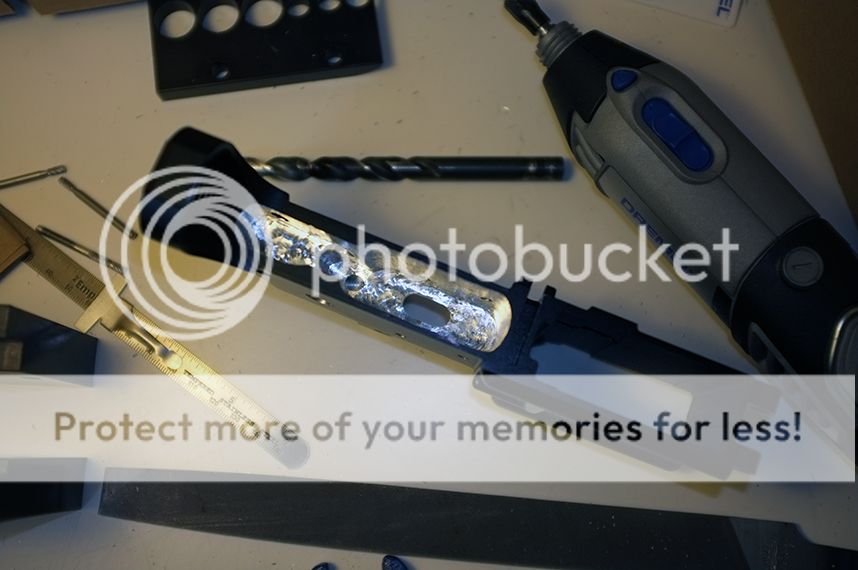
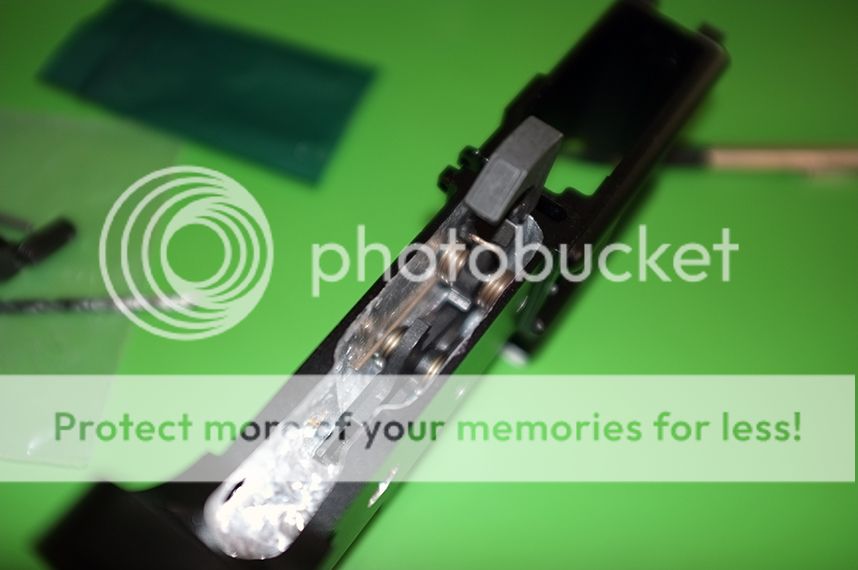
I had a lot of trouble trying to figure out how to drill out the trigger hole. The jig was of no help since I wouldn't be able to tell If I was holding the drill straight. I used my other AR and the blueprint to take measurements of where to drill. I used only the Dremel with Tungsten Carbide Cutter (9901) for the process. I had to be careful because the Dremel would not go down far enough without the piece that holds the bit scratching the top of the pocket or rubbing against the sides on the inside.
After I thought everything was complete I tried to put the trigger and hammer in only to realize the walls were just a tiny bit too thick... I had to go back and forth several times to remove material and try to get the parts to drop in smoothly. Then I had a problem with the front wall. The bottom of the hammer would rub against this. I had to remove about .050 of material from the receiver to let the hammer move freely. I used the Dremel with the High Speed Cutter Bit (115) to smooth the walls out as best I could.
I decided to try to complete an 80% lower with only a Dremel. Mainly because I didn't have access to any other machines and sometimes the hard way is more fun. I figured it would be pretty difficult but doable. I setup an area in the corner of my apartment to try and minimize debris from spreading around. I used a disassembled post office priority box as a little wall to keep little pieces of aluminum from flying away. In total it took about 21 hours, 2 hours every day starting on Monday thru Friday, 6 on Saturday and 6 more on Sunday including cleanup and little breaks. Every once in a while my wrists would hurt from the position I was holding the Dremel in. The table was so low I would be in awkward positions trying to see inside and keep the Dremel straight. At the end when I had to get really close to see what I was doing, I was on my knees with my face straight in the receiver. That's why I had the face mask to keep anything from going in my mouth and nose. There were a few points at the beginning when I wanted to give up. It looked like I would never get done. Especially when the Dremel gave out on me and I had to put more money into something that was already getting pretty expensive.... Anyway... here's the process.
The tools:
Drill
Dremel (2 of them, I broke one...)
Depth ruler
Regular ruler
Multi Tool
Flat head screwdriver
80% Jig
Various high speed cutting Dremel bits (194, 115, 9901, 117) (@ 20,000 RPM for aluminum)
Various drill bits (3/8, 1/8, 3/32, 5/32, 15/64, 7/64)
Lamp
Vise
Safety glasses (!)
Hearing protection (!)
Face mask (!)
Work Area: You can see in this photo the Dremel wasn't very nice to the top guide of the jig.
1 Hour into work with the Dremel... Instant regret... So I decided to use the drill to drill out most of it. I had to do this carefully since I was doing it by hand. At first I only did the top half of the pocket. I drilled slowly and tried to stay as close to the center so I wouldn't drill into the sides. I used the ruler and the measurements from the blueprint to mark the drill bit so I wouldn't drill too far down. I used very cautious measurements to give me a little extra material because the drill bits would leave little pockets at the bottom. I would remove them later with the Dremel.
Note: I used the hand drill to drill out the pin holes and the hole for the safety selector switch. Pretty easy and straight forward with a hand drill. The jig kept me from screwing this up and kept the bits straight. I didn't take any pictures of this process because it was done when I was getting frustrated with the Dremel and decided to get the drill. I thought I was over my head and I stopped documenting everything for a short time.
I drilled away most of the material but since I didn't use a guide it was kind of all over the place. I used smaller drill bits to drill around the larger holes, that's why I used so many sizes. I then used the Dremel to remove all excess material and create the top of the pocket.
The back was a little difficult because the Dremel would hit the circle where the buffer tube screws in. I had to lower the bit from the Dremel as far as I could without letting the Dremel throw it if I applied too much pressure. I had to keep going back and removing more material because when I tested the upper it would not alight properlyand let the pin close. It was too far forward so I had to remove a little more from sides in the back where it starts to round off.
Annnnd... the Dremel motor is now seized. I had to run to Home Depot and buy another one, I've gone too far to give up...
Most of the material was removed at this point but there was still a lot of material left at the bottom and sides. I had to use the Dremel with the High Speed Cutter (115) to remove that. This was the part that took the most time since it had to be very precise without removing too much material from any one spot. I stopped every once in a while to take measurements and make sure I wasn't removing too much from any one spot. At one point I had almost .300 left on the black and .100 on the front. It's hard to see if its even. I could only tell with the depth ruler.
Most of the bottom and sides are done... or so I thought..
I had a lot of trouble trying to figure out how to drill out the trigger hole. The jig was of no help since I wouldn't be able to tell If I was holding the drill straight. I used my other AR and the blueprint to take measurements of where to drill. I used only the Dremel with Tungsten Carbide Cutter (9901) for the process. I had to be careful because the Dremel would not go down far enough without the piece that holds the bit scratching the top of the pocket or rubbing against the sides on the inside.
After I thought everything was complete I tried to put the trigger and hammer in only to realize the walls were just a tiny bit too thick... I had to go back and forth several times to remove material and try to get the parts to drop in smoothly. Then I had a problem with the front wall. The bottom of the hammer would rub against this. I had to remove about .050 of material from the receiver to let the hammer move freely. I used the Dremel with the High Speed Cutter Bit (115) to smooth the walls out as best I could.


")


 I don't have the patience or the motivation to ever do that.