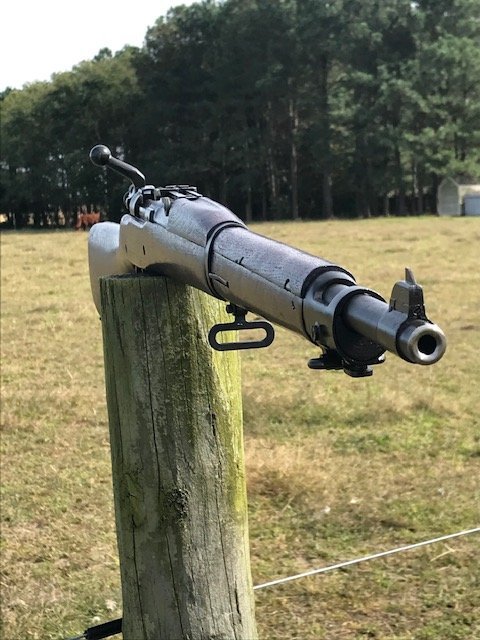
I have this old 03

The #1 community for Gun Owners of the Northeast

Member Benefits:

  • No ad networks!
  • Discuss all aspects of firearm ownership
  • Discuss anti-gun legislation
  • Buy, sell, and trade in the classified section
  • Chat with Local gun shops, ranges, trainers & other businesses
  • Discover free outdoor shooting areas
  • View up to date on firearm-related events
  • Share photos & video with other members
  • ...and so much more!
  • Doco Overboard

    Ultimate Member
    Ok, now were going to make something happen. Clean and inspect your threads. Dry them with carb cleaner or some other sort of solvent that quickly dries. The barrel should screw in easily by hand and not get hung or grab excessively. Were going to install without grease or lube, that's because of the square threads.
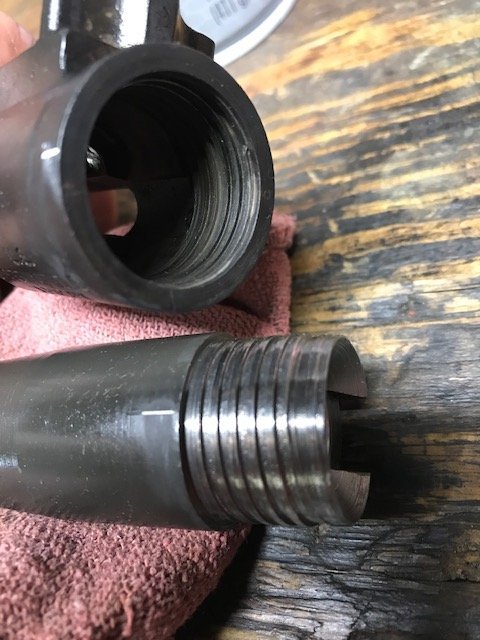
    Thread Clean.jpg

    Make sure you have enough crush once tightened. Theirs table top methods for peening or rolling the barrel shoulder if the right amount of torque cannot be achieved or if the barrel will over index. We don't have to get into that here because we have a pretty good fitting barrel. The barrel is a High Standard rebuild barrel which are known for quality and accuracy. HS made the Smith Corona barrels for the 03A3.
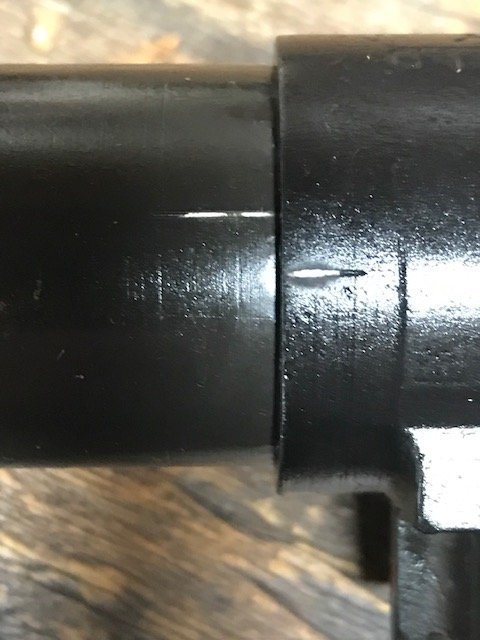
    Index-Crush.jpg

    Chuck that sucker up in your rigging, just like we did when we freed the old one. That wrench pointing slightly downward will give good leverage as you pull upwards and allow you to see the index marks as they meet. Use your legs with your arms locked tight not your back or arms.
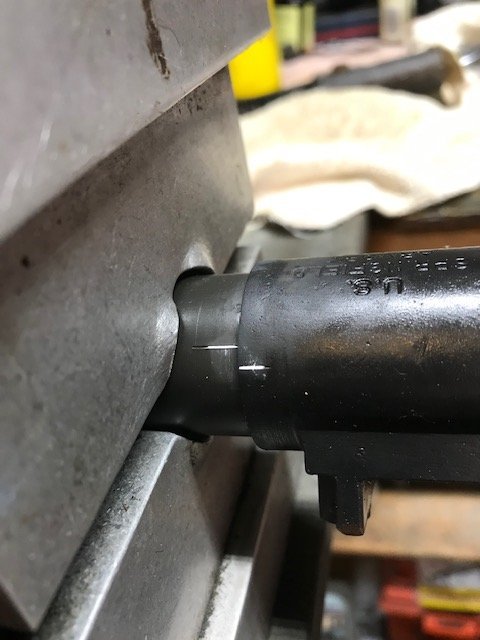
    IMG_1950.jpg

    Give it a good smooth even steady pull. looks pretty good so far.....
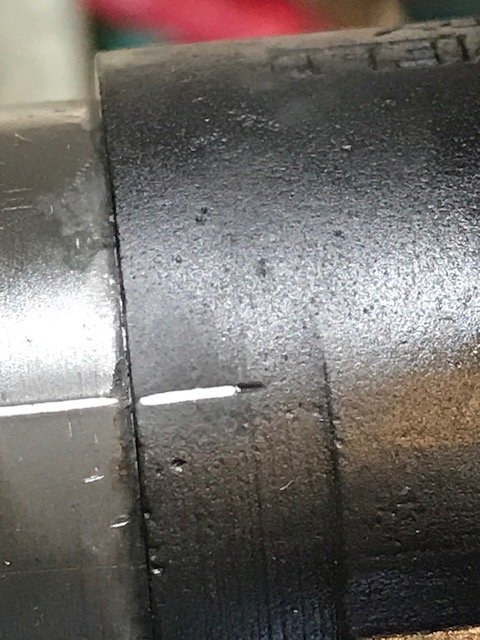
    Twitch 1.jpg

    Even better! No sense in rushing. Take the time to look things over and make sure it's right. Some barrels on different US rifles will all be a little different regarding crush and initial index. The 03A3 barrels often have a little more initial index which means you will sometimes have to run the barrel up and down to tight to get the right amount of bump needed to index them. Just go slow and smooth to prevent heat and galling or try to perform a miracle.

    Every once in a while you may have to skim a little off the barrel shoulder. M17's are usually close to the mark but seem to tighten more rapidly. The diameter of the barrel stub is larger as well. Garands can be anywhere in between but are usually close to index and need rolling out or peening for a take off barrel.
    You never know what your going to get.
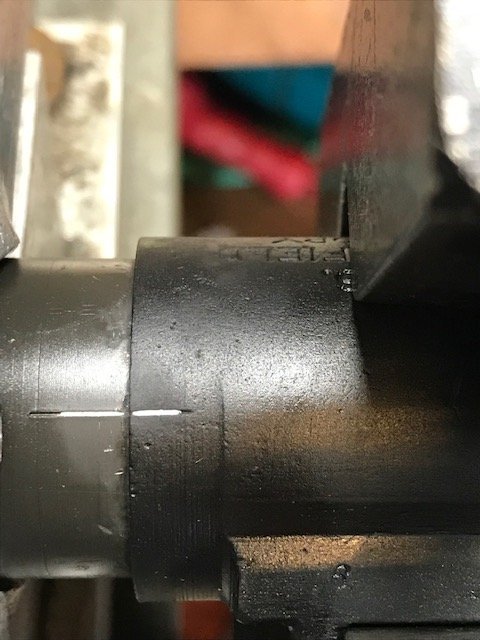
    Twitch 2.jpg

    Strip your bolt entirely make sure the chambers clean and dry and get your gauges. I marked them 1 2 3 in the next picture if you can see them so you can get an approximate idea of how far the bolt will rotate towards battery. Use a light touch and don't force the hardened gauge in to the chamber! Let gravity do its thing.
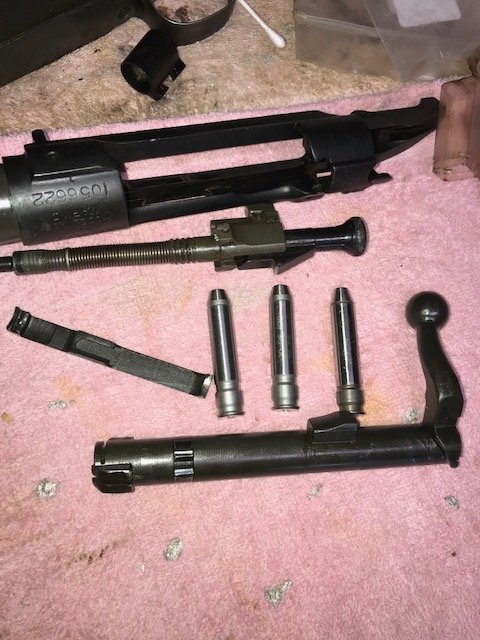
    IMG_1955.jpg

    Here is the go gauge No 1 which will indicate the bolt will close and the chamber is to full depth. The chamber and bolt combination are within minimum chamber dimension but will still accept a cartridge to the maximum dimension without causing excessive pressure.
    The bolt handle should fall with a little tink as it hits the receiver.
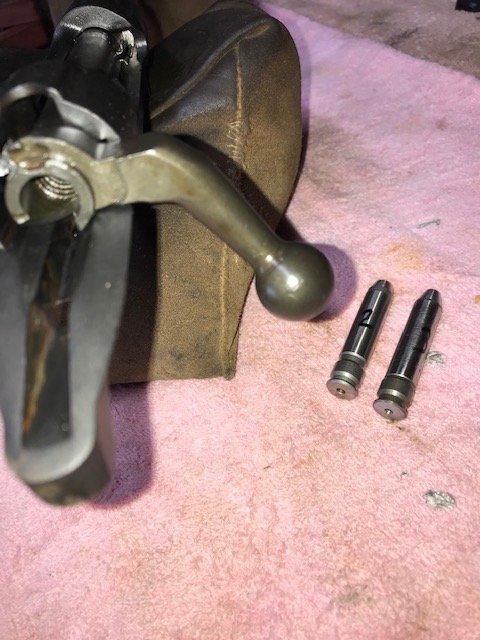
    IMG_1957.jpg

    No 2 the No Go proves the chamber is not longer than spec established by the longest cartridge dimension that would normally be encountered with factory ammunition. The no go is an intermediate gauge that demonstrates the chamber adequately supports the brass case allowing it to be fired without excessive stretching. A chamber that closes on a no go does not mean its unsafe, just that there is enough tolerance to be at or near the max dimension.
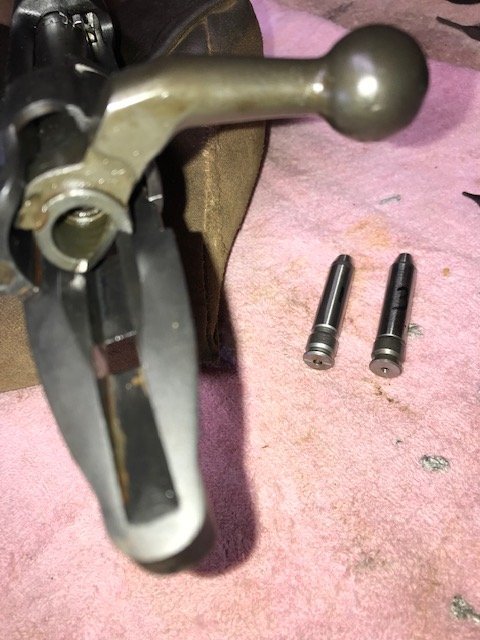
    IMG_1958.jpg

    The field gauge, is used when the chamber doesn't pass the no go gauge (the bolt closes) to ensure that the chamber is within the realm of safety regarding the cartridge cases ability to resist separating upon firing.
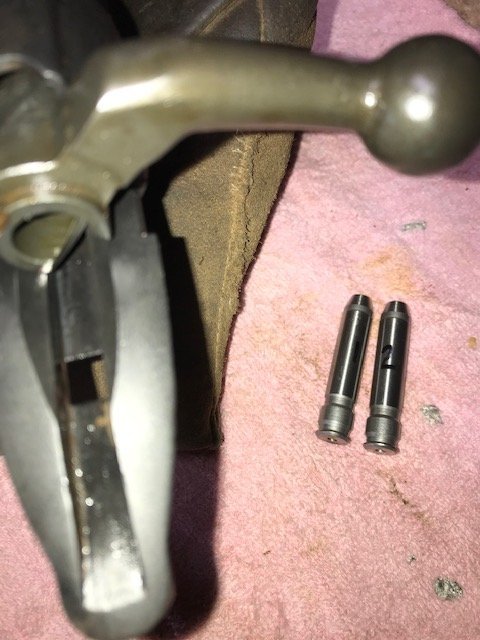
    IMG_1959.jpg

    Wait..... theirs another one! The one that matters because my rifles don't shoot no stinking gauges.
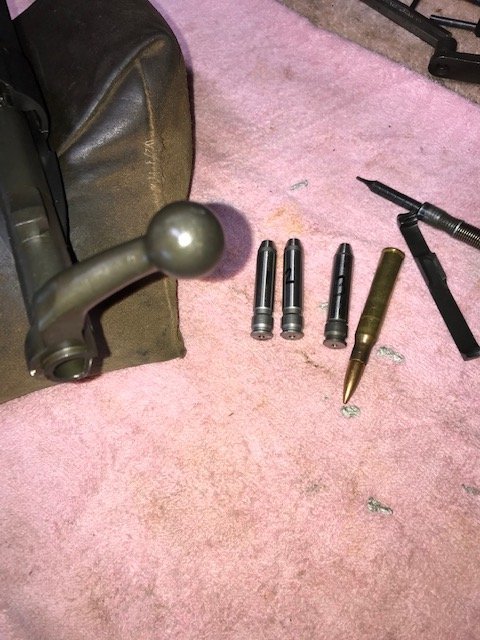
    IMG_1961.jpg

    See next post for more.
     

    Doco Overboard

    Ultimate Member
    I check with a M2 dummy cartridge to make sure the bolt doesn't drop shut with a tink like it did with the Go -Gauge. I want to just feel the vert slightest amount of resistance when going into battery because this is a bolt action rifle.
    If you ever do an M1 you better dam well make sure M2 ball allows the stripped bolt to just drop shut. The chamber should just allow a little more radial clearance and length for safety due to being semi-automatic. You don't need or want a semi auto resizing die.

    View attachment 295094

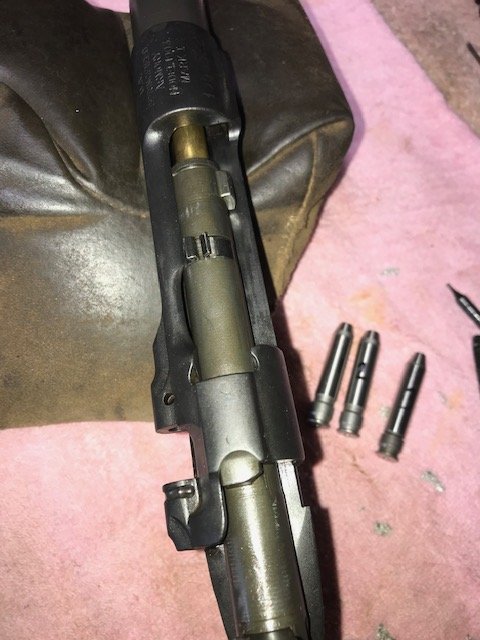
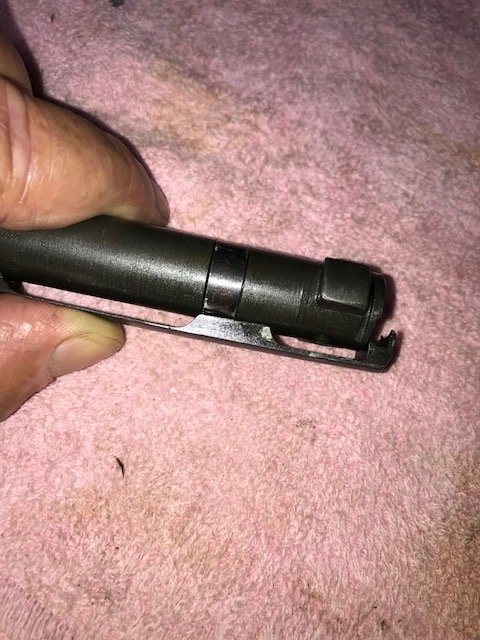
    Here's how I remove the extractor. Notice the thumb at the rear of the spring. Thats what the extractor is, a spring with a claw at the end of it. I rotate the bolt to the dis-assembly position and push in with the thumb. By doing that you will relieve tension at the front of the spring to allow it to be pushed forward over the bolt head and up and out of the guide foot slot. It will pop off and right back on. If the extractor doesn't have much tension it will almost always lead to feeding difficulty.
    Consequently, on a Mauser 98 the claw guide foot slot is very slightly beveled to increase tension on the cartridge extraction groove as the bolt is lifted increasing extraction camming force on the spent case.
    We didn't steal or use that feature that when we glommed the 98 design for the Springfield's.

    View attachment 295095

    Extractor in its final position. This bolt has a stamped extractor collar. You should make sure it doesn't protrude very much above the bolt sleeve body. It will drag inside the bolt raceway and make the action sticky or rough. Especially when its completely withdrawn rearwards.

    View attachment 295096

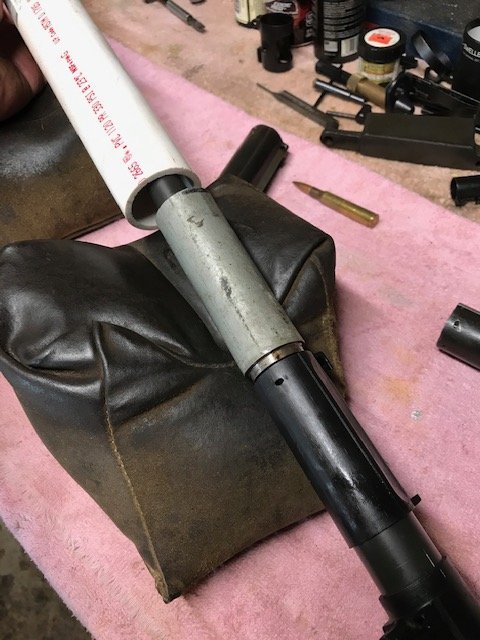
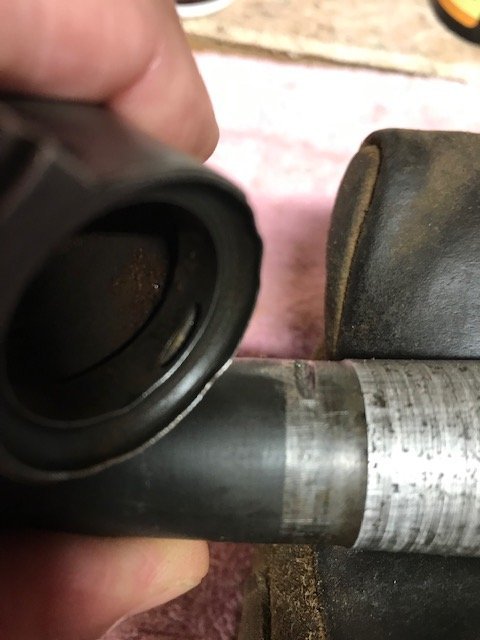
    What the hell is this mess?

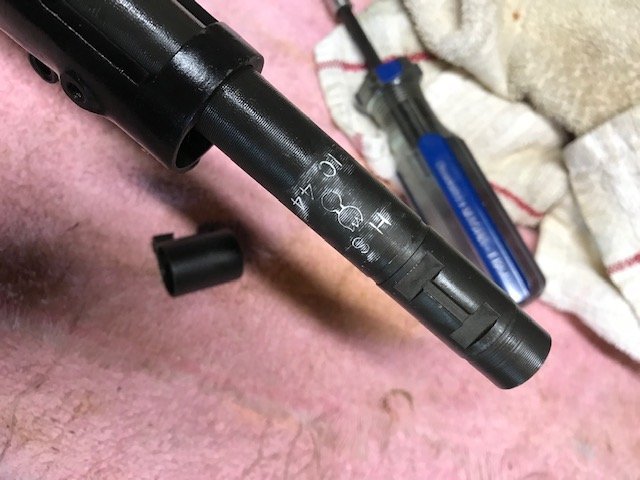
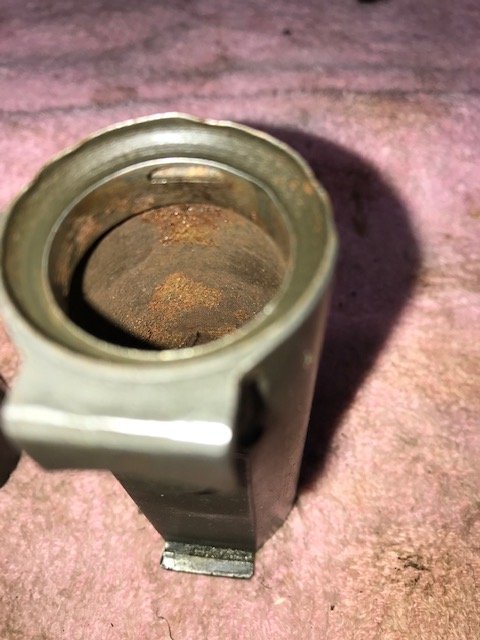
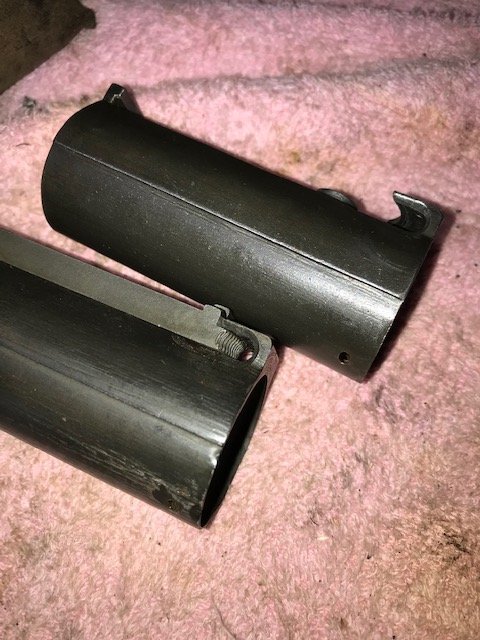
    You can see a piece of pipe with a radius cut around the circumference that just fits inside the recess located at the front of the collar.
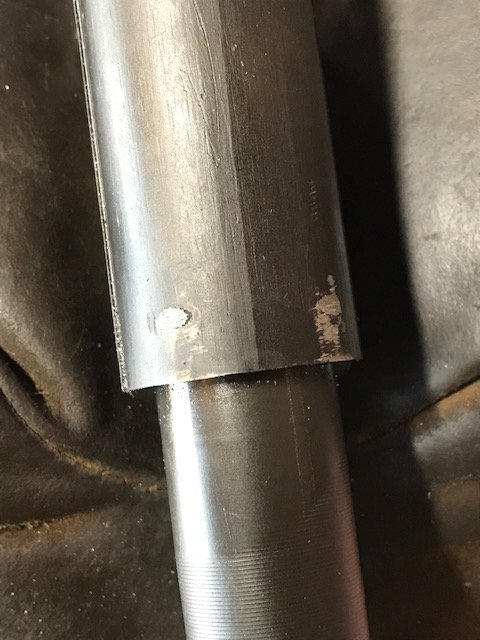
    Dont worry, I found the other special piece of pipe and ditched the PVC for the other piece of pipe that just slips over the barrel and will allow the collar to be driven home with aplomb.

    I was going to do it though. I though one of the youngins took my precision pipe and made it into a post for a trail camera or something but I found it!

    Use painters tape or something to protect the barrel exterior finish and put a piece of electrical tape or vinyl plug cap on the muzzle.

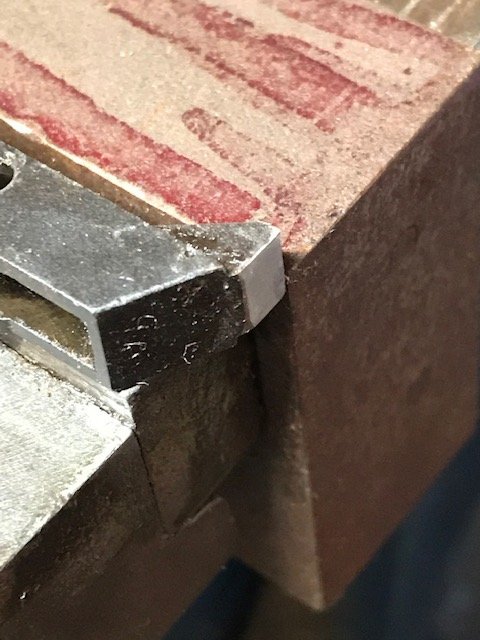
    Clamp the reciever into a bench vise at the milling of at the bottom of the reciever side walls to hold it firmly.

    View attachment 295097

    Lubricate the barrel exterior so the collar can be driven on from the muzzle while the reciever is captured in the vise.
    I use alot of that spray on white grease that comes in a can for stuff like this.
    Same stuff you maintain vehicle door locks and tailgate latch's with.

    Take your time and line up the sculpted index marks to the reciever. This could be considered a critical task because once you start you can drive the collar on out of alignment, but you can steer it by twisting with your hand if you have to. Get an assistant to work the hammer if you must. Use a big one with a little mass to it.

    Less hits= more accuracy and less fatigue which increases margin of error.

    View attachment 295098

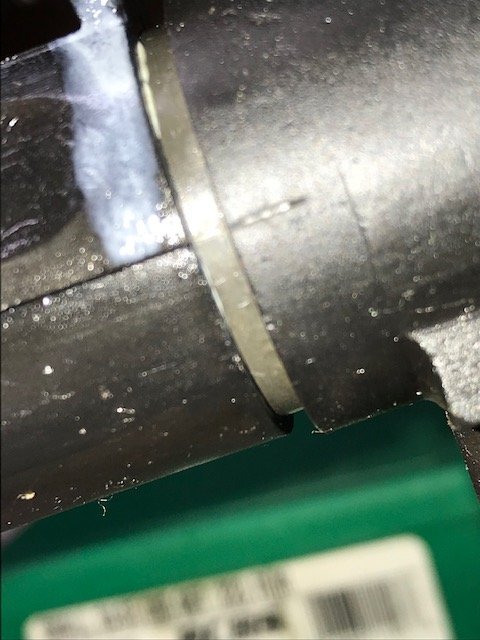
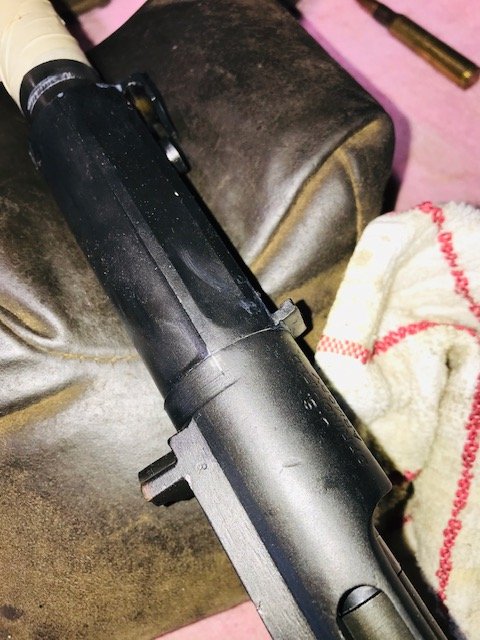
    Drive that sucker right up to the ring of the receiver nice and tight. Nothing worse for appearance than a dinged up gap that looks like crapola.
    When the collar is up tight you really don't need to rely on the transverse and rear pin at the breech end of the barrel if everything goes right and you have well fitting parts.
    We'll still install the transverse pin to make sure nothing moves in the future and the fitting is done as well as possible.
    The good thing about these collars, is that they are slightly malleable and they're one of those things that seem to fit in a wide variety of applications.

    Sometimes you may want to polish the barrel if you think you need to. You can fit them by hand so far but they really start to grab about a 1/2" from the reciever. if you screw it up you may get lucky and be able to Kung -Fu it off with a little heat and patience.

    This ones tighter than a buzzards ass in a power-dive. We will not pin the base until we check the level with the front site base once its installed.

    View attachment 295099

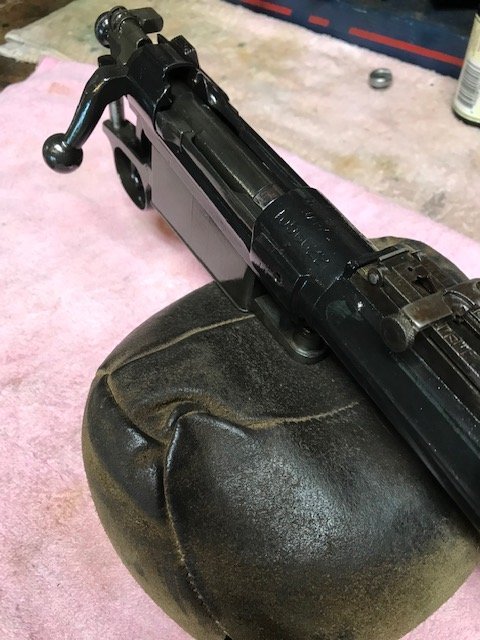
    At some point you can throw your parts together to check out your progress for inspiration.

    View attachment 295100

    I need to locate a front site spline for a 03A3. The old one was stuck in the old barrel and I couldn't free it without destroying it. Im not sure if I have one on hand. I know I have M17 splines but they are too wide. Worst case the hardware store should have something.
    Once we get one we can land the front base.

    View attachment 295101
     

    JamesDong

    Banned
    BANNED!!!
    Aug 13, 2020
    3,260
    Duffield, Va
    While I have a few of them and probably biased I think 03's are just so damn sexy. :o I can't imagine a boot doing 96 count manual of arms with a plastic pos doing anything for the bicep!
     

    Doco Overboard

    Ultimate Member
    Anyhow, small bits here.
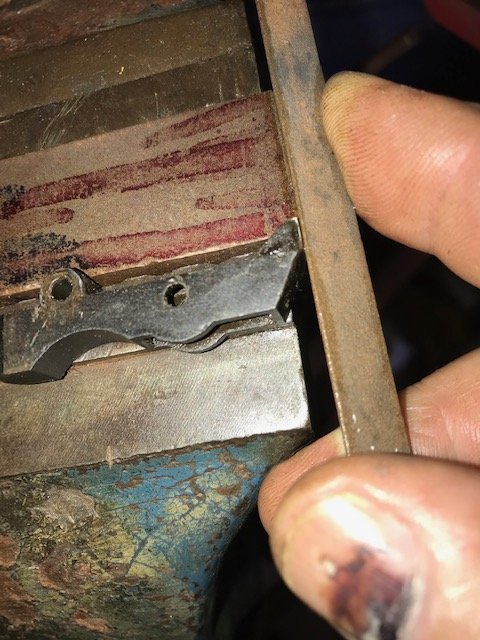
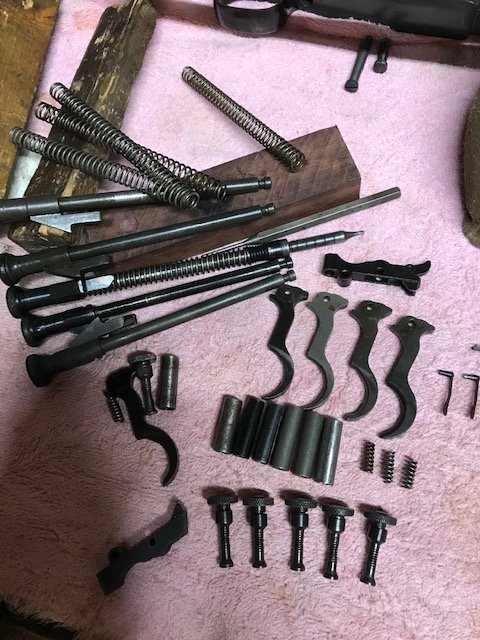
    Here's a small pile of 03 and A3 parts. If you look at the triggers you'll see some that are thicker down towards the bottom where it comes to a point. The rifle were working on had an A3 trigger in it that's separated to the left with a stock ferrule, wingage knob and sear spring.

    Were going to exchange it with one that has a pointy tip at the bottom which is for an O3. The A3 triggers are bulkier at the bottom and have a thicker center section and do not seem to give as a good response when being pulled. (mushy and over-travel)
    Also, the windgage knob will be switched out for one that allows a full smooth travel when making adjustments. The one that was on the rifle would very slightly drag when it was rotated. What that means is that when its turned, if the spring inside the small drum that maintains actuation tension, may allow slight movement as the apparatus centers itself unexpectedly.

    At the front face of the sight base there is an interrupted thread pattern that interacts with a radius at the front of the base. The two parts work best when carefully matched. ( I switched out the entire rear site for another I had available that worked better)

    The pile of striker rods are all for an A3 which is what was paired with the rifle. Nothing wrong with them they just don't quite give the same action as one intended for an O3. The one all the way at the bottom is the one we will be using. You can maybe just make out the different shape of the knob.

    The knobs at the end of the striker rod are not as finely made as they earlier ones that have a little bit more of streamlined shape to them. They are distinctly different in appearance when you see them side by side. The most significant factor is the sear engagement surface of the cocking piece. They are not quite as finely made and can contribute to creep, a mushy let off and slightly higher let off but can be adjusted with minimal work.

    In the picture you can see some bolt stops, striker springs and additional stock ferrules that we will select from to raise the rear of the action at the rear and provide more barrel pressure out to the muzzle. (no bolt stop either)

    The striker springs and sear springs are very important. With careful selection you can improve performance just by switching parts instead of hard fitting entirely on the sear.
    Often the safety and other bolt parts can be improved the same way. Having a decent inventory of spare parts is a huge benefit when tinkering with these rifles.

    IMG_1979.jpg

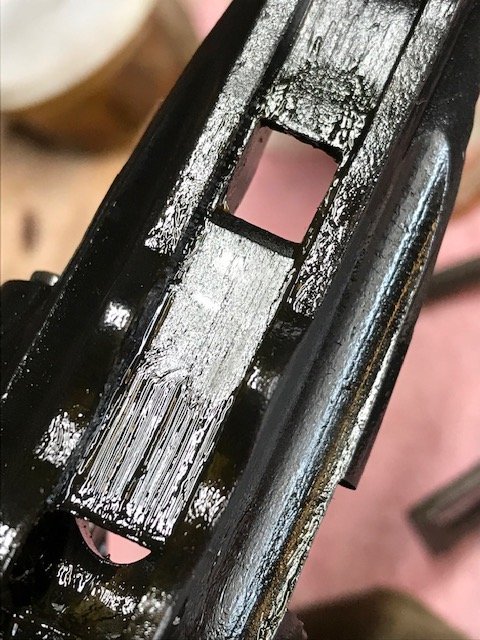
    Here we have a gooned up sear. Thats not going to give us what were looking for.

    IMG_1977.jpg

    Use a trued up steel block and fine flat stone to to flatten it out and sharpen it up. Move the stone the same way the parts move.

    IMG_1978.jpg

    IMG_1980.jpg

    Do the same thing to where the humps on the trigger interact with the bottom of the receiver. I have another medium stone that fits in that slot. You can see where the surface has very small ripples in it before starting. We are removing the finish, ripples, the same way as the trigger moves.

    Once you get everything nice and flat and smooth, get a felt bob and mirror polish the surfaces so they are nice and slick.
    Same thing with the trigger humps. the top edge of the sear surface should also ever so slightly.... be very slightly.... radiused over for the best break.
    It will also help avoid the possibility of chipping or being unevenly worn over time.

    IMG_1984.jpg

    IMG_1985.jpg

    IMG_1986.jpg

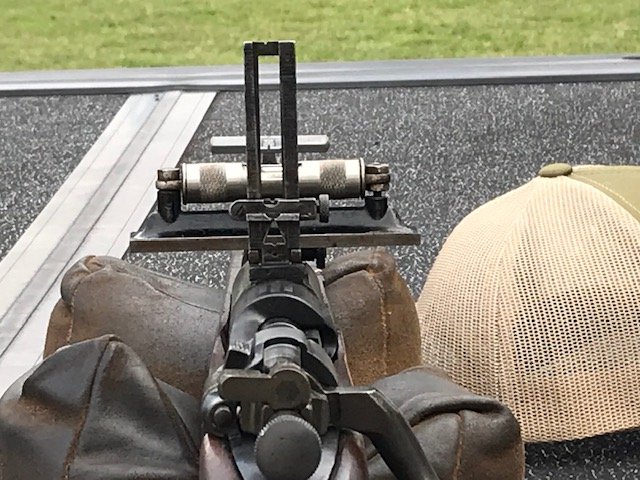
    Font site base is mounted and being checked to be alignment with the rear. Poor picture but both those bubbles are dead nuts center. All I have to do is pin the rear collar without disturbing the level. Thats still not completed yet and will be the last step.
    IMG_1989.jpg

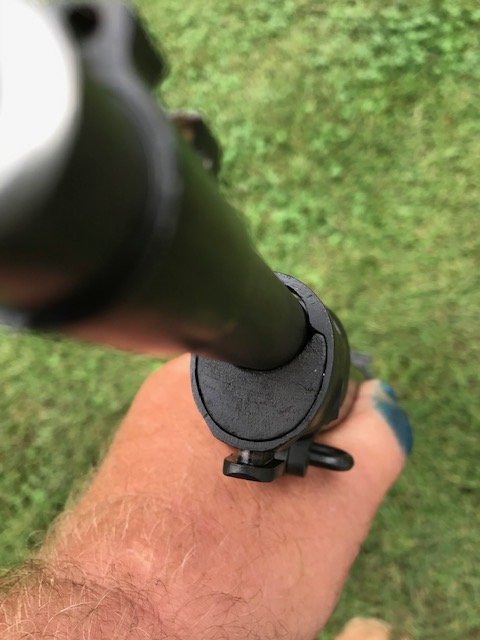
    By slightly increasing the height of the rear ferrule, downwards pressure has been applied to the bottom third of the barrel towards the muzzle.

    You can also see a gap at he top of the band when its place. The barrel needs to whip upwards the same amount and not contact the side of the stock nose for consistency. I very slightly removed some wood at the side of the stock so there was no bearing except on about the bottom third of the barrel circumference.
    I also scraped the rounded portion of the stock with a razor blade under the sight collar to make sure it was bearing evenly and at a slightly lower position to get some tension at the front. That collar acts like a bedding surface and should not be overlooked just because it fits or drops in.

    I didn't measure tension but were somewhere around 5-7 lbs muzzle pressure, the trigger is about five with zero creep and drag.Im not interested in having the lightest trigger pull possible. we need one that breaks clean right at the wall of the second stage. The striker knob also does not become cammed rearwards as the trigger is being drawn rearwards, a sure sign improvements to the trigger group can be made.

    Soot with candle black to determine what areas need attention and remember its easier to take it off that to put it on when removing wood.

    There were no significant historical artifacts that were destroyed with this project.
    Well, at least to a major degree anyhow.


    IMG_1993.jpg
     

    Doco Overboard

    Ultimate Member
    What’s your preferred method of drilling the rear sight collar cross pin?

    Drill press and V blocks so you don't have to hold both the drill and barreled action at the same time.

    The difficulty is, the hole that's already in the sight collar may be close to where where an attachment point was already located. (used barrel)
    When you try the force match the pre-existing hole in the collar to a used barrel the bit will have a tendency to walk.

    When the bit walks, it can unnecessarily oval out or tear the soft sidewalls of the collar which in turn will cause you to have to use a progressively larger and larger diameter pin to get a solid anchor.

    You can always just drill a new hole through the collar, usually on the receiver side. 1/4" to right will do just make sure it does not protrude into the bore!
    When the collar and barrel holes are close and you don't want a bunch of holes going on, heat up the pin red hot with a torch and then let it slowly cool so it will bend as its driven through. (reality is, no-one will see the holes anyway and you can soft solder them up) or :shocked4:use some sort of epoxy or plastic to hide the bodge.

    All the while you have to make sure the action of the drill doesn't want to pull the joint of the collar and receiver apart so drilling a new hole will ensure the two remain tight.

    If you keep the pin as small in diameter as possible, a cheap bit with a lot of flex is what you want to use.
    You only have to very slightly groove the outer diameter of the barrel for the pin to be able to pass through.

    Make the pin long enough so you can clip the excess of with diagonal cutters and then dress down with a smooth mill file, touch up with cold blue and your done.

    Best thing to use for a pin, find a waterproof drywall nail which is the same diameter as the nail the factory used.

    Its not as hard as it sounds is the important thing to remember.
    You could probably hit it right the first time with a cordless drill and be GTG as long as you don't damage the collar too badly or get to close to the bore:shocked3:

    I have some pictures of the pin and collar before and after its been driven through that I never posted, ill put them up when I get to the other rig with the pictures on it.
     

    Oswaldo87

    Active Member
    Feb 1, 2020
    151
    Frederick County
    Thank you. I also have a 1903 needing a new barrel and don’t think I can wait 8 months for CMP to take in my rifle. Gained some courage seeing this post.
     

    Doco Overboard

    Ultimate Member
    The pin measures around .093 which is 3/32 or just over a no.61 drill bit depending how the bit measures out.
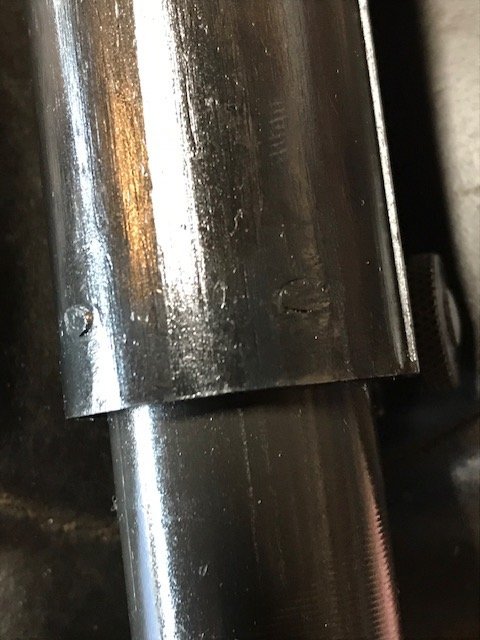
    Here you can see whats involved with the shape of the collar, where the transverse pin goes through the front portion of the body, the barrel groove and the minor diameter of the collar inside radius and how little the pin emerges through the inner collar ring.
    Also, dressed down after it's been installed then touched up.
    IMG_2013.jpg

    IMG_2012.jpg

    IMG_2006.jpg

    IMG_1997.jpg

    IMG_1998.jpg
     

    chilipeppermaniac

    Ultimate Member
    MDS Supporter
    Looks like you had to drill a hole in your thumb nail. Been there, done that.

    Also, I sure am glad for your post too. The first real center fire gun ( other than a rim fire 22) I was offered to shoot was an 03A3. Liked it so much, my first Center fire was a Winchester Model 70 in 30- 06
     

    TheOriginalMexicanBob

    Ultimate Member
    Jul 2, 2017
    32,795
    Sun City West, AZ
    The 1903...in all its forms...is a truly magnificent rifle. It was and is legendary in the American military history...and deservedly so. In its time it had few peers...the SMLE and Mauser were its peers and each had certain advantages over the others but it was there when needed and did all that was required of it...and more. It was replaced by possibly the most legendary main battle rifle of all time...the M1 Garand...but that takes nothing away from the '03 and they served side-by-side even if the '03 was secondary by that point.

    I think the 1903 is at least collectible as the Garand...it has more variations than most are aware of...but that's besides the point. The '03 is a rifle that can be collected and fired as much or more than most any other military rifle with no loss of value.
     

    Doco Overboard

    Ultimate Member
    The 1903...in all its forms...is a truly magnificent rifle. It was and is legendary in the American military history...and deservedly so. In its time it had few peers...the SMLE and Mauser were its peers and each had certain advantages over the others but it was there when needed and did all that was required of it...and more. It was replaced by possibly the most legendary main battle rifle of all time...the M1 Garand...but that takes nothing away from the '03 and they served side-by-side even if the '03 was secondary by that point.

    I think the 1903 is at least collectible as the Garand...it has more variations than most are aware of...but that's besides the point. The '03 is a rifle that can be collected and fired as much or more than most any other military rifle with no loss of value.

    As far as collectable goes one thing Ive been considering is the fact that best examples of the 03, the low number ones were often overlooked by persons who were primarily interested in a shooter example.
    What this did was preclude the finest examples of collectabilty and rarity reserved for the persons who were also the most vocal about not actually using them.
    All the while allowing them to be scooped up to be reserved for collections where value was the primary focus.
    Im talking about the no hole or early stock types, NRA sales rifles, Rod bayonet models, low digit and roll scripted models USMC SRS hits etc.
     

    Users who are viewing this thread

    Forum statistics

    Threads
    275,323
    Messages
    7,277,228
    Members
    33,436
    Latest member
    DominicM

    Latest threads

    Top Bottom