Daddy needs a beltfed.... 1919 throw together

The #1 community for Gun Owners of the Northeast

Member Benefits:

  • No ad networks!
  • Discuss all aspects of firearm ownership
  • Discuss anti-gun legislation
  • Buy, sell, and trade in the classified section
  • Chat with Local gun shops, ranges, trainers & other businesses
  • Discover free outdoor shooting areas
  • View up to date on firearm-related events
  • Share photos & video with other members
  • ...and so much more!
  • wbw2123

    Active Member
    Nov 19, 2012
    905
    Since you saw it here ( https://www.mdshooters.com/showpost.php?p=4867847&postcount=1 ) first, I guess I should do a build thread on it.

    This is how I put together a 1919 in a few days. Sorry I don't have more pictures because I wasn't expecting to do a thread on it.

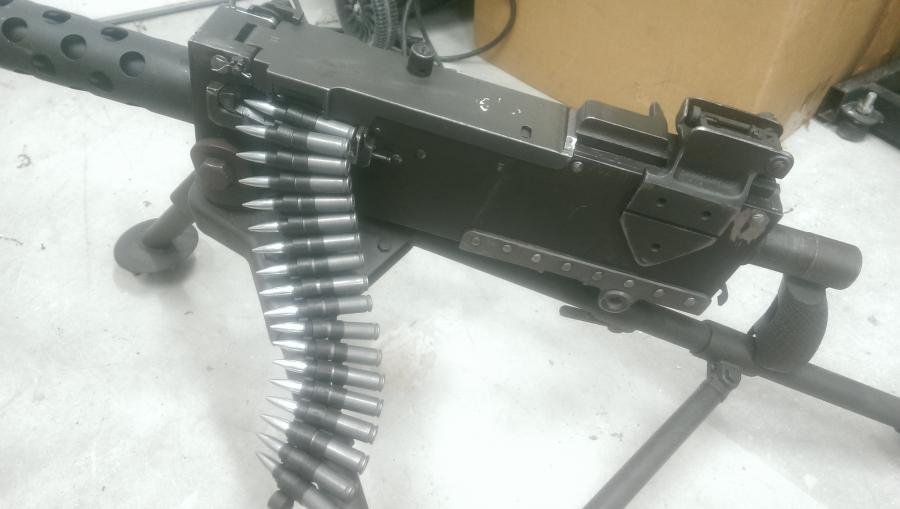
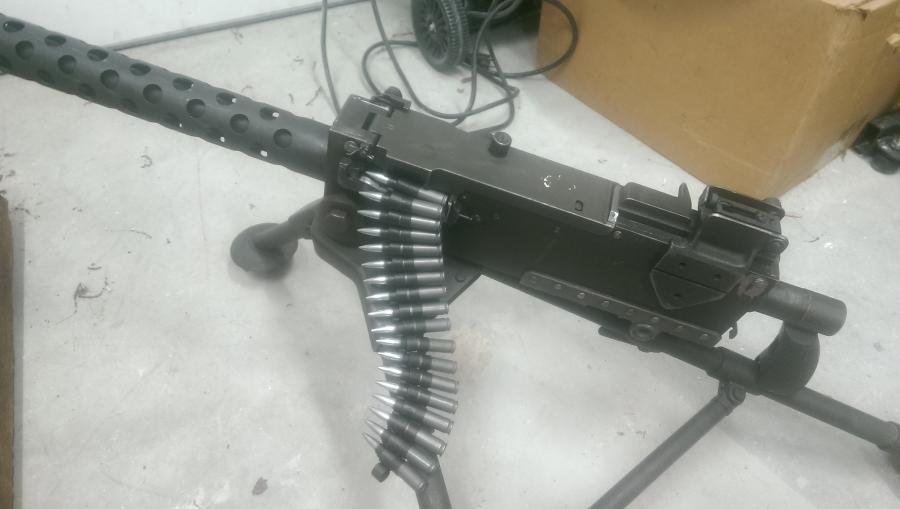
    First is to find a kit. I took advantage of the temporary Cetme-L availability issues and sold a bunch of extra stuff to get the 1919 kit very cheap. Expect to pay $1500 or more if you can't find a deal. My kit was an Israeli lend lease kit and as such had most of the necessary conversion parts for 7.62Nato. I found an Israeli drilled tripod for $200, 1K Israeli links for $75 and also found some NOS 100 RND USGI surplus belts that had buckles added to them for pack straps. They are 99 rnd now, but I couldn't beat the price for $12 each shipped. Will order some repo starter tabs from sarco and try to find someone local with a belt loading machine to stretch them for the first loading.

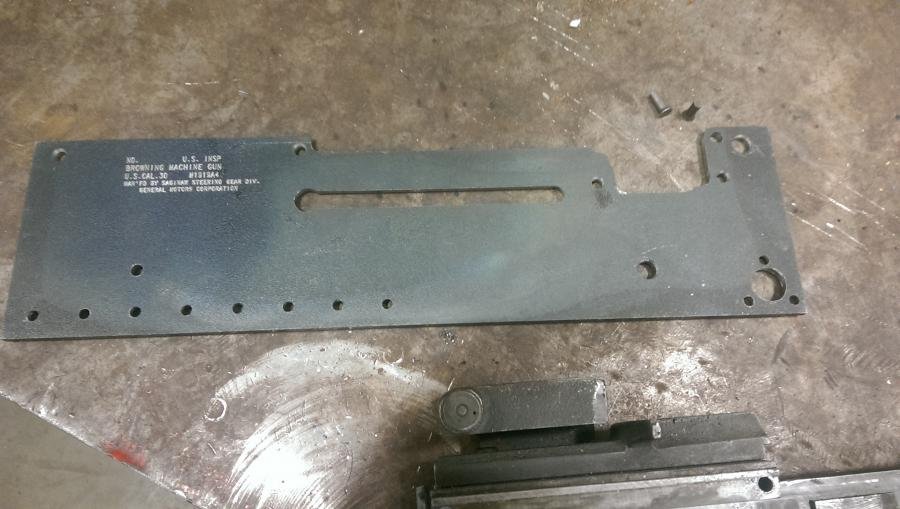
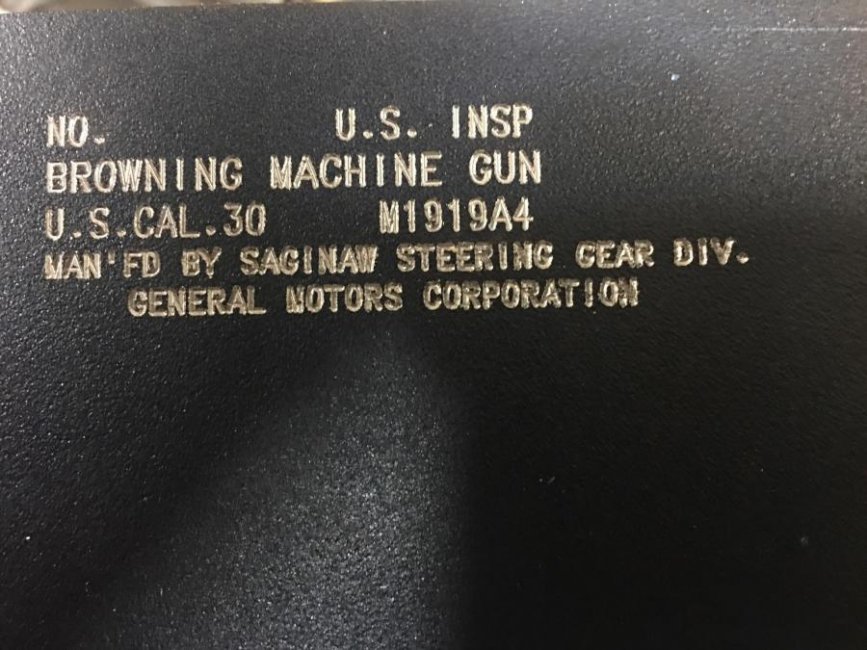
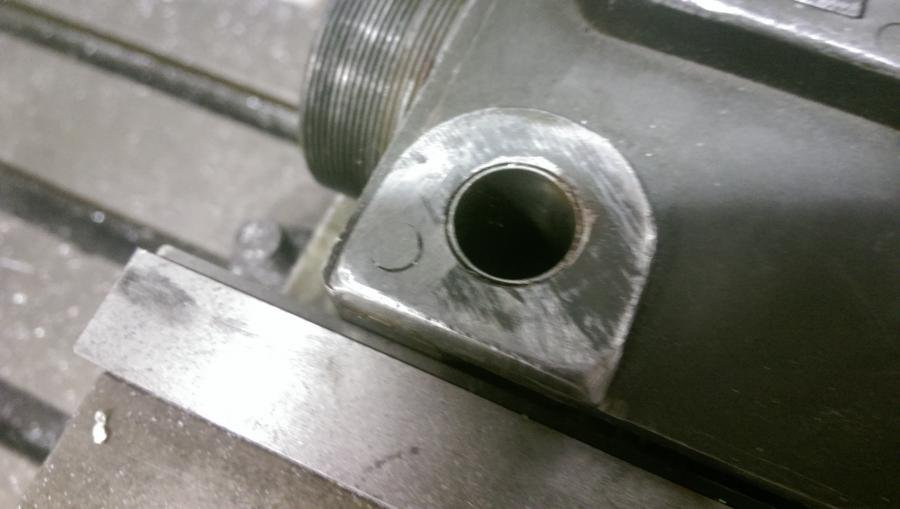
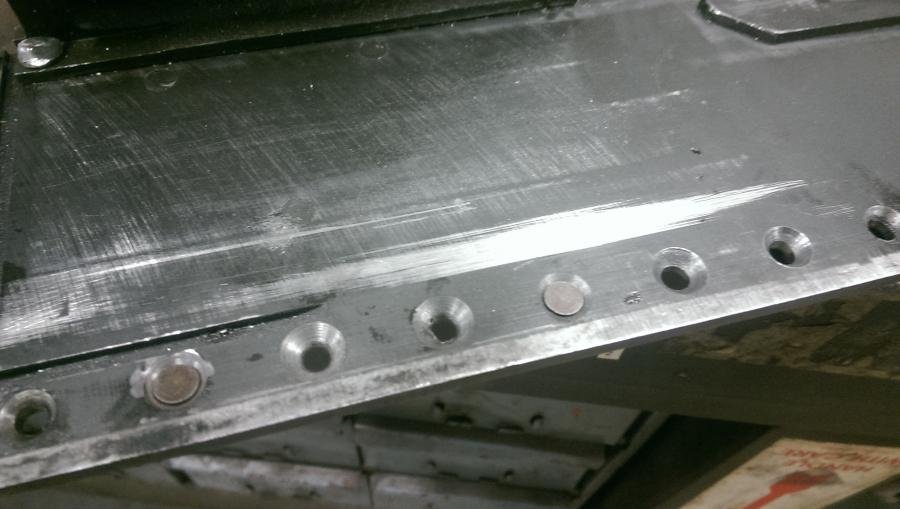
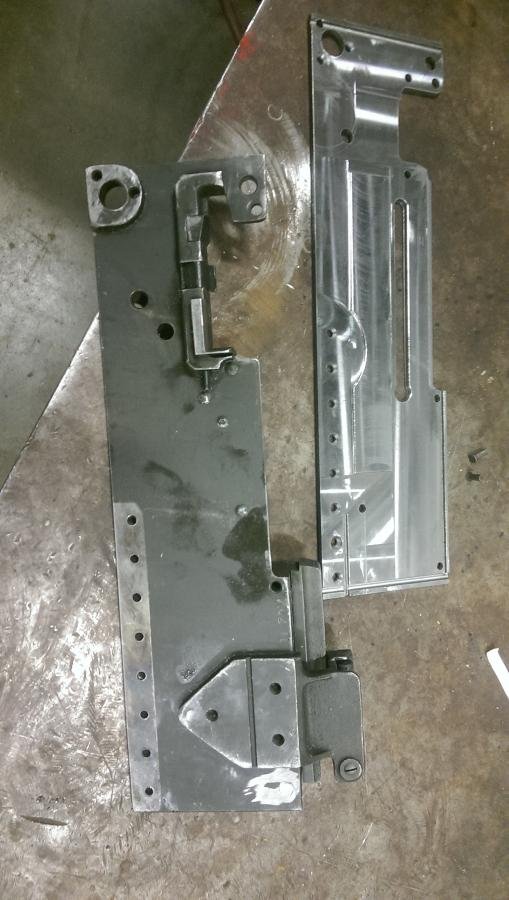
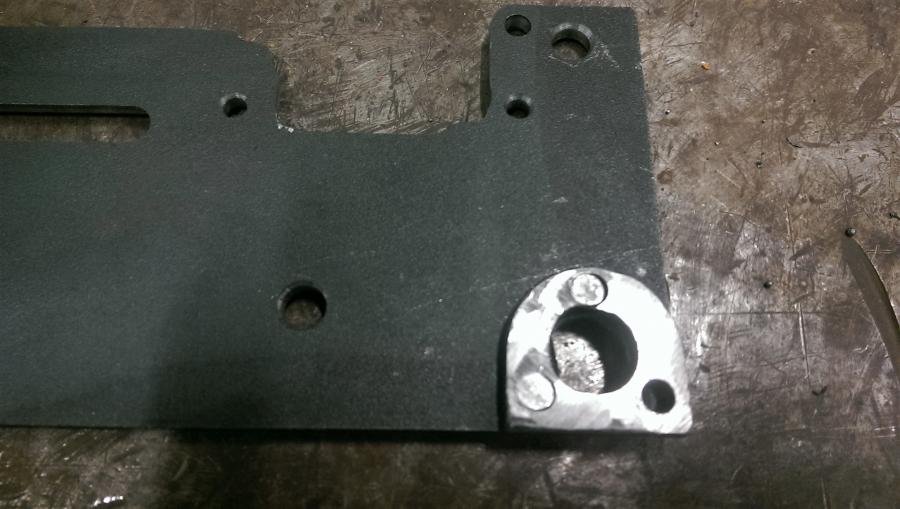
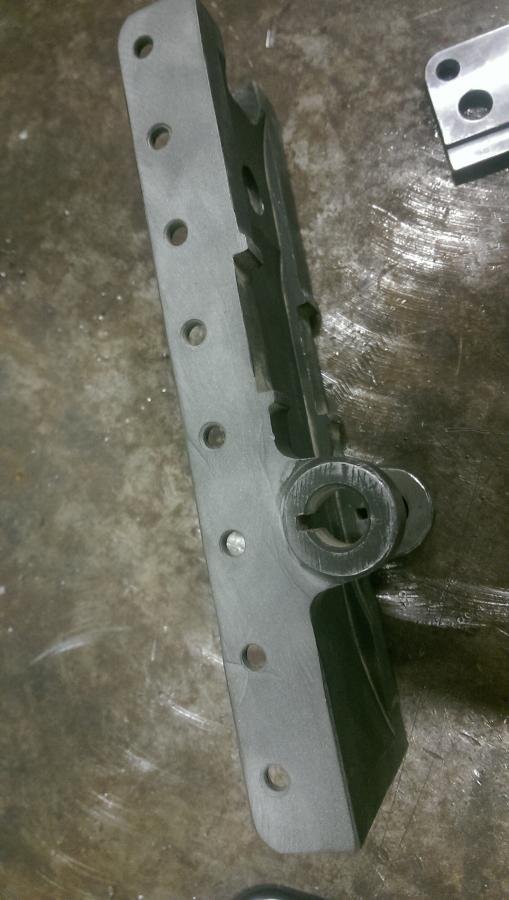
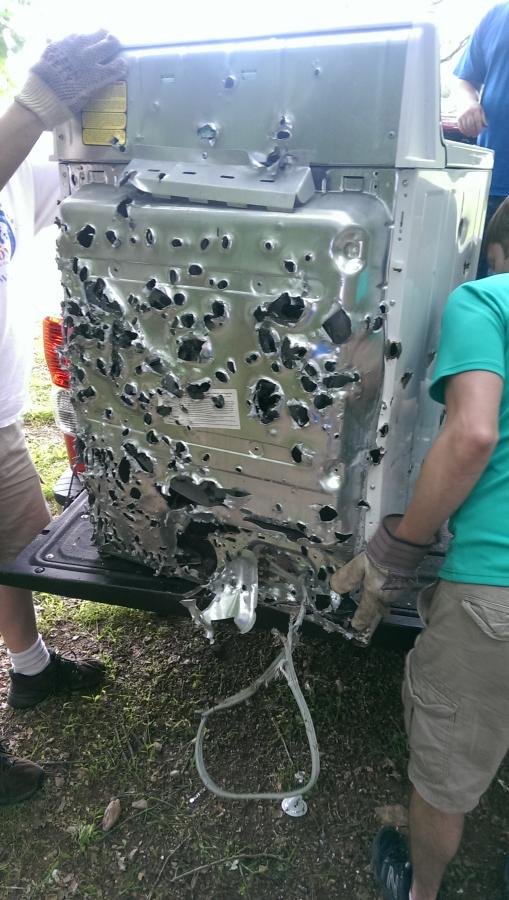
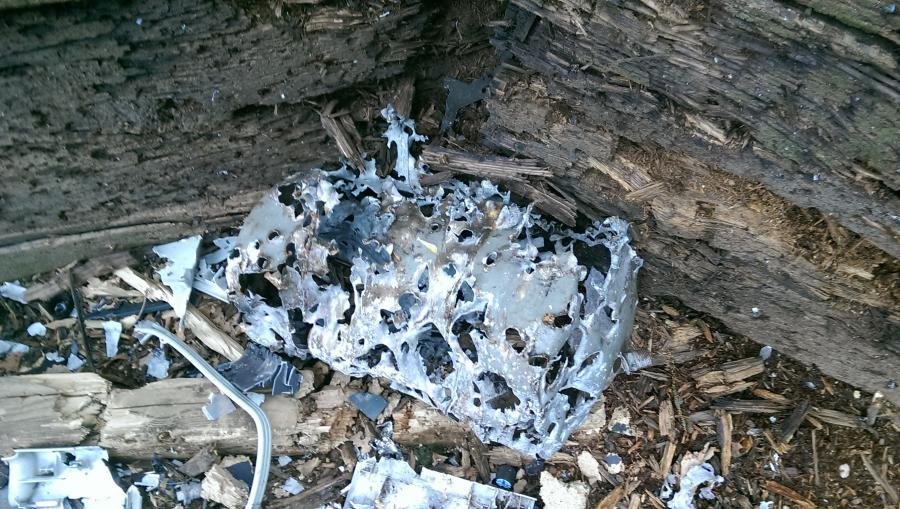
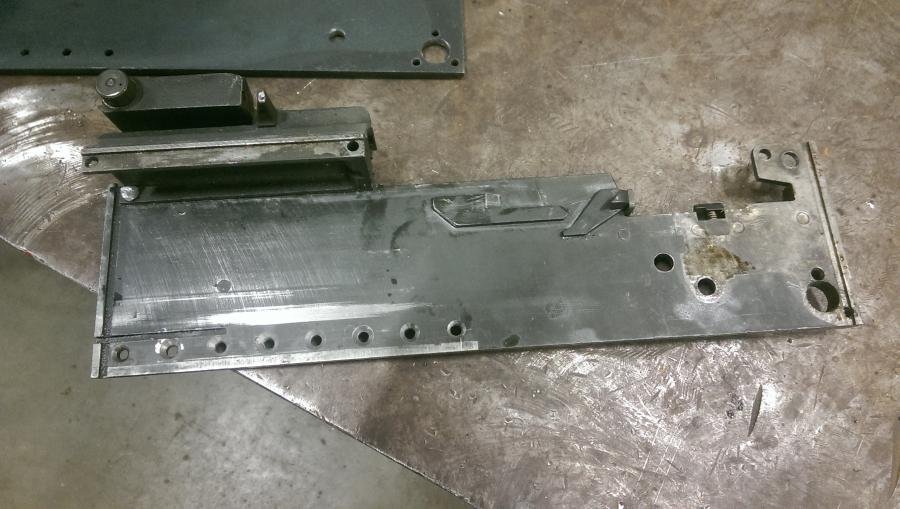
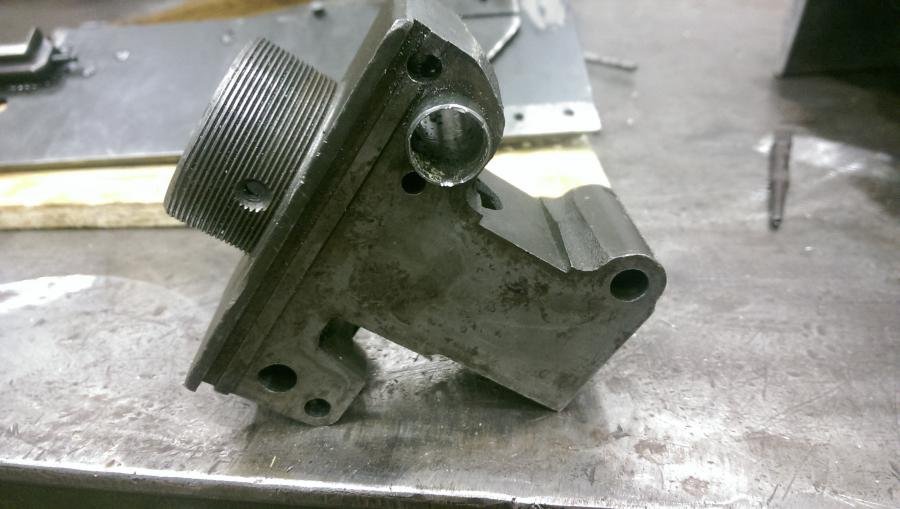
    My kit still had the trunion attached to the left side plate, so I had some demil to do before building. Whomever started the demil probably worked for Century because it was rough. The barrel shroud is original USGI and still had the 30-06 booster on it.

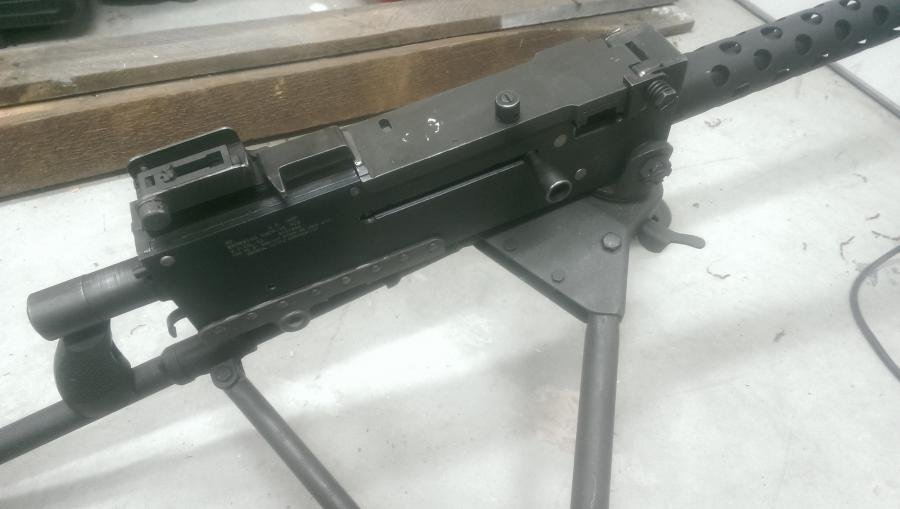
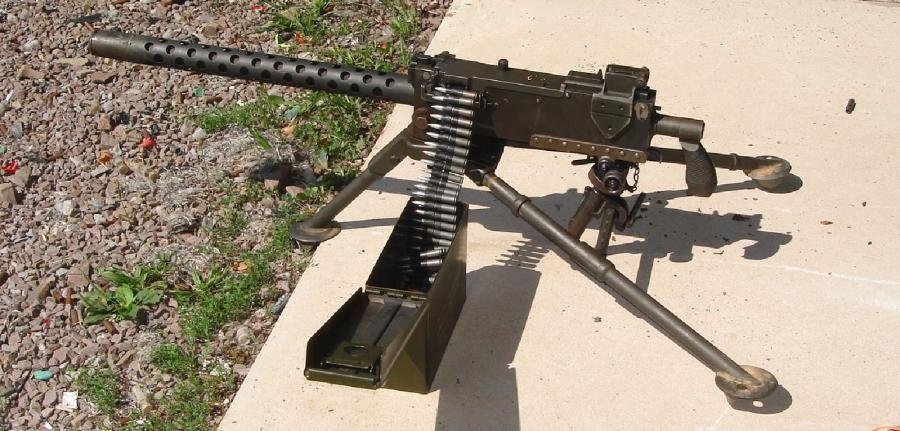
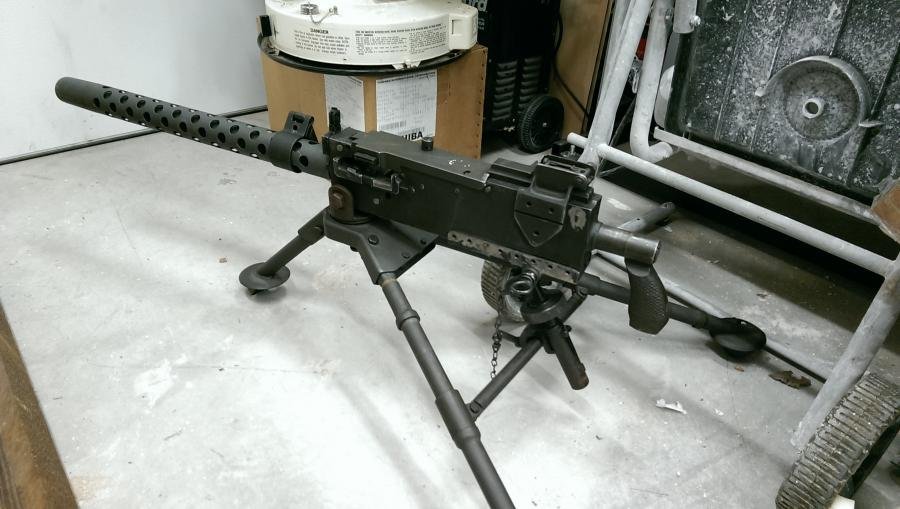
    The last picture is before I started working on it. Just put the parts on the tripod when everything came in.

    Here is a great tutorial from 1919a4.com http://1919a4.com/showthread.php?421-Build-Sequence-Checklist
     

    Attachments

    • IMAG3559.jpg
      IMAG3559.jpg
      69.5 KB · Views: 642
    • IMAG3555.jpg
      IMAG3555.jpg
      57.5 KB · Views: 508
    • IMAG3565.jpg
      IMAG3565.jpg
      53.4 KB · Views: 501
    • IMAG3510.jpg
      IMAG3510.jpg
      66.5 KB · Views: 537
    Last edited:

    wbw2123

    Active Member
    Nov 19, 2012
    905
    To build a semi auto 1919 you will need to modify the trigger, trigger frame, bolt, and barrel extension. The right side plate is the ATF firearm so a new one must be made or purchased. The semi auto denial feature is a blocking shelf on the right side plate so the trigger frame, bolt, and barrel extension are reduced in width to accommodate.

    I went to KMP to get a non-firearm right side plate blank, the trigger, sear, and return spring. They were great to deal with and I had everything within 2 days of ordering.

    http://www.karmametalproducts.com/KMP/KMP_1919.htm

    They do both a FFL plate and a non-gun plate. I did the non-firearm and machined it on the mill. KMP sent a dimensional drawing with the plate and all the holes were spotted and the openings were indicated within 1/16 of full cut so it was very easy to quickly finish.
     

    Attachments

    • IMAG3560.jpg
      IMAG3560.jpg
      62.4 KB · Views: 552

    wbw2123

    Active Member
    Nov 19, 2012
    905
    The rivets came from burnt capital. http://burntcapital.sharepoint.com/Pages/default.aspx

    Michael (MSG on the boards) was a great resource and hooked me up with the right rivet set for my kit. He even includes a few extra rivets in case you bugger one up. I also bought his fixture and setting tool to that I could use my hydraulic press to do the rivets. It went in the tool box and will be used for any rivet build I do in the future.
     

    Attachments

    • bcb%201919%20rivet%20setting%20tools%202.jpg
      bcb%201919%20rivet%20setting%20tools%202.jpg
      40.7 KB · Views: 471

    wbw2123

    Active Member
    Nov 19, 2012
    905
    The side plate did not come engraved, so before machining it I sent it and my internals to Brian Penley for engraving and machining. You can find him over at 1919a4 or PM me for his contact information. He doesn't have a website that I am aware of but his prices are extremely fair and he is the go to guy for the mods. I'll have to take a picture of the machined internals later as I can't find the one I took. Turn around time was extremely fast.

    This is his engraving. 90% of my parts were Saginaw with a few Buffalo Arms mixed in so I stuck with the Saginaw engraving. My topcover had a serial number stamped on it so I had stamped that serial number when I got the plate back.
     

    Attachments

    • 515792162.jpg
      515792162.jpg
      93.8 KB · Views: 474

    wbw2123

    Active Member
    Nov 19, 2012
    905
    Once I had everything on hand, it was just a matter of putting it all together.

    I borrowed a wedge style bucking bar from the Loaner Tool Crib over at Weaponsguild.com. The wedge style bucking bar and the BurntCapital press fixture allowed hollyb1 and I to have all of the rivets pressed and cleaned up in about 3 hours. Be careful if you are using a press. I doesn't take much more than a ton or two to press the rivets. Anything more than that and you can quickly crack the cast bottom plate.
     

    Attachments

    • DSCF7520.jpg
      DSCF7520.jpg
      62.9 KB · Views: 454
    • IMAG3548.jpg
      IMAG3548.jpg
      40.2 KB · Views: 465
    • IMAG3550.jpg
      IMAG3550.jpg
      41.5 KB · Views: 464
    • IMAG3557.jpg
      IMAG3557.jpg
      52.7 KB · Views: 471
    • IMAG3561.jpg
      IMAG3561.jpg
      65 KB · Views: 511
    • IMAG3564.jpg
      IMAG3564.jpg
      57.9 KB · Views: 456
    • IMAG3562.jpg
      IMAG3562.jpg
      55.1 KB · Views: 461

    wbw2123

    Active Member
    Nov 19, 2012
    905
    So, there is clearly a gap in pictures. I'll have to get some more close-up pictures of the finished receiver and rivets. I still need to blast and reparkerize it but I usually save that until after I have it running 100%.

    The last two pictures are from the first range session. :D
     

    Attachments

    • IMAG3566.jpg
      IMAG3566.jpg
      40.6 KB · Views: 454
    • IMAG3567.jpg
      IMAG3567.jpg
      41.6 KB · Views: 449
    • IMAG3568.jpg
      IMAG3568.jpg
      39.5 KB · Views: 444
    • IMAG3569.jpg
      IMAG3569.jpg
      83.7 KB · Views: 446
    • IMAG3570.jpg
      IMAG3570.jpg
      122.6 KB · Views: 454

    wbw2123

    Active Member
    Nov 19, 2012
    905
    I can say without a doubt that bet-fed guns, even in semi-auto are addictive. I can guarantee that this will not be my last. Next might be an RPD.

    In case you were wondering about the cost to run. You can blast through a 100rnd belt in less than a minute, even in semi auto, but right now you can buy steel cased .308 for around $0.35/round if you can't reload for less. There are conversion kits to run a 1919 in .30 cal, 7.62 nato, 8mm, 7.62x39 and .22lr but the last two are very expensive. I'll be sticking to 7.62 NATO for now.
     

    wbw2123

    Active Member
    Nov 19, 2012
    905
    In the video you can see that see that it is having trigger issues. I had the headspace set at two clicks past lockup for the ammo that I was using. If you run a 1919 make sure to check headspace every time you go to the range or change ammo. Unfortunately, at 2 clicks the trigger was not engaging the sear on every pull. You can actually feel the trigger move past the sear. To get the gun to run 100% I had to open the headspace to 9 clicks past lockup. There were no pressure signs or evidence of unsupported cases, but I didn't have feeler gauges with me at the range. I have it on the bench and need to check with feelers to see how far open the headspace really is. It may just need to run that way. The parts are a mix of pieces that are almost 75 years old.

    To headspace a 1919, take the internals out and assemble them on the bench. Make sure to be extra cautious with the driving spring. Tighten the barrel against the closed bolt with the locking piece in the locked position. Start backing off the barrel until the lock will fall free by gravity. At this point back the barrel off two more clicks to account for expansion of the parts.


    Thanks again to the Hooligans for posting the video. Hope to see you again in the next few weeks.


    FFBWMD

    ,
    Industry Partner
    Oct 3, 2011
    4,671
    Woodbine MD
    In the video you can see that see that it is having trigger issues. I had the headspace set at two clicks past lockup for the ammo that I was using. If you run a 1919 make sure to check headspace every time you go to the range or change ammo. Unfortunately, at 2 clicks the trigger was not engaging the sear on every pull. You can actually feel the trigger move past the sear. To get the gun to run 100% I had to open the headspace to 9 clicks past lockup. There were no pressure signs or evidence of unsupported cases, but I didn't have feeler gauges with me at the range. I have it on the bench and need to check with feelers to see how far open the headspace really is. It may just need to run that way. The parts are a mix of pieces that are almost 75 years old.

    To headspace a 1919, take the internals out and assemble them on the bench. Make sure to be extra cautious with the driving spring. Tighten the barrel against the closed bolt with the locking piece in the locked position. Start backing off the barrel until the lock will fall free by gravity. At this point back the barrel off two more clicks to account for expansion of the parts.


    Thanks again to the Hooligans for posting the video. Hope to see you again in the next few weeks.


    I've NEVER had to run headspace more than 3 clicks past lockup! Not knocking on you but you might want to check things over real good. I own 2 Semi's and have built and shot over 20 1919's, just saying. Just for reference RPD's are a whole other ball game unless you own a lathe and a mill. Any questions let me know.

    Brian
     

    wbw2123

    Active Member
    Nov 19, 2012
    905
    I've NEVER had to run headspace more than 3 clicks past lockup! Not knocking on you but you might want to check things over real good. I own 2 Semi's and have built and shot over 20 1919's, just saying. Just for reference RPD's are a whole other ball game unless you own a lathe and a mill. Any questions let me know.

    Brian

    Thanks Brian, I know something is wrong but I haven't had the time to check it since returning from the range. I forgot to take my feelers with me. I was opening the headspace a click at a time until it ran. Checking pressure signs and looking for unsupported cases at each click. Once I find the cause I will post the findings. Test and Tune...

    I do have both a lathe and mill for the RPD if I decide to do one. I just didn't have the time to do the time to do the 1919 mods myself and the prices for the work was probably less than I should be paying myself right now.
     

    FFBWMD

    ,
    Industry Partner
    Oct 3, 2011
    4,671
    Woodbine MD
    Thanks Brian, I know something is wrong but I haven't had the time to check it since returning from the range. I forgot to take my feelers with me. I was opening the headspace a click at a time until it ran. Checking pressure signs and looking for unsupported cases at each click. Once I find the cause I will post the findings. Test and Tune...

    I do have both a lathe and mill for the RPD if I decide to do one. I just didn't have the time to do the time to do the 1919 mods myself and the prices for the work was probably less than I should be paying myself right now.
    Roger that.


    Sent from my SCH-I545 using Tapatalk
     

    Users who are viewing this thread

    Latest posts

    Forum statistics

    Threads
    275,434
    Messages
    7,281,616
    Members
    33,455
    Latest member
    Easydoesit

    Latest threads

    Top Bottom