And Another Hooligan Traditions Kentucky Rifle DIY Project

The #1 community for Gun Owners of the Northeast

Member Benefits:

  • No ad networks!
  • Discuss all aspects of firearm ownership
  • Discuss anti-gun legislation
  • Buy, sell, and trade in the classified section
  • Chat with Local gun shops, ranges, trainers & other businesses
  • Discover free outdoor shooting areas
  • View up to date on firearm-related events
  • Share photos & video with other members
  • ...and so much more!
  • buellsfurn

    Ultimate Member
    Dec 1, 2015
    5,951
    southern end of Maryland
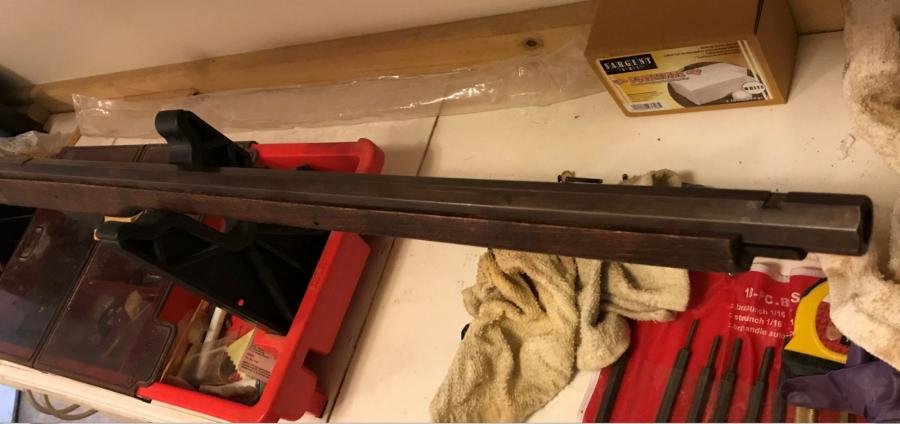
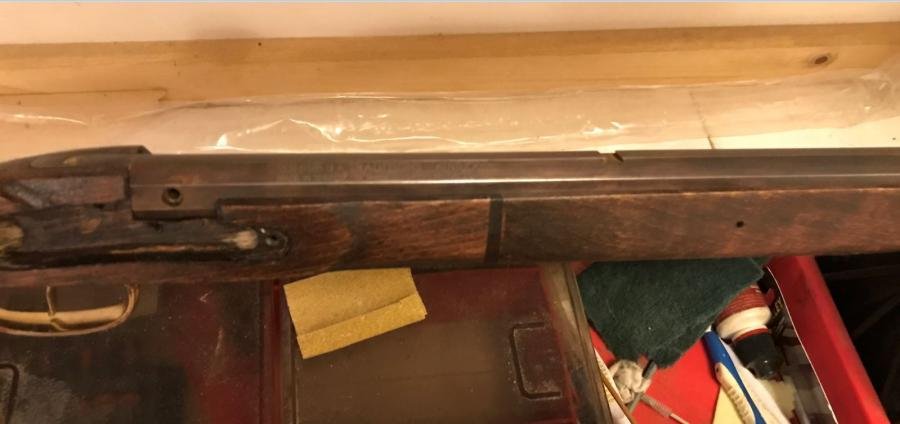
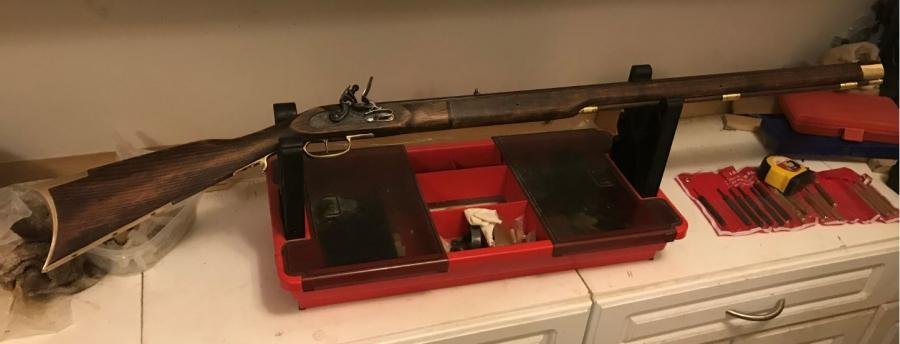
    gotcha on the adsorbent/grain .I just looked for the stuff i had i was going to send you a pic of it . I had great results with it when i was finishing a fair amount Cherry wood that's famous for getting that blotch look . It basically seals the wood so that your stain goes on even . It looks good I think as you oil it the blonder areas will likely darken some .
     

    j8064

    Garrett Co Hooligan #1
    Feb 23, 2008
    11,635
    Deep Creek
    Another Update

    The more I looked at how the first stain came out the less I liked it. So I got creative:
    • Yesterday I took some 80 grit to the stock and opened the grain while evening out some of the darker spots.
    • Then I put a coat of gunstock stain over the original walnut. (First Pic).
    • This morning I re-stained the entire stock with red mahogany and more of the dark walnut. I put it on thick and worked it into the wood well.
    • While the barrel was out I got to work with a torch and the BC Plum Brown barrel finish.
    • After five applications (de-grease, heat, apply plum brown and wash in cold water - repeat) I've got the metal as even as it's gonna get.

    The last pic is how the project sits tonight. Once the stain is dry I'll do final sanding with 220 grit and even any stain that's needed. Then the sights get installed and everything gets put back together with final fitting.

    Then let the oiling of the stock and the shooting begin!

    :thumbsup:
     

    Attachments

    • IMG_0440 Stock Re-Stain 12_18_2018.jpg
      IMG_0440 Stock Re-Stain 12_18_2018.jpg
      40.1 KB · Views: 286
    • IMG_0444 BC Plum Brown First Coat.jpg
      IMG_0444 BC Plum Brown First Coat.jpg
      79.8 KB · Views: 302
    • IMG_0445 Barrel Browned 01.jpg
      IMG_0445 Barrel Browned 01.jpg
      45.6 KB · Views: 305
    • IMG_0446 Barrel Browned 02.jpg
      IMG_0446 Barrel Browned 02.jpg
      37.1 KB · Views: 312
    • IMG_0447 Flintlock Side View 12_19_2018.jpg
      IMG_0447 Flintlock Side View 12_19_2018.jpg
      34.3 KB · Views: 315

    buellsfurn

    Ultimate Member
    Dec 1, 2015
    5,951
    southern end of Maryland
    The more I looked at how the first stain came out the less I liked it. So I got creative:
    • Yesterday I took some 80 grit to the stock and opened the grain while evening out some of the darker spots.
    • Then I put a coat of gunstock stain over the original walnut. (First Pic).
    • This morning I re-stained the entire stock with red mahogany and more of the dark walnut. I put it on thick and worked it into the wood well.
    • While the barrel was out I got to work with a torch and the BC Plum Brown barrel finish.
    • After five applications (de-grease, heat, apply plum brown and wash in cold water - repeat) I've got the metal as even as it's gonna get.

    The last pic is how the project sits tonight. Once the stain is dry I'll do final sanding with 220 grit and even any stain that's needed. Then the sights get installed and everything gets put back together with final fitting.

    Then let the oiling of the stock and the shooting begin!

    :thumbsup:

    looks good color definitely more consistent. question I've never worked with any blueing/ plum brown product before. Will the barrel have a shine to it
     

    j8064

    Garrett Co Hooligan #1
    Feb 23, 2008
    11,635
    Deep Creek
    looks good color definitely more consistent. question I've never worked with any blueing/ plum brown product before. Will the barrel have a shine to it

    Barrel finishes require protective oil. The oil will add shine. I haven't oiled the metal yet because if I want to add another coat of Plum Brown, removing the oil would add more work.

    There will be plenty of oil added to the wood and metal later.

    :thumbsup:
     

    j8064

    Garrett Co Hooligan #1
    Feb 23, 2008
    11,635
    Deep Creek
    Ready To Oil The Stock!

    As of today the rifle is "built". :party29:

    I gave the stock a good scrub with fine steel wool to even the stain and smooth the grain.

    During final fitting the thimbles were installed. The screws that hold them are a little too long and interfere with the ramrod. The tips of the screws are filed to fit inside each thimble once they are in place. Since I don't plan to ever remove the thimbles, Loctite was used.

    All the other brass was removed and polished. To better align the flash hole with the pan I placed a .002 shim under the barrel tang and glued it in place.

    Fitting is now complete. The flintlock is ready to test fire! I couldn't resist testing the frizzen spark. It sure looks like it will set off any powder in the pan! :thumbsup:

    Next step is to apply a pure Tung oil finish. I've started with a 50/50 mixture of Tung oil and mineral spirits. After a few coats of thinned mix I'll move on to undiluted Tung oil.

    This has definitely been an interesting project. I'm really looking forward to test firing the Kentucky Flintlock at a Hooligan shoot very soon!

    :D
     

    Attachments

    • IMG_0452 Fully Assembled 12_21_2018.jpg
      IMG_0452 Fully Assembled 12_21_2018.jpg
      31.4 KB · Views: 283
    • Spark Test 21_21_2018 Capture.JPG
      Spark Test 21_21_2018 Capture.JPG
      60.4 KB · Views: 272

    Users who are viewing this thread

    Latest posts

    Forum statistics

    Threads
    275,431
    Messages
    7,281,547
    Members
    33,454
    Latest member
    Rifleman

    Latest threads

    Top Bottom