wjt1169
Active Member
As an initial disclaimer –– I signed up with Osprey Defense as a dealer back in December 2009. I promised not to sell a single unit until I was satisfied that the system actually worked and was reliable. As a result, I'm still holding on to the units I ordered back in December until I finish my personal testing. I made a visit to the range today, so I wanted to provide my experience to date on the system.
INSTALATION:
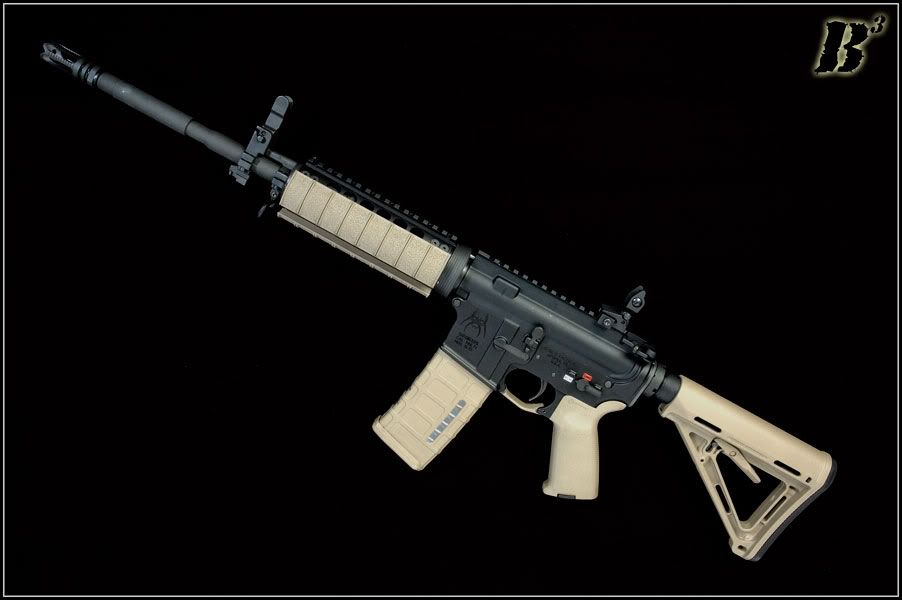
Though the system is designed as a retrofit, I decided to put it in an upper I built from parts I had on hand. The barrel is a Daniel Defense chrome lined 1/7 twist 16" M4 profile (carbine length gas system). I used a YHM clamp on front sight/gas block and the standard end cap, barrel nut, and delta ring set up. I also used the Midwest Industries MCTAR-17P drop in type rail system design specifically for piston systems. The upper receiver is made by DSarms. The bolt, firing pin, firing pin retainer pin, and cam pin are all from Stag Arms. I had an LMT tactical charging handle lying around, so I used that and a Midwest Industries low profile flip up sight to finish the upper build.
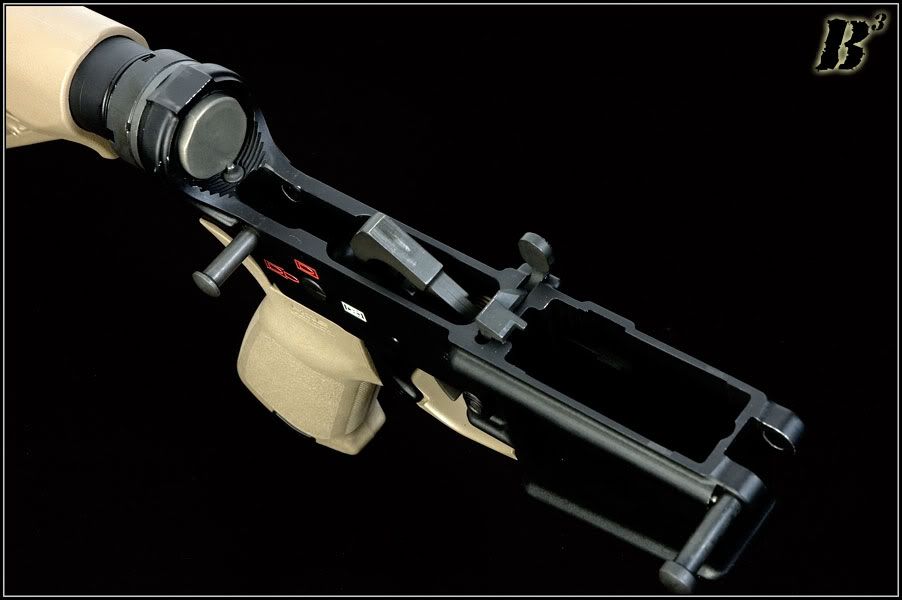
The upper is on a Spike's Tactical Lower:
Installing the piston kit itself had some challenges that I imagine get easier once you tackle the job a few times. Like other kits, you must insert a bushing into the upper receiver that the op-rod rides in..to be honest, I used a tool from another manufacturer's piston kit in order to install the bushing:

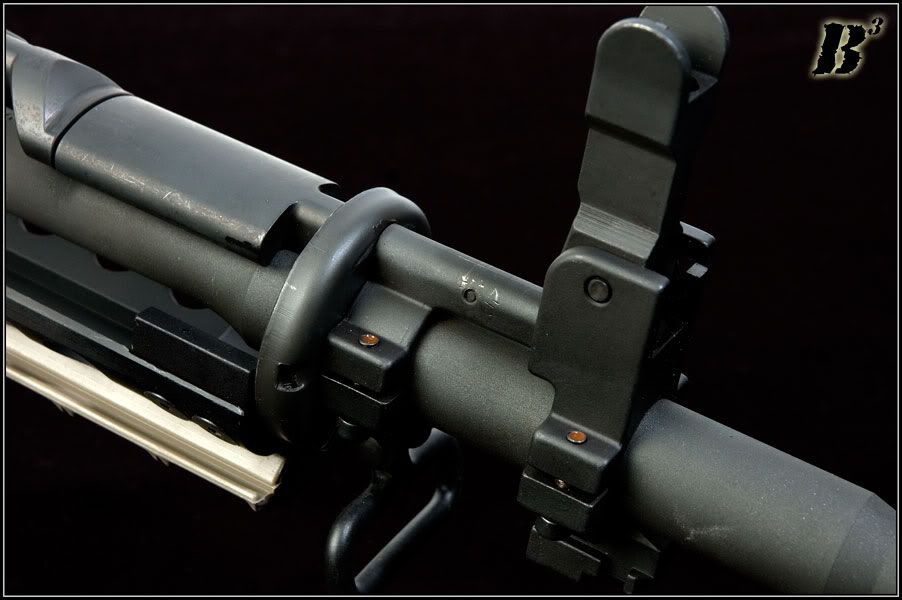
By far, the hardest part was installing the "groove pin" that secures the "piston chamber" into the front sight base/gas block. As the directions suggest, I used a 5/64 punch to get the job done...but it took a lot hammering. I caused some damage when the punch slipped off of the pin:
Another challenge was installing the "retaining clip" through the left side so that it clips upward as the directions suggest. Cory (Osprey Tech Support Guru) later told me that I could have installed it the other way. In fact, they now have redesigned clip. However, I was able to install the kit following the directions exactly:
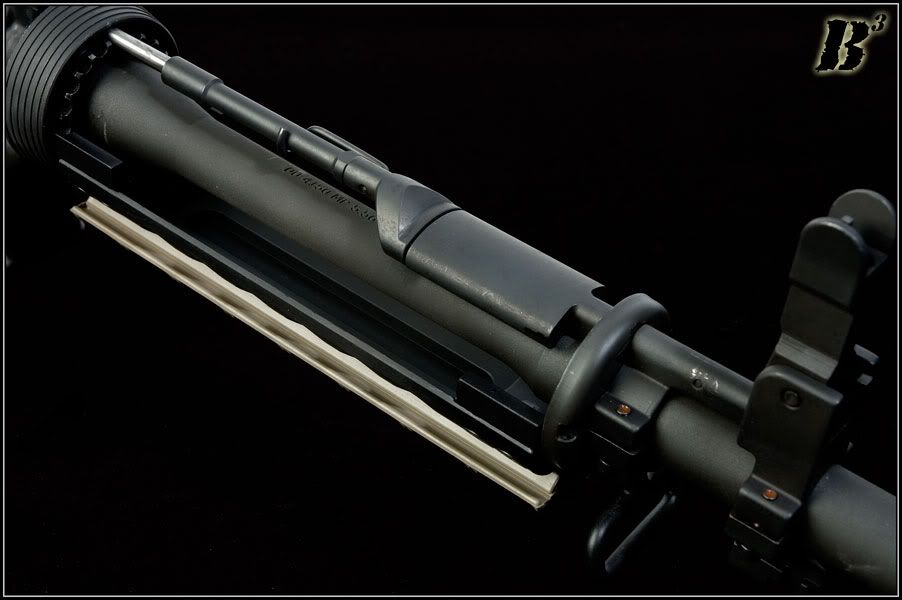
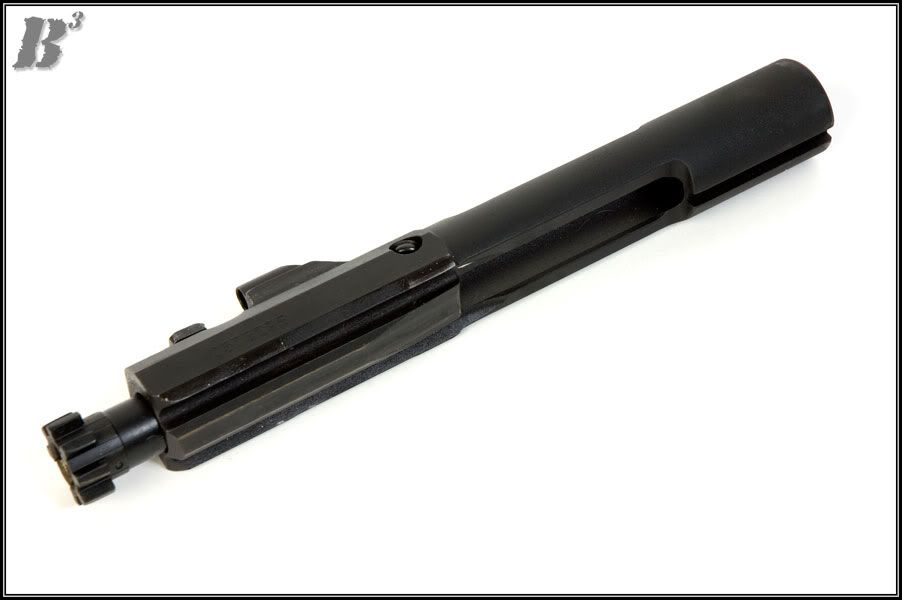
The one piece bolt carrier that comes with the kit requires installation of the bolt, firing pin, cam pin, and firing pin retaining pin:
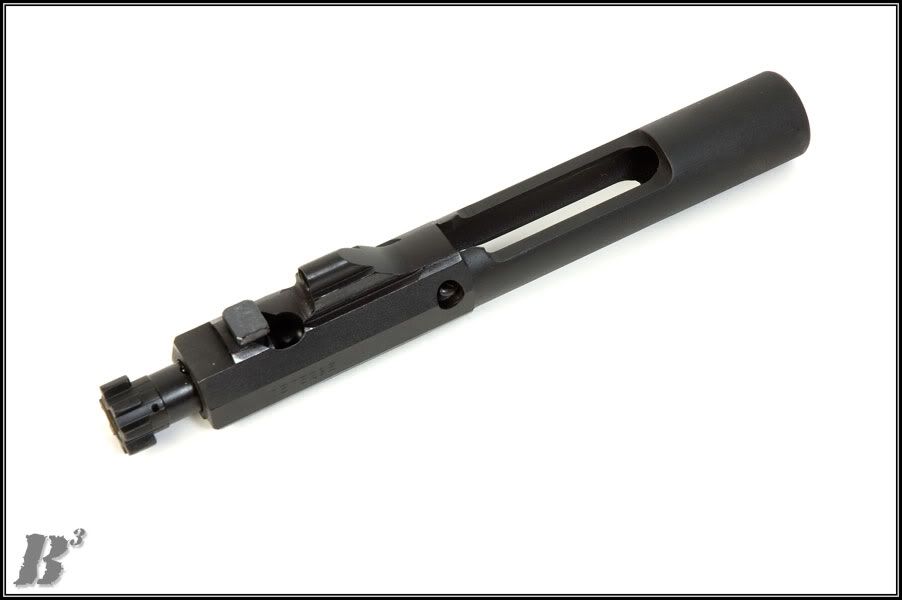
The Osprey bolt carrier does not have a built up rear section to prevent possible "carrier tilt":
I ran the kit using a standard carbine buffer as Osprey suggests:
RANGE TESTING - FIRST TRY:
On my first trip to the range, the rifle would fire, but the bolt carrier would stop about half way back across the magazine...it was short stroking. I fired several shots with the same result on every pull of the trigger. So I tried my upper on two other lowers. The other lowers both had notched hammers...but the result was the same.
I checked the barrel nut to see if the op-rod was moving freely. I found that the op-rod was rubbing slightly. I thought I had found the problem, so I disassembled the upper, and re-aligned the barrel nut so that the op-rod moved without any rub.
Back at the firing line...I had the same short stroking problem.
It was back to the shop...
ENTER CORY THE OSPREY TECH SUPPORT GURU:
I called Osprey and spoke to Cory. As others have commented, Cory was pleasant to deal with and eager to fix my problem. He looked up the date that I had purchased my order of kits, and found that it was prior to a slight design change they had made in the piston itself. He told me he would send off a new piston for each of the kits I had in-stock. They arrived inside of a week...unfortunately, so did record breaking snow falls.
I replaced the piston...but another range visit had to wait a few weeks...until today...
RANGE TESTING - SECOND TRY:
Today, I loaded a mag with just six rounds. I had inspected the new piston, and could not see any real difference between the old piston it replaced. So I did not expect improved performance. However, I pulled the trigger the first time and the weapon cycled without a failure. A second trigger pull...a second no-malfunction cycle. I finished the six rounds with no malfunctions.
I loaded up three more 30 round mags and decided to let it rip. I fired all three mags as fast as I could pull the trigger (semi-auto) and reload. 90 rounds later I still had ZERO malfunctions. I guess I should be more of an optimist, because that was all the ammo I brought today. Like I said, I wasn't really expecting the unit to work for me.
I realize 96 rounds is not a real performance test, but I'm feeling pretty good about this product right now. It has slightly more felt recoil than a DI system –– as do all piston systems. The plus for me so far with the Osprey System is it's light weight compaired to the other two piston AR's I have.
Now that it's running properly, I'll keep running rounds through it and keep you all updated as to how it runs.
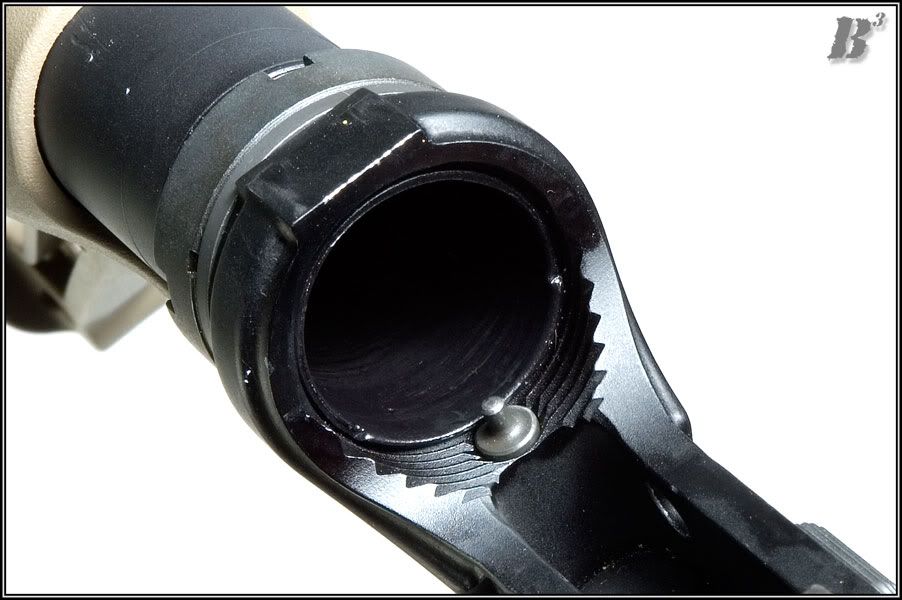
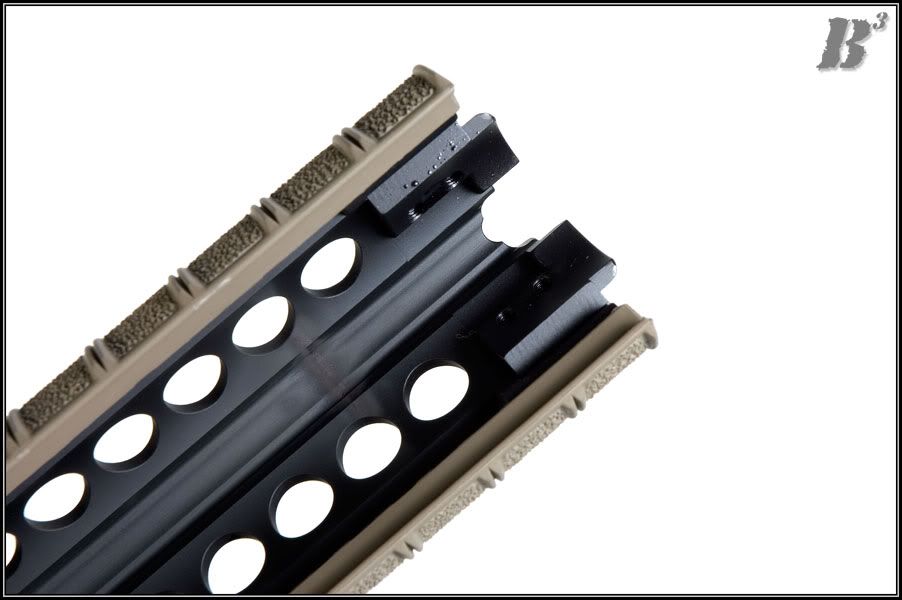
Here's a picture of the inside of the top of the handguard where the gas exhausts:
INSTALATION:
Though the system is designed as a retrofit, I decided to put it in an upper I built from parts I had on hand. The barrel is a Daniel Defense chrome lined 1/7 twist 16" M4 profile (carbine length gas system). I used a YHM clamp on front sight/gas block and the standard end cap, barrel nut, and delta ring set up. I also used the Midwest Industries MCTAR-17P drop in type rail system design specifically for piston systems. The upper receiver is made by DSarms. The bolt, firing pin, firing pin retainer pin, and cam pin are all from Stag Arms. I had an LMT tactical charging handle lying around, so I used that and a Midwest Industries low profile flip up sight to finish the upper build.
The upper is on a Spike's Tactical Lower:
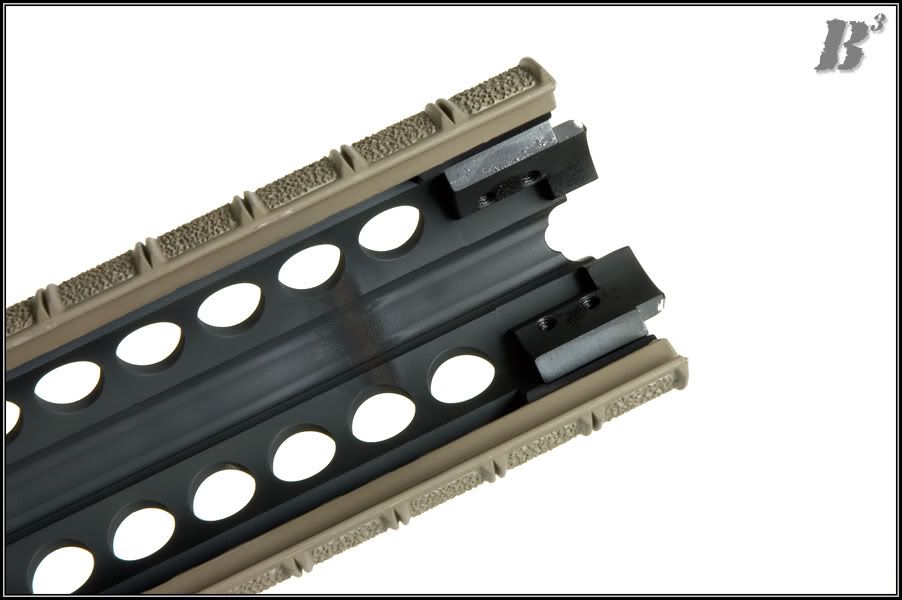
Installing the piston kit itself had some challenges that I imagine get easier once you tackle the job a few times. Like other kits, you must insert a bushing into the upper receiver that the op-rod rides in..to be honest, I used a tool from another manufacturer's piston kit in order to install the bushing:
By far, the hardest part was installing the "groove pin" that secures the "piston chamber" into the front sight base/gas block. As the directions suggest, I used a 5/64 punch to get the job done...but it took a lot hammering. I caused some damage when the punch slipped off of the pin:
Another challenge was installing the "retaining clip" through the left side so that it clips upward as the directions suggest. Cory (Osprey Tech Support Guru) later told me that I could have installed it the other way. In fact, they now have redesigned clip. However, I was able to install the kit following the directions exactly:
The one piece bolt carrier that comes with the kit requires installation of the bolt, firing pin, cam pin, and firing pin retaining pin:
The Osprey bolt carrier does not have a built up rear section to prevent possible "carrier tilt":
I ran the kit using a standard carbine buffer as Osprey suggests:
RANGE TESTING - FIRST TRY:
On my first trip to the range, the rifle would fire, but the bolt carrier would stop about half way back across the magazine...it was short stroking. I fired several shots with the same result on every pull of the trigger. So I tried my upper on two other lowers. The other lowers both had notched hammers...but the result was the same.
I checked the barrel nut to see if the op-rod was moving freely. I found that the op-rod was rubbing slightly. I thought I had found the problem, so I disassembled the upper, and re-aligned the barrel nut so that the op-rod moved without any rub.
Back at the firing line...I had the same short stroking problem.
It was back to the shop...
ENTER CORY THE OSPREY TECH SUPPORT GURU:
I called Osprey and spoke to Cory. As others have commented, Cory was pleasant to deal with and eager to fix my problem. He looked up the date that I had purchased my order of kits, and found that it was prior to a slight design change they had made in the piston itself. He told me he would send off a new piston for each of the kits I had in-stock. They arrived inside of a week...unfortunately, so did record breaking snow falls.
I replaced the piston...but another range visit had to wait a few weeks...until today...
RANGE TESTING - SECOND TRY:
Today, I loaded a mag with just six rounds. I had inspected the new piston, and could not see any real difference between the old piston it replaced. So I did not expect improved performance. However, I pulled the trigger the first time and the weapon cycled without a failure. A second trigger pull...a second no-malfunction cycle. I finished the six rounds with no malfunctions.
I loaded up three more 30 round mags and decided to let it rip. I fired all three mags as fast as I could pull the trigger (semi-auto) and reload. 90 rounds later I still had ZERO malfunctions. I guess I should be more of an optimist, because that was all the ammo I brought today. Like I said, I wasn't really expecting the unit to work for me.
I realize 96 rounds is not a real performance test, but I'm feeling pretty good about this product right now. It has slightly more felt recoil than a DI system –– as do all piston systems. The plus for me so far with the Osprey System is it's light weight compaired to the other two piston AR's I have.
Now that it's running properly, I'll keep running rounds through it and keep you all updated as to how it runs.
Here's a picture of the inside of the top of the handguard where the gas exhausts:
")