Replacing older BHP ejector

The #1 community for Gun Owners of the Northeast

Member Benefits:

  • No ad networks!
  • Discuss all aspects of firearm ownership
  • Discuss anti-gun legislation
  • Buy, sell, and trade in the classified section
  • Chat with Local gun shops, ranges, trainers & other businesses
  • Discover free outdoor shooting areas
  • View up to date on firearm-related events
  • Share photos & video with other members
  • ...and so much more!
  • bbrown

    Ultimate Member
    MDS Supporter
    Oct 10, 2009
    3,034
    MD
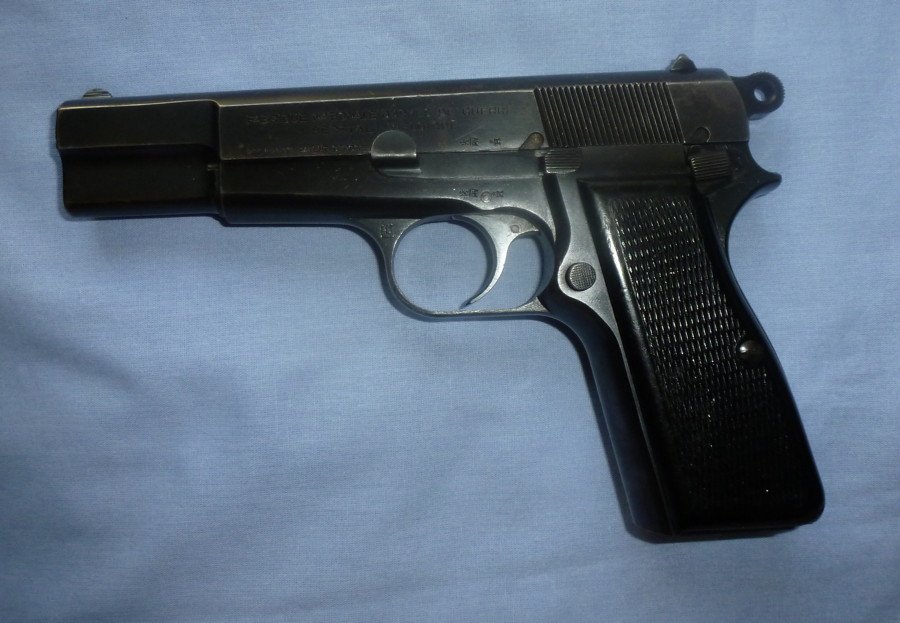
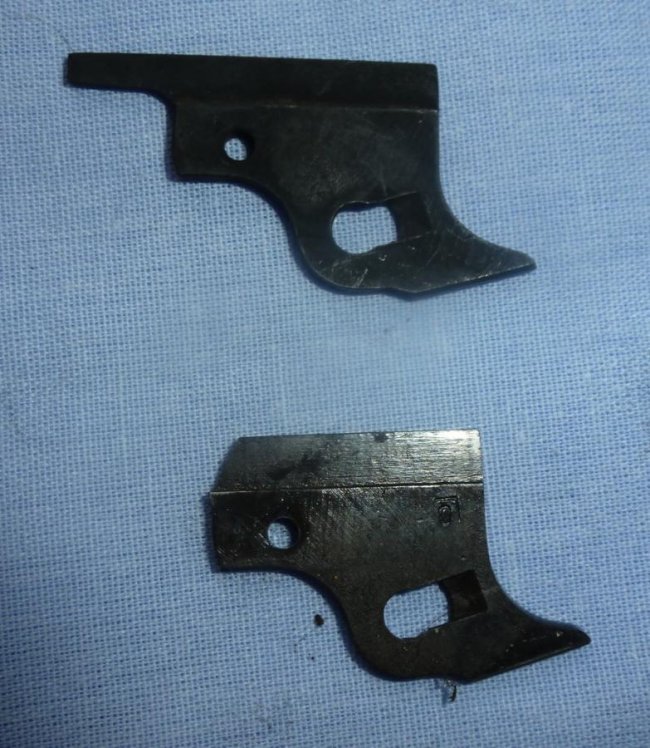
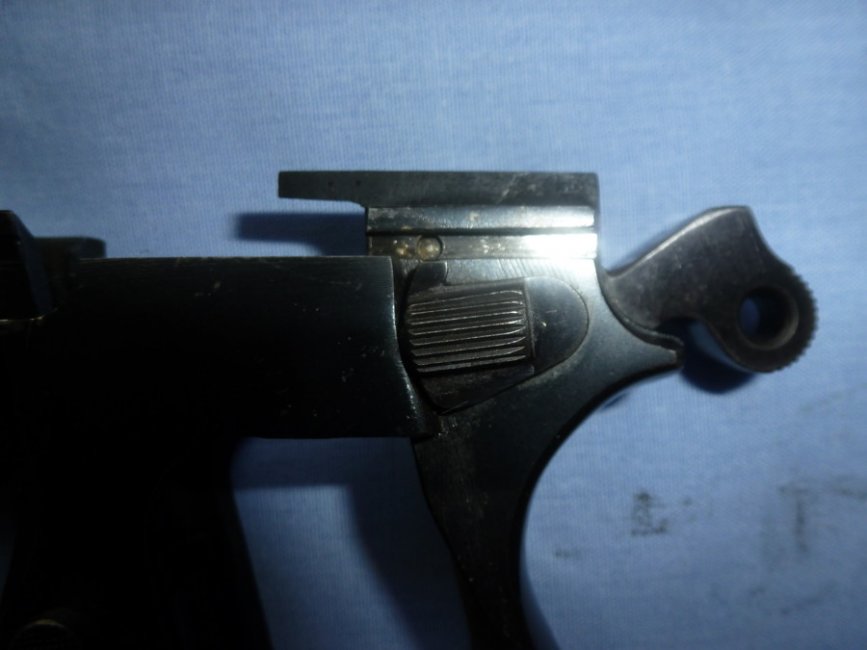
    Found out at the range yesterday that the reason I've been having ejection issues with my C&R 1951-era BHP (with internal extractor) is that the ejector is broken. Doh!

    Anyway, a replacement (and a spare) are on the way, but is there anything I need to look out for when doing the replacement myself? From the online information I've seen it looks like the pin holding the ejector in is also doing duty for other parts as well.

    TIA.
     

    toolness1

    Ultimate Member
    Jan 5, 2014
    2,723
    BFE, Missouri
    This may be super obvious, but if you haven't already, check YouTube for a detail strip/full disassembly video. I got a BHP clone made by FEG and found a couple really good vids for when I took it all the way down to clean and replace springs when I got it.

    I can tackle almost anything if I can see it done first, and sometimes there's little tricks that someone will show you that can save a lot of effort and searching on your hands and knees trying to find small parts in the carpet :)

    Pics of C&R HP?

    Good luck!

    Sent from my XT901 using Tapatalk
     

    wabbit

    Ultimate Member
    Apr 29, 2010
    5,271
    Decock the hammer before you try to remove the safety.

    Don't drive the little pin above the safety all the way out. Drive it out just enough to release the ejector, but don't take it all the way out of the sear. It'll be easier to put pin back if you keep it in the gun.
     

    bbrown

    Ultimate Member
    MDS Supporter
    Oct 10, 2009
    3,034
    MD
    I finally received the replacement ejectors yesterday, so it looks like Saturday afternoon is the big day for doing the replacement. I've never taken a pistol apart this much before, and I appreciate all the advice.
     

    bbrown

    Ultimate Member
    MDS Supporter
    Oct 10, 2009
    3,034
    MD
    Got the broken ejector replaced this afternoon. I followed the procedures in the book Firearms Disassembly by Wood, published by Krause. Here are some pictures of the steps. Dunno how to mix pictures and text. :sad20:

    - pistol before

    - broken ejector, in place

    - disassembled, with broken ejector in lower right

    - ejectors, new on top, broken on bottom

    - reassembled, with new ejector in place

    - new ejector in place

    The proof will be in the test fire, but it dry fires just fine and passes the pencil test.

    It was made by FN in 1951-52 or so, all matching, one of the E-series. Most likely refinished, but very little pitting and, well, lovely to behold. :)

    My brass punch is a bit gnarly, but it still works fine.

    Bryan
     

    Attachments

    • left_before.jpg
      left_before.jpg
      71.2 KB · Views: 99
    • right_before.jpg
      right_before.jpg
      71 KB · Views: 110
    • left_broken_ejector.jpg
      left_broken_ejector.jpg
      43.4 KB · Views: 99
    • left_step2.jpg
      left_step2.jpg
      84 KB · Views: 100
    • ejectors.jpg
      ejectors.jpg
      115.1 KB · Views: 104
    • left_reassembled.jpg
      left_reassembled.jpg
      80.6 KB · Views: 94
    • left_new_ejector_in_place.jpg
      left_new_ejector_in_place.jpg
      51.9 KB · Views: 91

    Users who are viewing this thread

    Latest posts

    Forum statistics

    Threads
    275,539
    Messages
    7,285,627
    Members
    33,475
    Latest member
    LikeThatHendrix

    Latest threads

    Top Bottom