Old PowerMaster 760 Disassembly

The #1 community for Gun Owners of the Northeast

Member Benefits:

  • No ad networks!
  • Discuss all aspects of firearm ownership
  • Discuss anti-gun legislation
  • Buy, sell, and trade in the classified section
  • Chat with Local gun shops, ranges, trainers & other businesses
  • Discover free outdoor shooting areas
  • View up to date on firearm-related events
  • Share photos & video with other members
  • ...and so much more!
  • MigraineMan

    Defenestration Specialist
    Jun 9, 2011
    19,218
    Frederick County
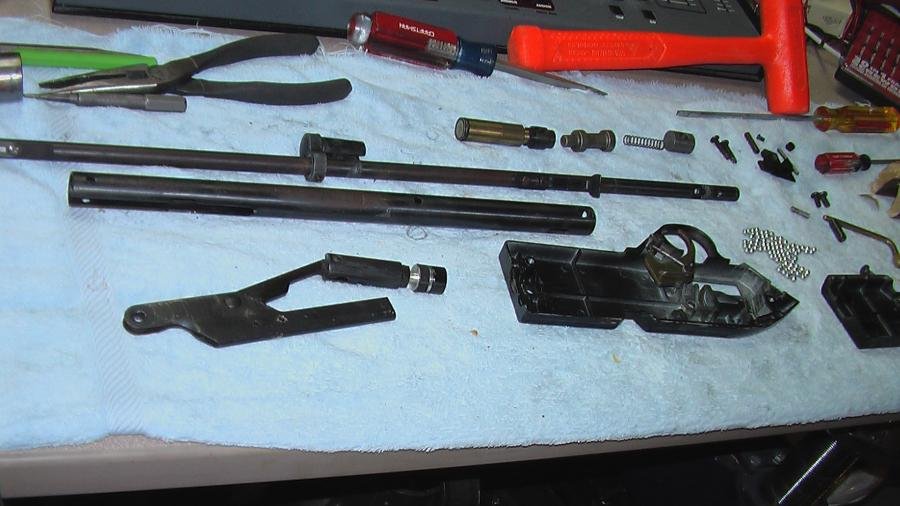
    My son and I took apart my trusty old 760. I got it second-hand as a yoot, and I shot the bejezus out of it. It has many problems. I will take credit for the damage to the foregrip. It suffered a stress fracture at the forward roll pin, and I attempted to epoxy the pieces together. I was probably 12 at the time, and hadn't developed much discipline yet.

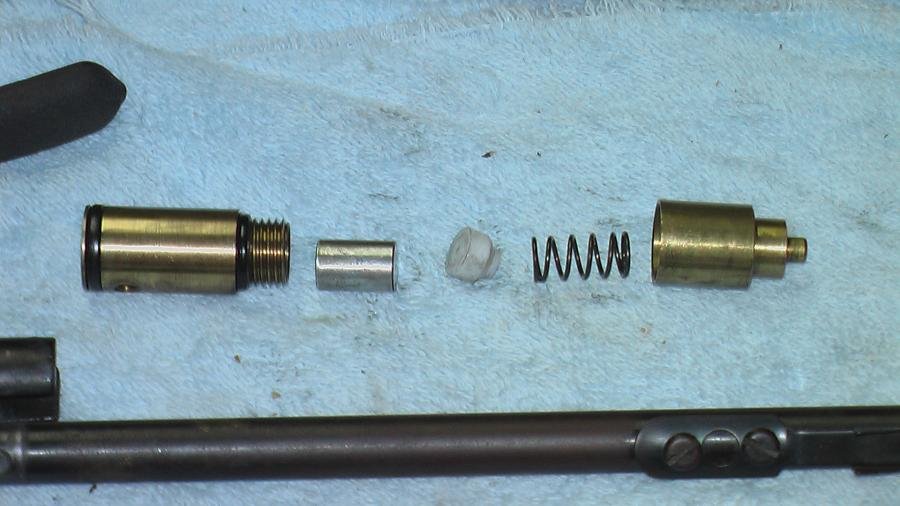
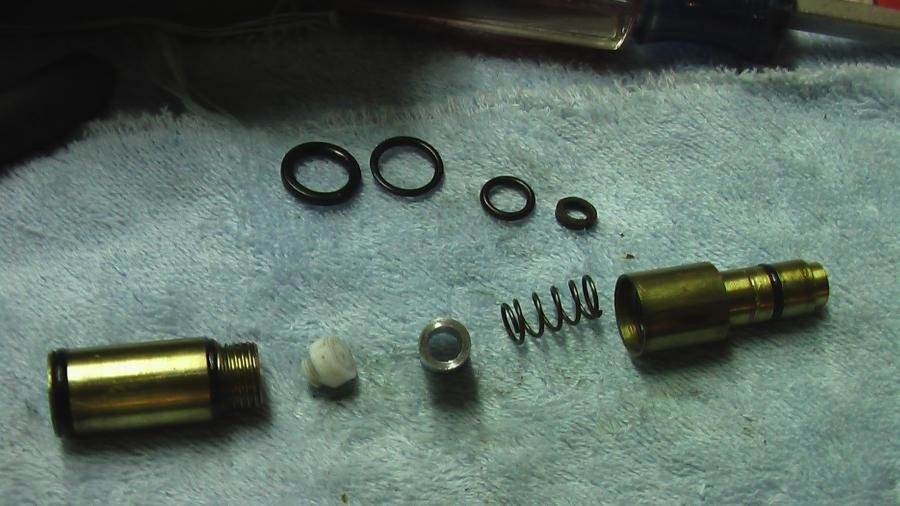
    It's clear that the previous owner had been inside this thing. The BB retainer button and spring have always been missing. The damage to the stock at the rifle interface has always been there ... I remember fussing my thumb across the edges. And it appears that the contents of the pressure chamber are assembled improperly. According to the factory prints, the white nylon element should go in first with the taper forward, then the aluminum spacer. Finally, the gasket between the air chamber and the barrel breech is made of vacuum line. There should be an o-ring and a metal breech gasket sleeve in there.

    Based on the necessary replacement parts, it's cheaper to go buy a new 760 from Walmart for $37.
     

    Attachments

    • IMGA0636.jpg
      IMGA0636.jpg
      65.4 KB · Views: 811
    • IMGA0637.jpg
      IMGA0637.jpg
      67.9 KB · Views: 767
    • IMGA0640.jpg
      IMGA0640.jpg
      64.6 KB · Views: 590
    • IMGA0641.jpg
      IMGA0641.jpg
      60.2 KB · Views: 601

    MigraineMan

    Defenestration Specialist
    Jun 9, 2011
    19,218
    Frederick County
    Ehhh ... we had some momentum this morning, so we trotted over to the store and acquired a Daisy 880S. The longer pump handle was the decision factor. It's still a little big for small shooters. I guess he will have to grow into it.
     

    Attachments

    • IMGA0642.jpg
      IMGA0642.jpg
      100.6 KB · Views: 575
    • cj_first_shots_20140808.jpg
      cj_first_shots_20140808.jpg
      75.1 KB · Views: 553

    Overboost44

    6th gear
    MDS Supporter
    Jun 10, 2013
    6,634
    Kent Island
    I have one that I am getting ready to take apart because the seals are bad. I haven't searched YT for videos yet in order to know how to do it. If you can keep it and fix it it would be cool.
    Mine was my first gun and I want to keep shooting it. The new ones are plastic. I bought one for my daughter and it isn't half the gun of the old one. If you are trashing it and the seals are any good, I would take them and send you something for them. Sounds like you may be missing something though. Let me know.
     

    MigraineMan

    Defenestration Specialist
    Jun 9, 2011
    19,218
    Frederick County
    Replacement furniture and o-rings have arrived. I guess the only obstacle is getting my overloaded butt in gear ... that, and fabricating the missing BB retainer button and breech gasket sleeve.

    The replacement stock is hollow and is substantially lighter than the solid plastic original. I might have to hunt around for a wood one, or figure out how to adapt an AK stock ... it's surprisingly similar.
     

    Attachments

    • IMGA0715.jpg
      IMGA0715.jpg
      58.6 KB · Views: 561
    • IMGA0716.jpg
      IMGA0716.jpg
      52.2 KB · Views: 631

    MigraineMan

    Defenestration Specialist
    Jun 9, 2011
    19,218
    Frederick County
    Crusty old o-rings removed; new ones installed. I bored out the aluminum chamber spacer to increase air volume. Fabricated the missing BB loader button from aluminum sheet with a 4-40 screw as the actuator and a re-wound ballpoint pen spring. Works well. Lots of assembly lube all over everything. Took me five or six tries to get the bits installed in the proper order. Had to drill a new hole for the forestock - replacement unit wasn't exactly the same dimensions as the old busted one. But we're back in working order again.
     

    Attachments

    • IMGA0726.jpg
      IMGA0726.jpg
      64.7 KB · Views: 570
    • IMGA0727.jpg
      IMGA0727.jpg
      68.2 KB · Views: 536
    • IMGA0729.jpg
      IMGA0729.jpg
      75.6 KB · Views: 540
    • IMGA0731.jpg
      IMGA0731.jpg
      59.4 KB · Views: 532
    • IMGA0732.jpg
      IMGA0732.jpg
      78.6 KB · Views: 507
    • IMGA0733.jpg
      IMGA0733.jpg
      59.4 KB · Views: 531

    Users who are viewing this thread

    Forum statistics

    Threads
    275,342
    Messages
    7,277,832
    Members
    33,437
    Latest member
    Mantis

    Latest threads

    Top Bottom